Describe Shapes Using
Properties. Review the Shape Charts from Lesson 1. Have
students name some of the properties for each of the shapes and
add properties to the charts.
- We are going to begin recording the properties
of each of the shapes on the Shape Charts. One way to
describe two-dimensional shapes is to say how many sides and
corners it has. You can also say whether or not it has any
square corners.
Point to the sides and corners and explain that you can fit
a square in a square corner. Use the corner of a sheet of paper
to point out the square corners.
Remind students not to describe the pattern blocks using
their color or name. They should concentrate on the properties
of the shapes.
Display a triangle pattern block and use the shape to
explain the terms "side," "corner," and "square corner." Ask
students to identify the number of sides and corners it has and
whether or not it has any square corners. After students identify
some properties of the triangle, change the orientation of the
shape and see if students can still identify the shape as a
triangle. See Content Note and Sample Dialog 1.
It is important for students to see shapes in many
orientations. For example, if we rotate a triangle, the triangle
remains a triangle. This will be true for any rotated shape.

Sample Dialog 1 is an example of a class discussion about
a triangle and its properties.
Teacher: Who can tell us the name of this shape?
Benjamin: It's a triangle.
Teacher: Yes, it is a triangle. How can you describe a
triangle? How many sides does it have?
Vedika: It has three sides.
Teacher: That's right. Let's count the sides as Vedika
points to each side. How many corners does a triangle have?
Javier: It has three corners.
Teacher: Good answer, Javier! Will you point to the
three corners? So far, we said that the shape is a triangle
and it has three sides and three corners. Can you think of any
other way to describe a triangle?
Laura: It doesn't have any square corners because you
can't fit a square in any of the corners.
Teacher: That's true that this triangle doesn't have
square corners, but let's look at our shape charts. Do you see
any triangles with square corners?
Brian: One of the triangles on the chart has square
corners, so we can't say that all triangles don't have square
corners.
Teacher: Great answer, Brian. Now I am going to turn the
triangle. [Teacher rotates the triangle, changing its
orientation so that a corner is pointing straight down.]
What has changed and what has stayed the same?
Brenda: There are three sides and three corners, but
it's not a triangle anymore.
Teacher: How many of you agree with Brenda? Let's go
back to the shape charts we made the other day. What makes a
triangle a triangle?
Ashley: A triangle has three sides and three corners.
Since it still has three sides and three corners when you turn
it, it's still a triangle.
Teacher: Yes! Now, let's record some of the properties
on the triangle chart.
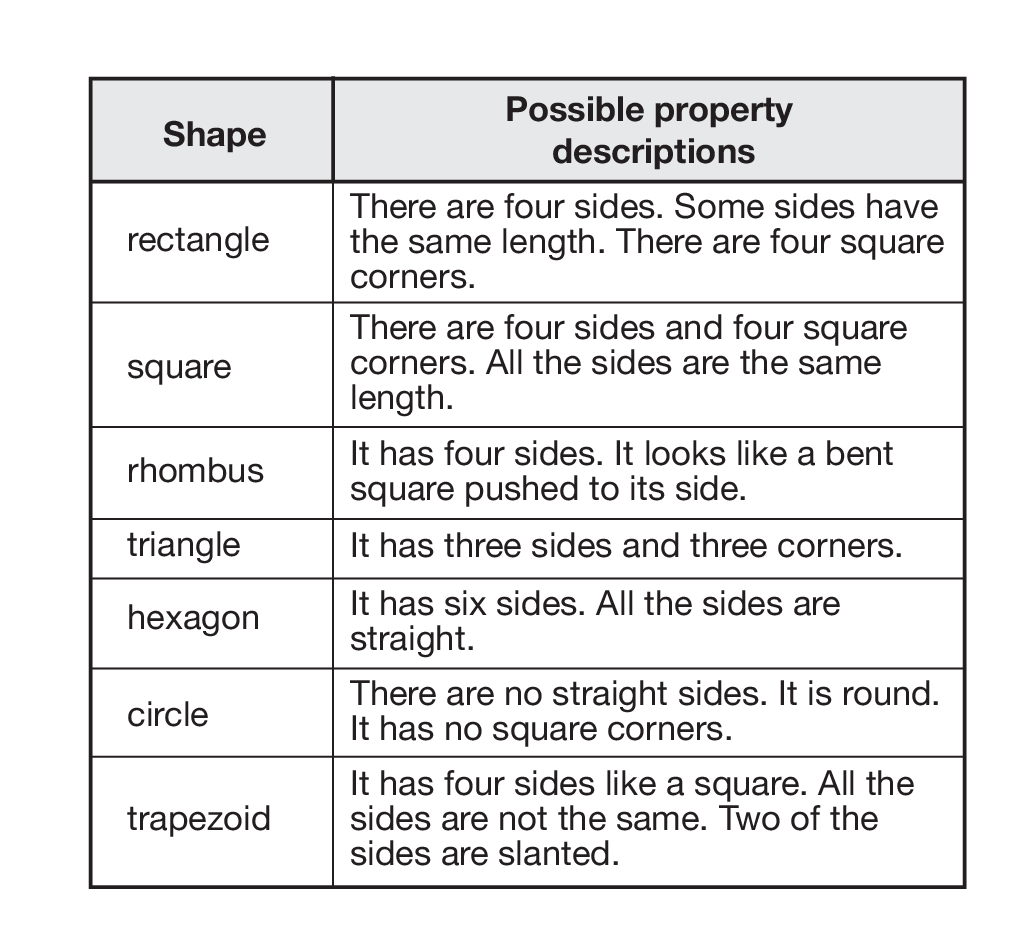
Continue with the other shapes and record appropriate
student responses on the shape charts. In addition to the pattern
blocks, have students describe the circle and rectangle. See
Figure 3.
Play Guess My Shape. Give each
student pair a set of pattern blocks to use during this game.
Place a set of pattern blocks in a bag and refer students to the
Shape Charts from Lesson 1. See Materials Preparation.
Reach inside the bag and select a block without showing it
to the class. Invite students to ask "yes" or "no" questions
about the selected block in order to identify it. Students should
focus on the properties and characteristics of the shape (e.g.,
number of corners). They are not allowed to point to a shape and
ask, "Is this the shape?" Rather they should continue to ask
questions about the shape's properties until the choices are
reduced to one shape. You might need to prompt students by
suggesting that they ask about the number of sides or the number
of corners. As you answer each question, encourage student pairs
to place the pattern blocks that have a particular property in
front of them and the ones that do not have that property off to
the side of their desk. Limit the number of "yes" or "no"
questions students can ask or keep a record of how many questions
they ask before they can guess the shape. See Sample Dialog 2.

Sample Dialog 2 is an example of a class discussion about
a trapezoid.
Teacher: I reached inside this bag and pulled out a
shape, but I will keep it a secret. You will have to guess my
secret shape by asking me questions about the properties of
the shape. I can only answer your questions by saying, "yes"
or "no." One rule for this game is that you are not allowed to
point to a shape and ask if that is the secret shape until we
have narrowed it down to one shape. Who has a question?
David: Is it the blue rhombus?
Teacher: Remember you have to ask me questions about the
properties of the shape. You can't point to a shape and ask if
this is the secret shape.
Connor: Does it have three sides?
Teacher: That's a great question! No, it doesn't have
three sides. Okay, which shapes can we take away?
Grace: I took away the triangle because it has three
sides and you said it doesn't have three sides.
Teacher: Good answer, Grace! Does anyone else have a
"yes" or "no" question?
Jose: Does it have four sides?
Teacher: Yes, it does. Which shapes can we eliminate
now?
Jacob: We can take out the hexagon because it has six
sides. That leaves four shapes: the square, the blue rhombus,
the tan rhombus and the trapezoid.
Teacher: Very good thinking, Jacob! Does anyone else
have a question that will help us narrow it down to one shape?
Akielah: Are all the sides the same size?
Teacher: No, all the sides are not the same length.
Eric: I think it's the trapezoid! It's the only one left
because the other ones have sides that are the same length!
Teacher: Great job, Eric! Now, let's try another shape.
Place the pattern block back in the bag and choose another
block. Repeat the process with other blocks.
Although students use the shapes of the pattern blocks to
describe properties of shapes in this activity, you may want to
adapt the activity by using other shapes such as circles and
rectangles.
During the activity Guess My Shape, observe students as
they determine which questions to ask about the shapes and which
shapes to eliminate based on the answers. Assess students'
abilities to identify two-dimensional shapes [E1] and to
describe the properties of shapes [E2].
For targeted practice, students can play Guess My Shape
with a partner. Place sets of pattern blocks in a learning
center so that students can continue to practice identifying
two-dimensional shapes using their properties.
Waiting after asking a question before calling upon a
student will allow more students to participate. If many
students do not respond to a question, ask them to talk to their
partners and share their ideas before raising their hands.
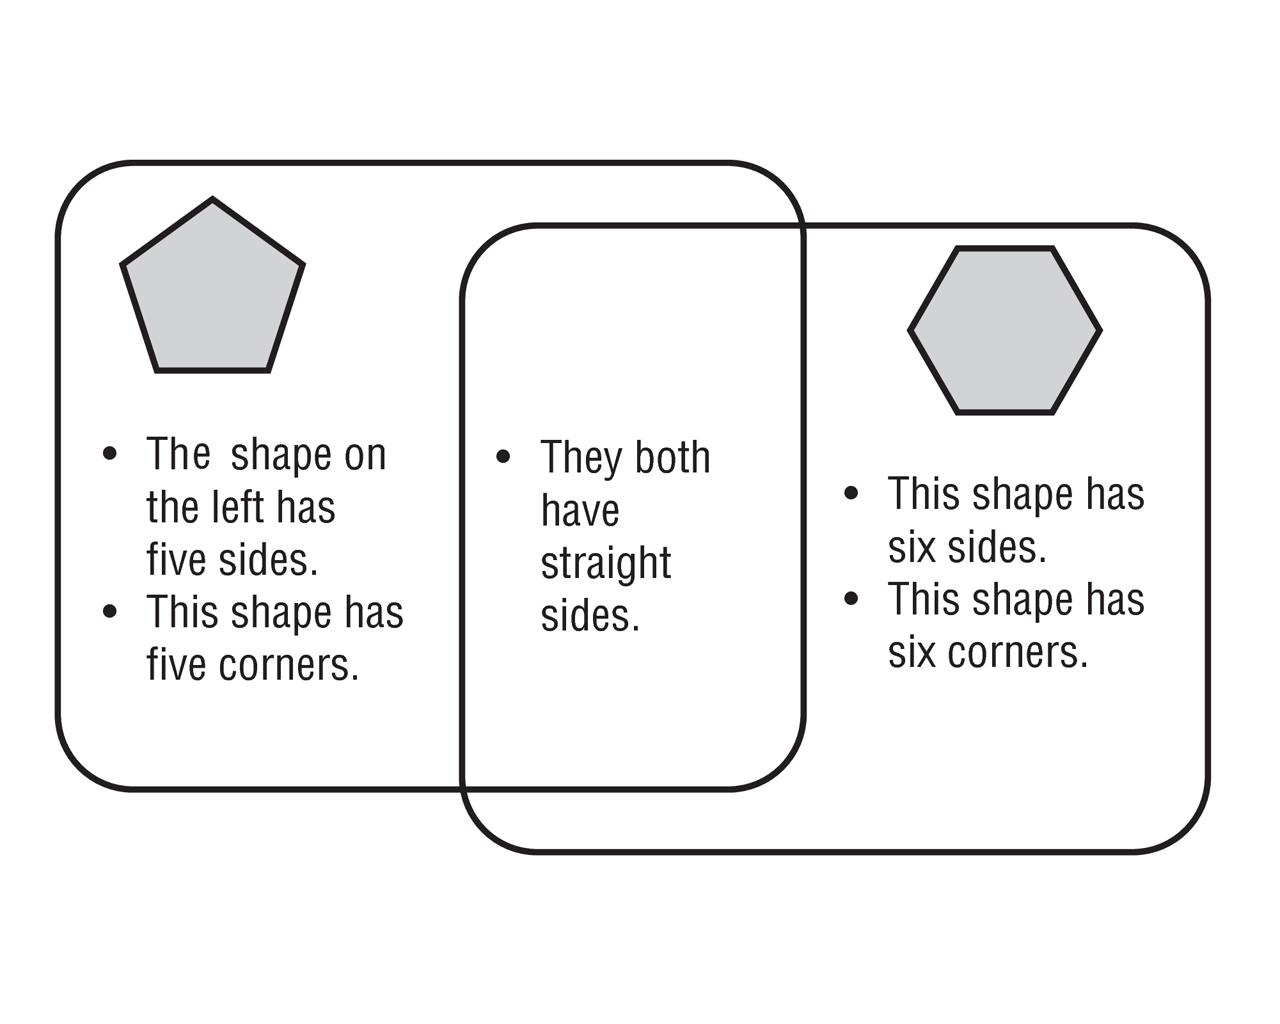
Comparing Properties of Shapes.
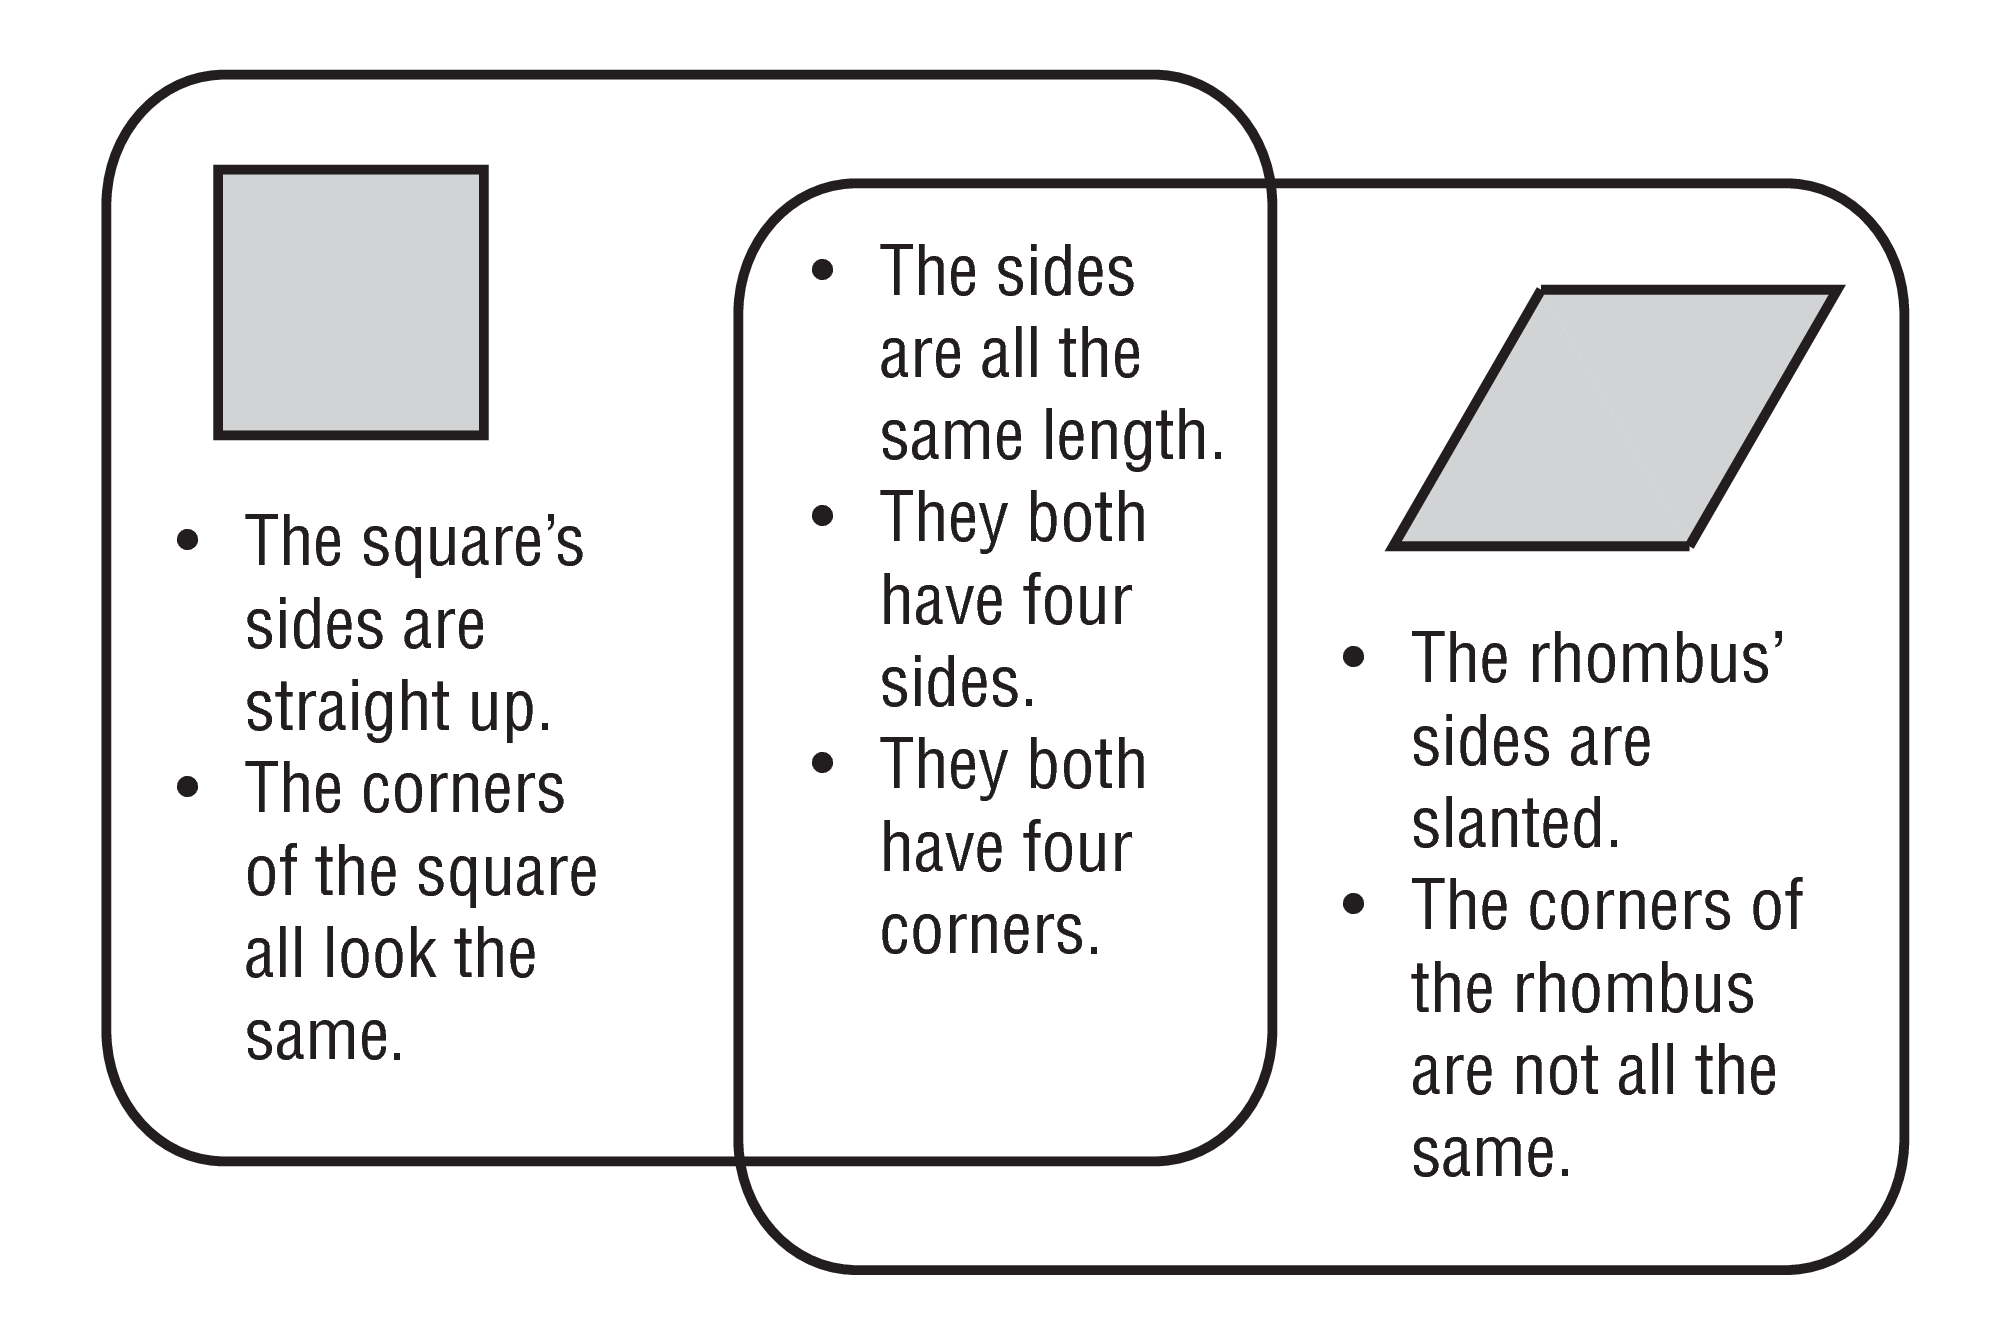
Display the 3 Venn Diagrams and pairs of shapes you prepared.
See Materials Preparation. Show the first chart with the square
and the rhombus. Ask students to explain how the two shapes are
alike and record student responses on the intersecting part of
the Venn Diagram. Remind students to focus on the properties of
the shapes. Next ask students how the square is different from
the rhombus. Record properties related to the square in the space
under the square and record properties related to the rhombus in
the space under the rhombus. See Figure 4 for some examples of
student responses for the square and rhombus.
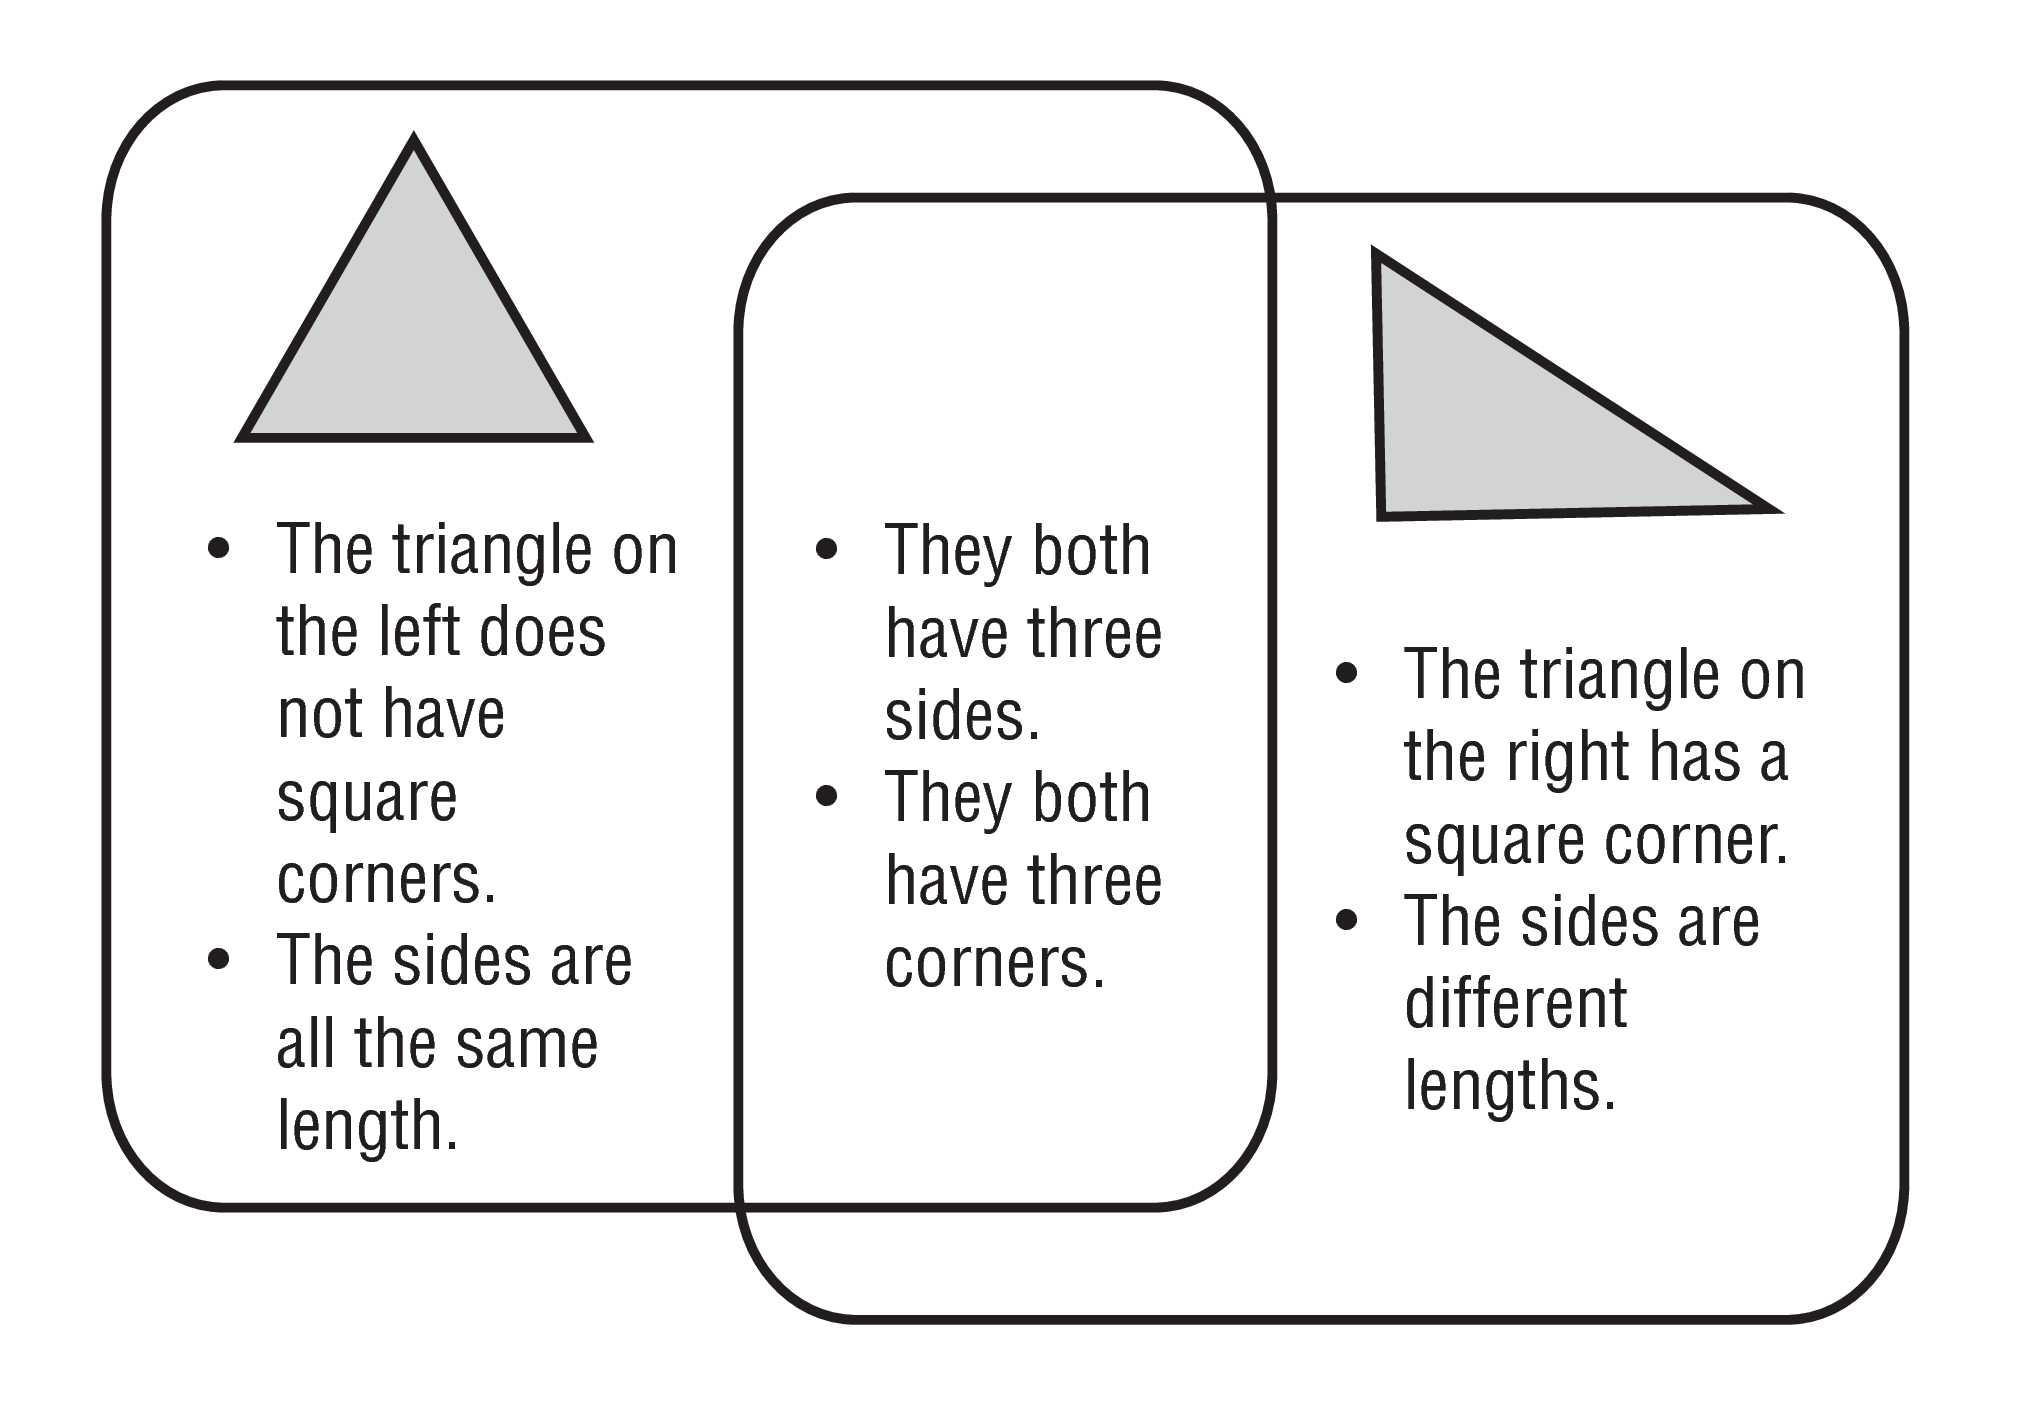
Continue the activity using the second and third pairs of
shapes on the other two sheets of chart paper. See Figures 5 and
6 for examples of student responses for the other pairs of
shapes.