Lesson 5

Mystery Shapes

Est. Class Sessions: 2

Developing the Lesson

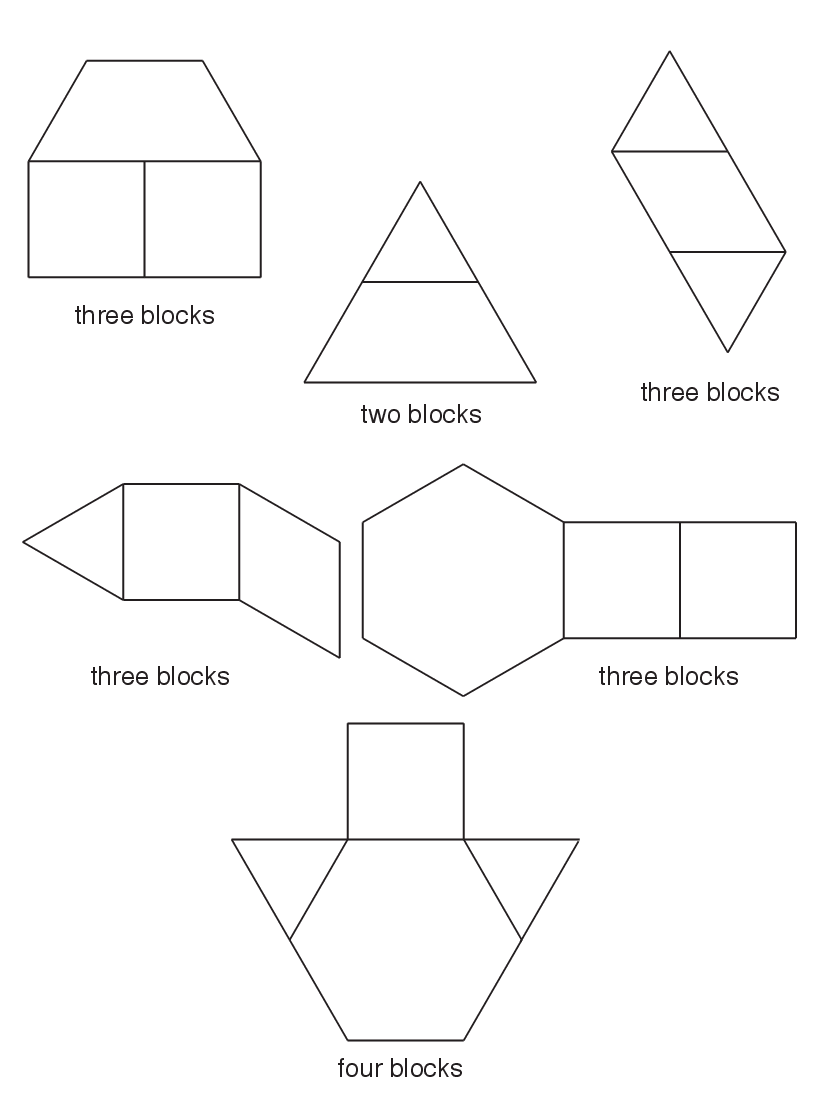
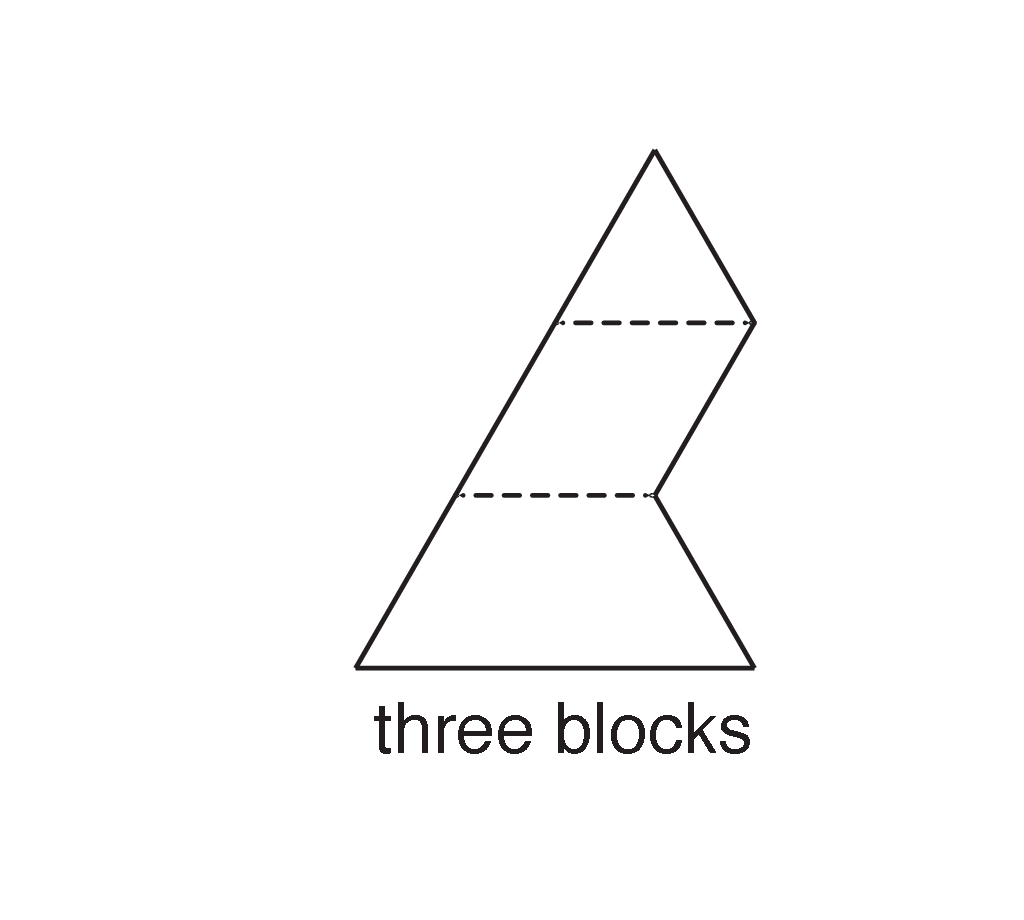
Make Mystery Shapes. Display a set of pattern blocks you will use to make mystery figures. Display a shape made of three pattern blocks without showing which pattern blocks compose the shape. Display the silhouette of the shape made with pattern blocks or display one of the shapes on the Mystery Shapes Master. See the TIMS Tip and Figure 1. Distribute sets of blocks to student pairs and ask them to construct the figure displayed using three pattern blocks.

X

If available, an overhead projector and regular pattern blocks can be used to display mystery figures. Build the figures with the light off so students do not see its composition. Blocks will appear as shadows since they are solid, displaying the silhouette of the figure. Be careful not to show spaces between the blocks. Several student solutions can be shared at the same time by having students build their solution right on the projector.

As student pairs are working, circulate throughout the room to observe how they are making the shape and to answer questions. Use prompts to support students as they try to determine which blocks to use.

X
  • How many blocks should you use to make this shape?
  • Look at the corners of the shape. Which pattern blocks look like they might match? Try it.
  • Look at the sides of the shape. Do any pattern blocks seem to match one of the sides?
  • Can you try two blocks to make a part of the shape?
  • Does it look like two or more pattern blocks can be combined to match the long side of the shape?
X
  • How did you decide which blocks to use? (Possible responses: I matched corners. I matched sides.)
  • How did you decide which block(s) to try for this side [point to a long or short side] of the shape? (Possible response: The side is longer than one pattern block so I knew I needed more than one block. I had to look at the corner to find a block to match first, then I fit the other corner and filled in the missing block to match the length of the leftover space.)
  • How did you know you should use [the orange square] block here? (It has a square corner, not a slanty one.)
  • Which shapes do not fit? Why?
  • Do a [triangle and a square] fit together to make that shape? Why?

Discuss Mystery Shape Solutions. After adequate time, ask a pair of students to display and share their solution and thinking. Ask additional pairs to share other ways to solve the mystery figure. Aid students in justifying their solution using properties of shapes (number of sides, length of sides, number of corners, relative size of corners) as needed using prompts similar to those used as you circulated through the room while students were working. Compare and contrast a few solutions.

X
  • How are these two solutions alike?
  • How are they different?
  • Can the same shape be made with fewer pattern blocks?
  • Can the same shape be made with more pattern blocks?
See the Sample Dialog for a possible discussion comparing solutions for the mystery shape in Figure 2. By comparing solutions side by side, students reason how to alter a solution using four blocks to meet the guideline of using 3 blocks.

Repeat this process for at least two more shapes by displaying the shapes on the Mystery Shapes Master or showing the silhouette of your own shapes made with pattern blocks. Display just one figure at a time. Then share and compare solutions before moving on to the next shape. Include figures made from two, three, or four pattern blocks. Tell students the number of blocks to use for each figure.

Partitions for shapes on the Mystery Shapes Master
X
+
A mystery shape
X
+