


Reading Graduated Cylinders
Est. Class Sessions: 1Developing the Lesson
Learn to Read a Graduated Cylinder. A graduated cylinder, calibrated in milliliters or cubic centimeters, is an important tool for measuring volume. Students will explore this concept further in the lab Measuring Volume in Lesson 4.
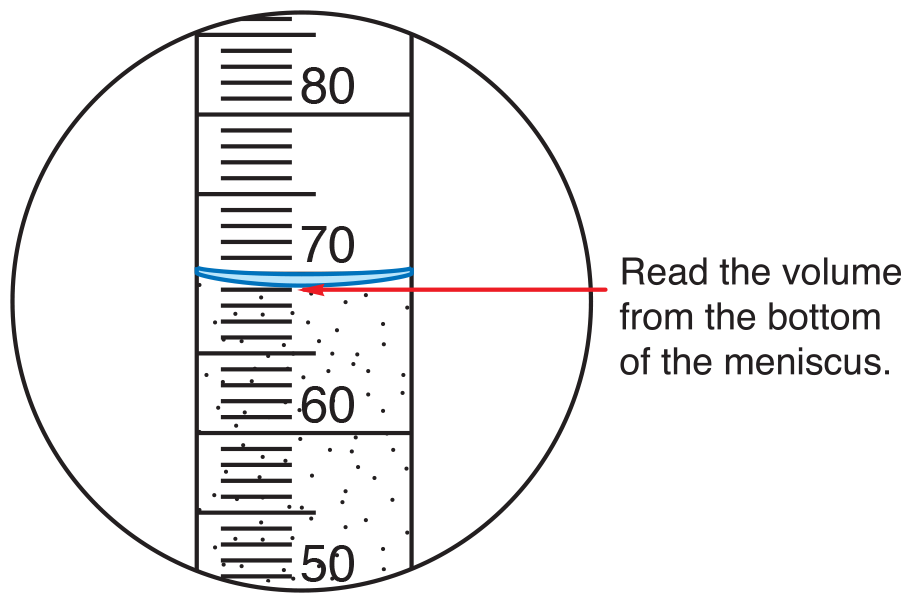
Explain to students that they will work in pairs to read the eight graduated cylinders placed around the classroom. Before they begin the activity, they should learn how to read the meniscus—the shape of the surface of the water in the cylinder. Due to the surface tension of the walls of the graduated cylinder, a small amount of water is pulled up the side of the graduated cylinder, thus causing the surface of the water to curve. As a result, a double line appears through the side of the graduated cylinder. Show the Graduated Cylinder Master and the Meniscus Master to help students visualize the meniscus in a graduated cylinder. When you read the graduated cylinder, read the line at the bottom of the meniscus. See Figure 1.
Next, explain that a cubic centimeter is the metric unit of volume that we will use. Most graduated cylinders are calibrated in milliliters. One milliliter is equivalent to 1 cubic centimeter. Show students a centimeter connecting cube. Ask a volunteer to measure each edge. The cube will measure one centimeter on each edge. Tell students the cube is one cubic centimeter (1 cc) and that, if the cube were hollow, it would hold one milliliter (1 ml) of water.
Using one of the graduated cylinders you have filled, demonstrate for the class the correct way to read the volume of the water.
Say:
As students observe your actions, place the cylinder on a level surface, bending down if needed so that your eyes are level with the water.
When you are finished, ask:

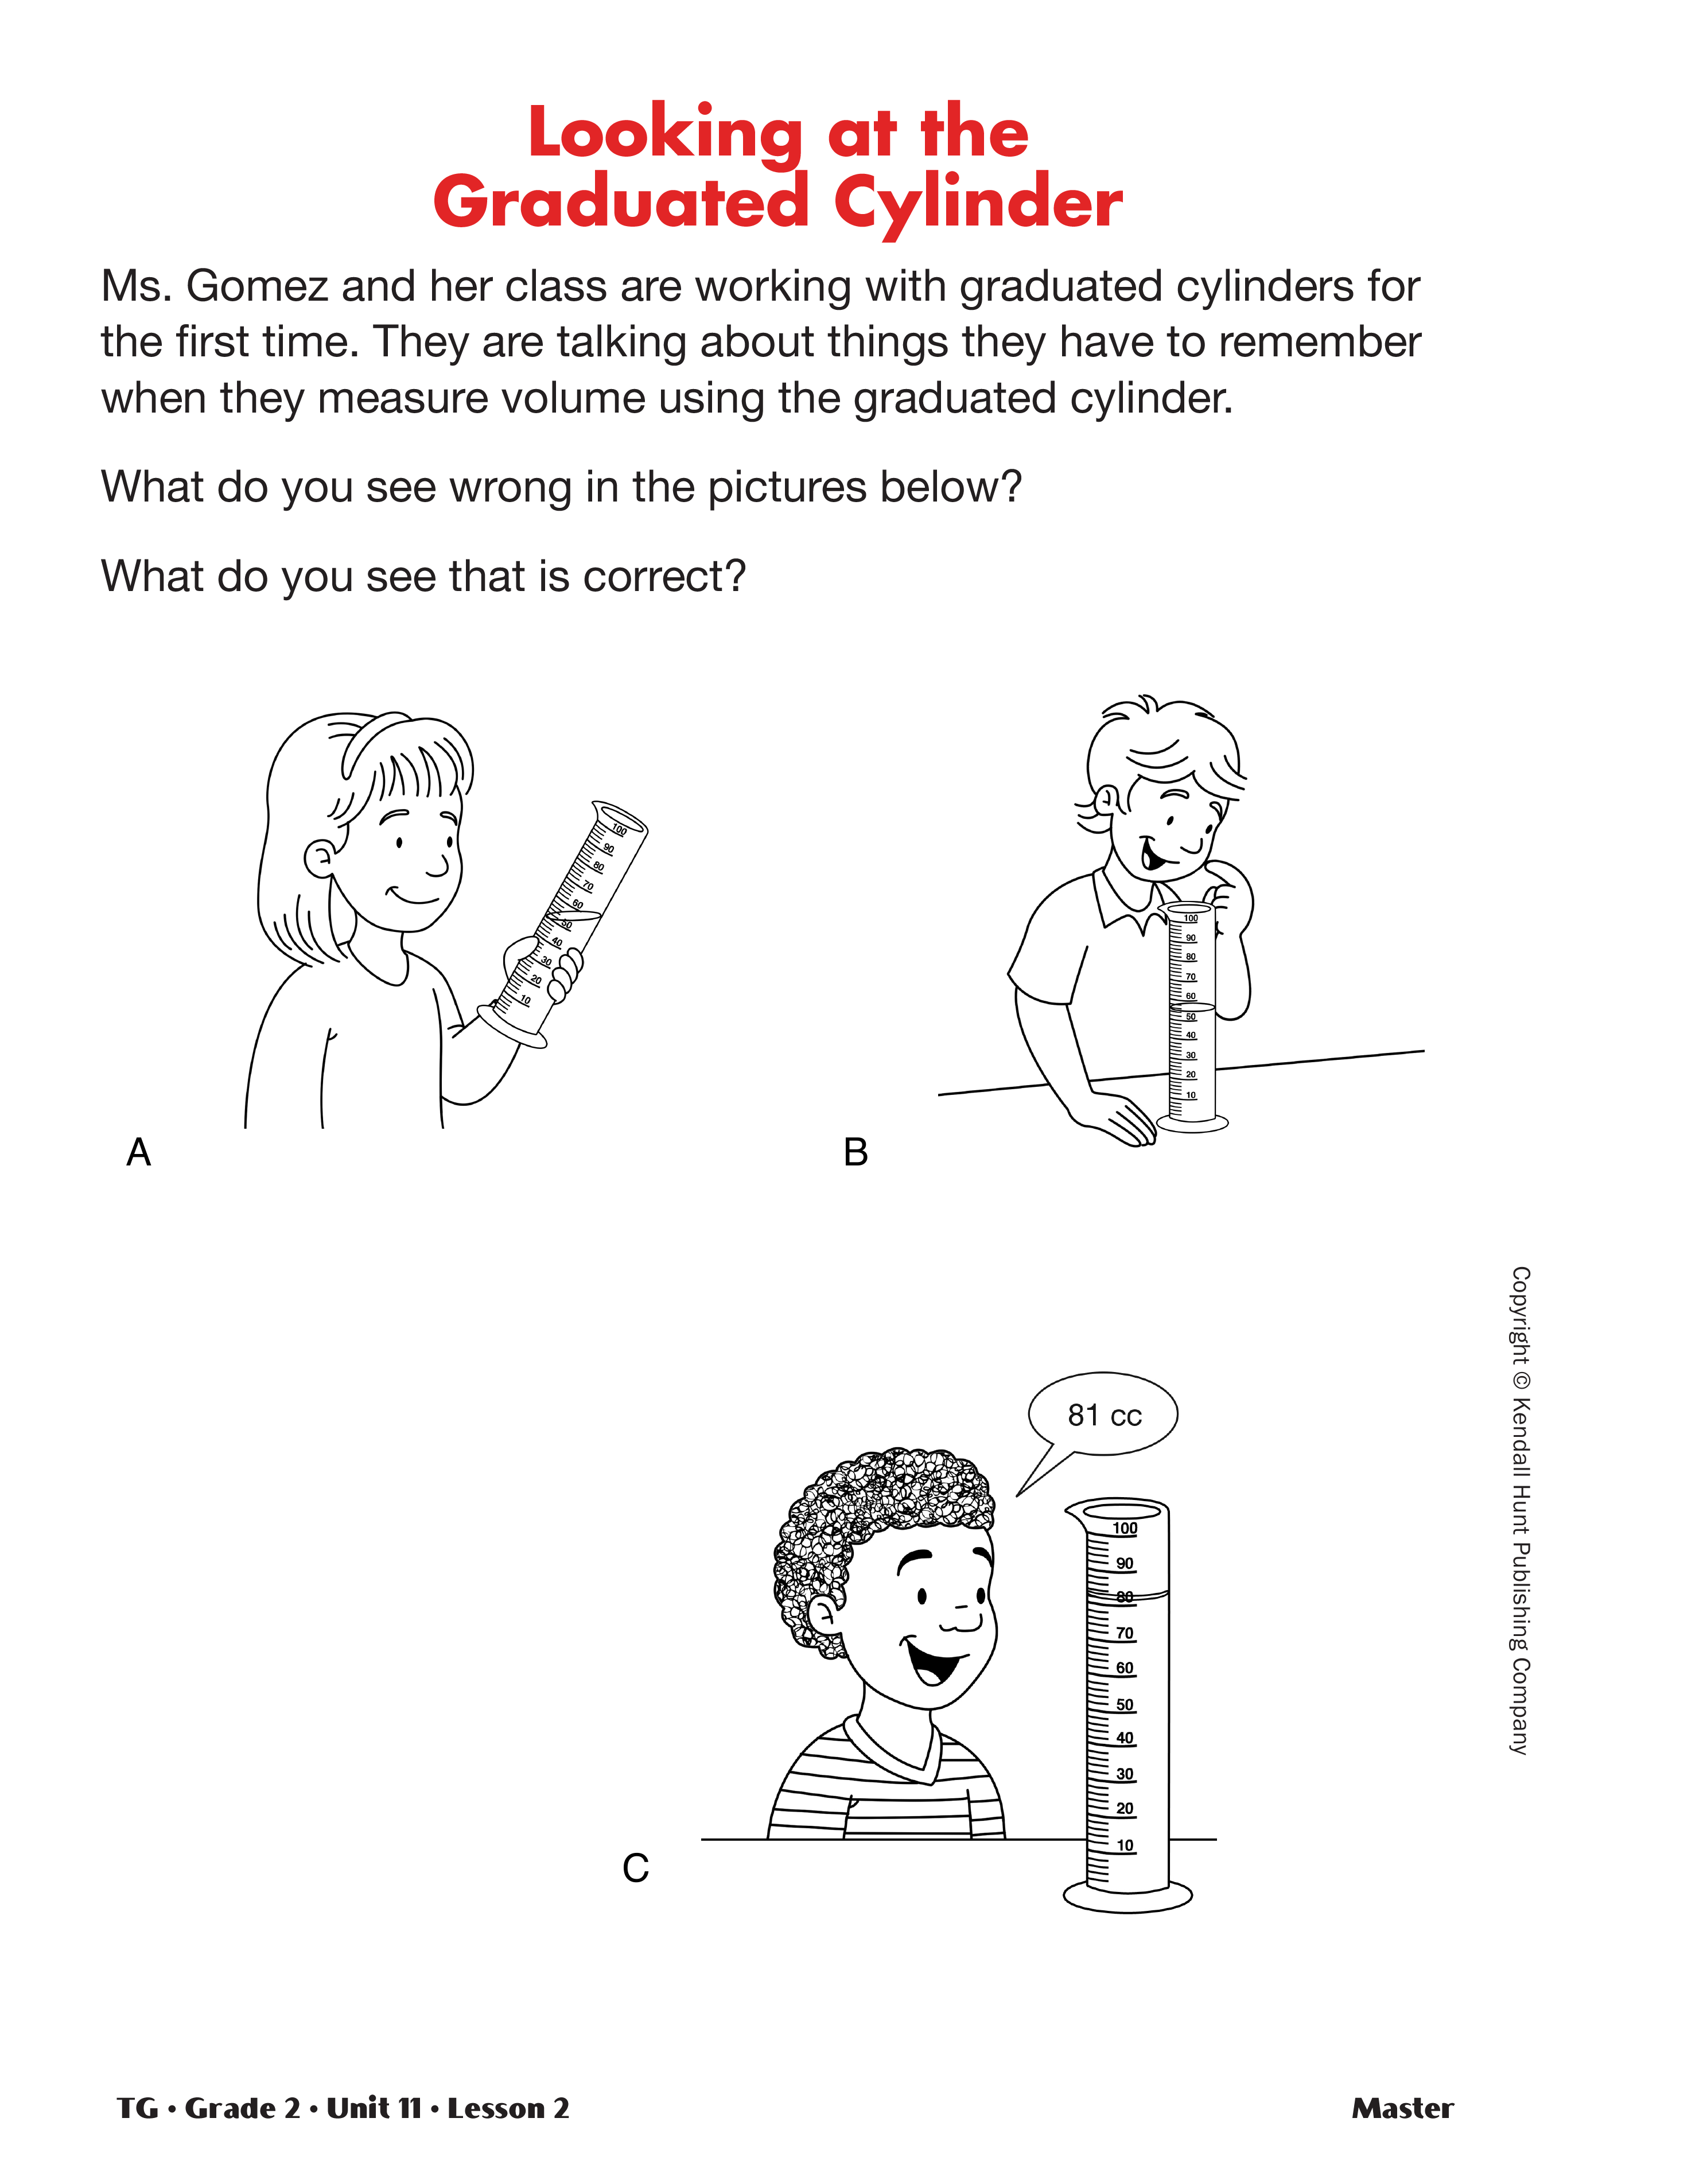
Common Errors Reading Graduated Cylinders. Next display the Looking at the Graduated Cylinder Master. The pictures illustrate some common errors in reading the graduated cylinder. Emphasize the following points as you discuss each picture:
- Picture A: Leave the graduated cylinder on the table. The water level may tilt if you pick up the cylinder.
- Picture B: Your eye should be level with the water. You may need to bend down to read the graduated cylinder.
- Picture C: Read the bottom line of the meniscus. The bottom line more accurately represents the true volume.
Ask:
Record students' ideas on chart paper. Title the chart "Reading a Graduated Cylinder Tips" and keep the chart posted throughout the unit.
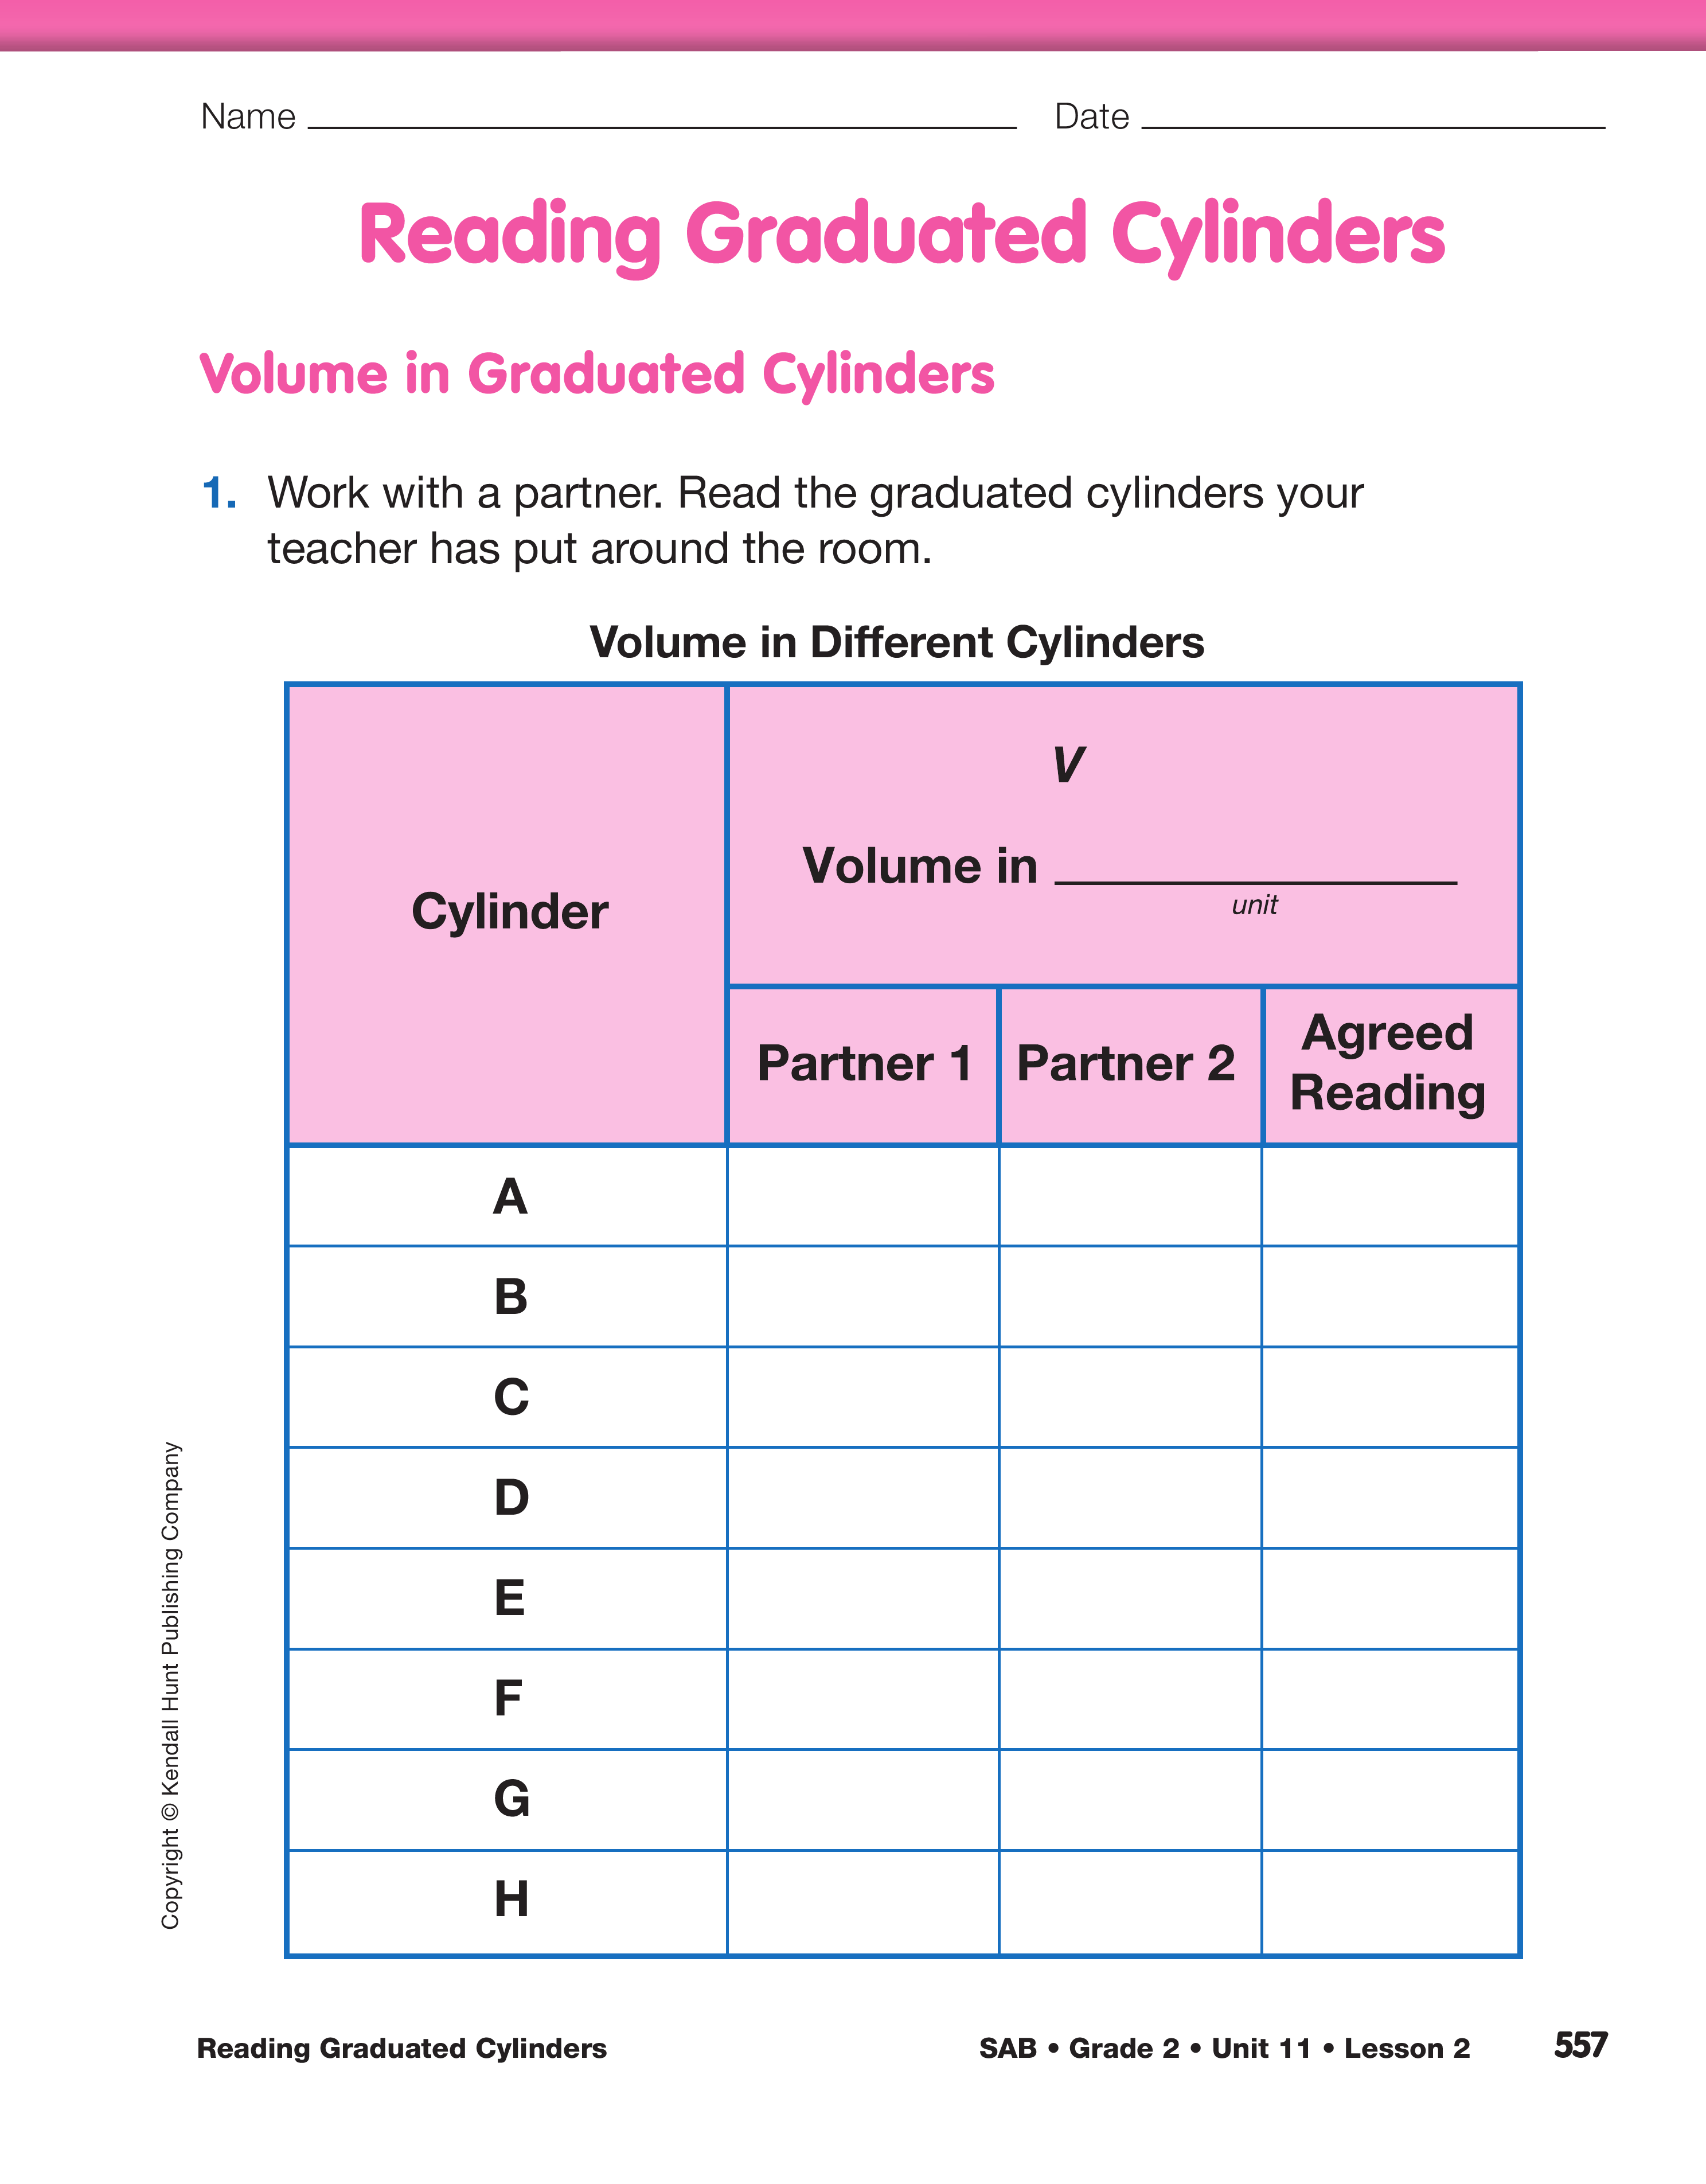
Read Graduated Cylinders. Explain to students that they will practice reading the graduated cylinders you have placed about the room with a partner. Display the data table from the Reading Graduated Cylinders pages in the Student Activity Book to discuss the unit of measurement and how partners will record their readings. Explain that students will read a cylinder independently, then compare answers and come to agreement on a reading before recording their findings in the Agreed Reading column.
After noting the column headings say:
Then have student pairs read each of the eight graduated cylinders arranged around the classroom. Students may start at any graduated cylinder and do not have to read the cylinders in alphabetical order. Remind students to label their answers. If students finish early, or if they have time while waiting to read a cylinder, they can work on the Mrs. Gomez's Class section of the Reading Graduated Cylinders pages. Question 2 in the Volume in Graduated Cylinders section should be completed after the discussion in Summarizing the Lesson.