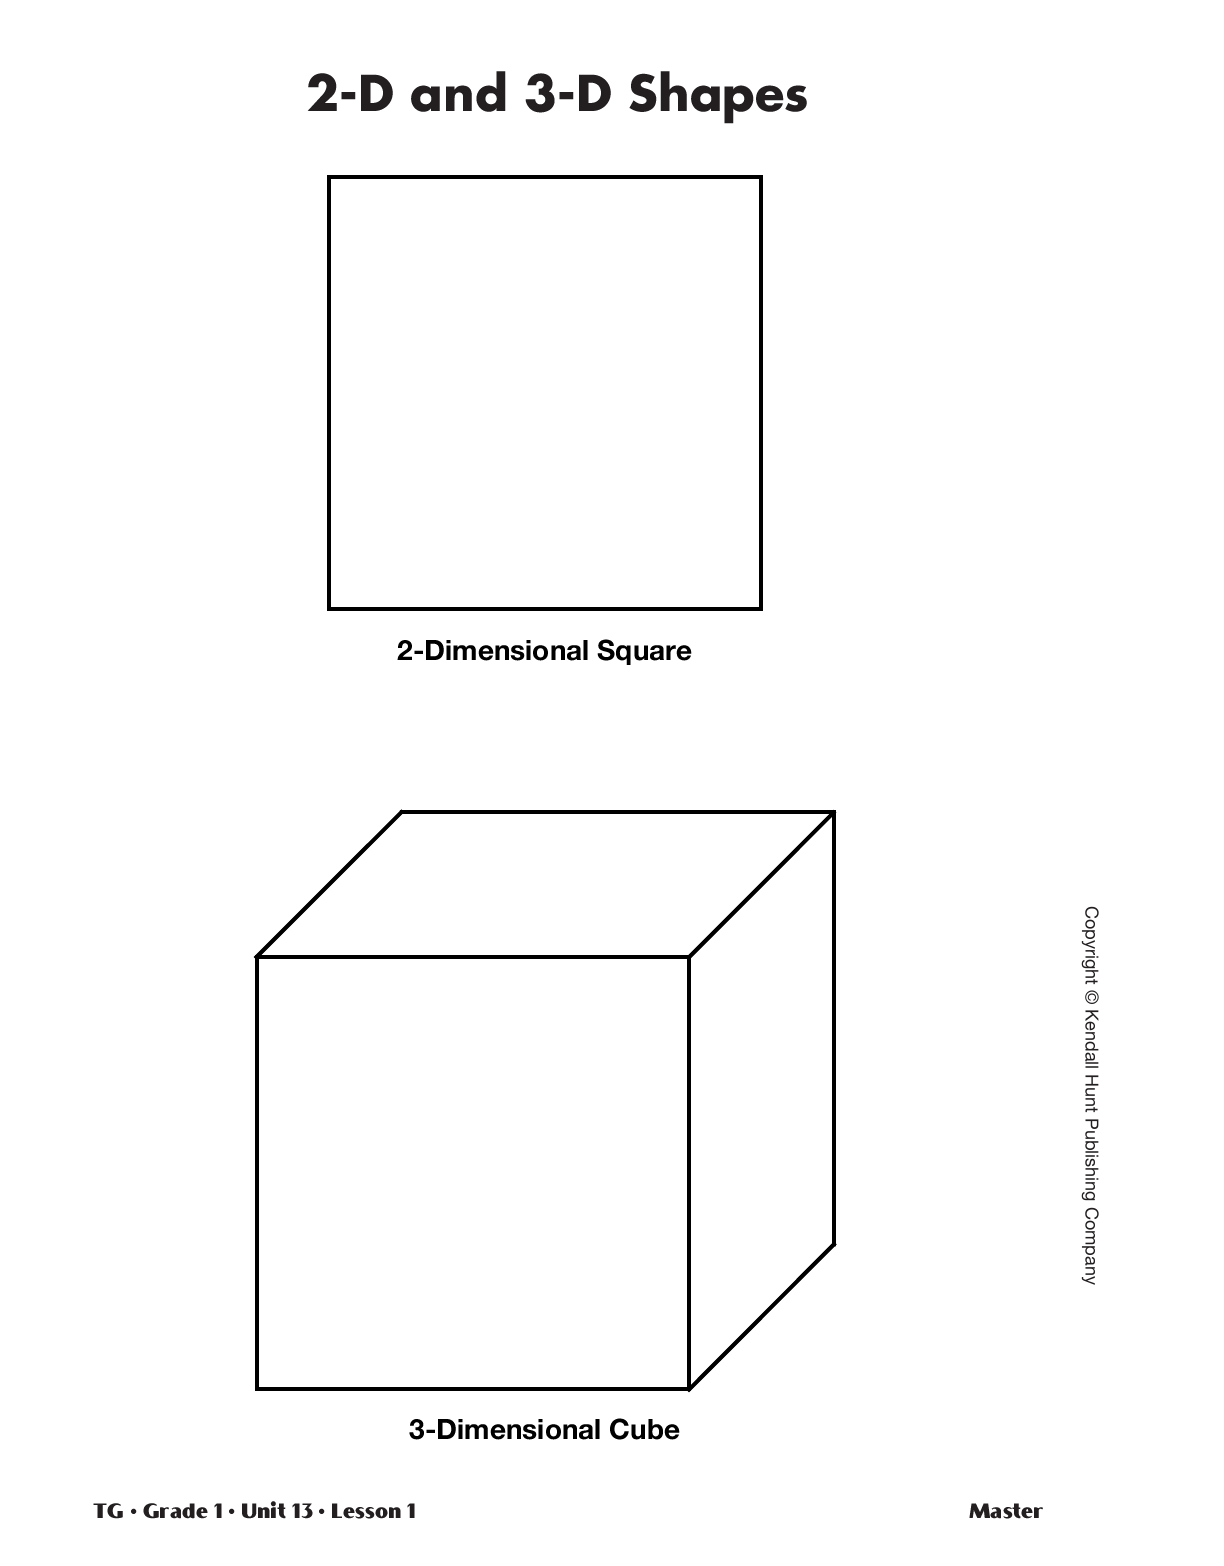
Attributes of a Square.
Display the 2-D and 3-D Shapes
Master, but cover the three-dimensional cube drawing, showing only the drawing of the two-dimensional square. Ask students to work with a
partner to brainstorm what they know about squares and how they have used them so far in math class.
After several minutes, ask:
- What shape is in this drawing? (a square)
- How do you know? (Possible response: A square has 4 square corners and 4 equal sides.)
- How have we used squares in math class? (Possible responses: We found squares in pictures. Ten frames are made of squares.
Sometimes the answer space is a square. A 100 Chart is made of 100 squares. We used squares to find the area of shapes.)
If no one suggests using squares to find area, use the following prompts to remind them of the Goldilocks
story in Unit 8, when they used squares to measure area.
- How did we use squares when we were reading the Goldilocks story? (Possible response: We covered shapes with squares to find their area.)
- What do we call squares when we are measuring area? (square units or square inches)
Attributes of a Cube.
Uncover the three-dimensional drawing and ask:
- How is this drawing different from the drawing of the square? (Possible responses: It has more lines. It is a 2-D drawing of a 3-D block.)
- How is this drawing the same? (Possible response: The front of it looks just like the square.)
Explain that a three-dimensional drawing is made to look like it has length, width, and height. Provide
each student with one of the cubes gathered prior to the lesson. Tell students that the three-dimensional
drawing on the display is a drawing made to look like a cube. Ask students to carefully study their cube.
- What do you see when you look at your cube? How could you describe it to someone who can’t see it?
As students describe the cube, elicit information as to number, shape, and size of faces (sides) and number
of vertices (corners). Use the information to write the following attributes of a cube on the board:
- Six faces (sides)
- All the faces (sides) are equal (the same)
- All the faces (sides) are squares
- Eight corners
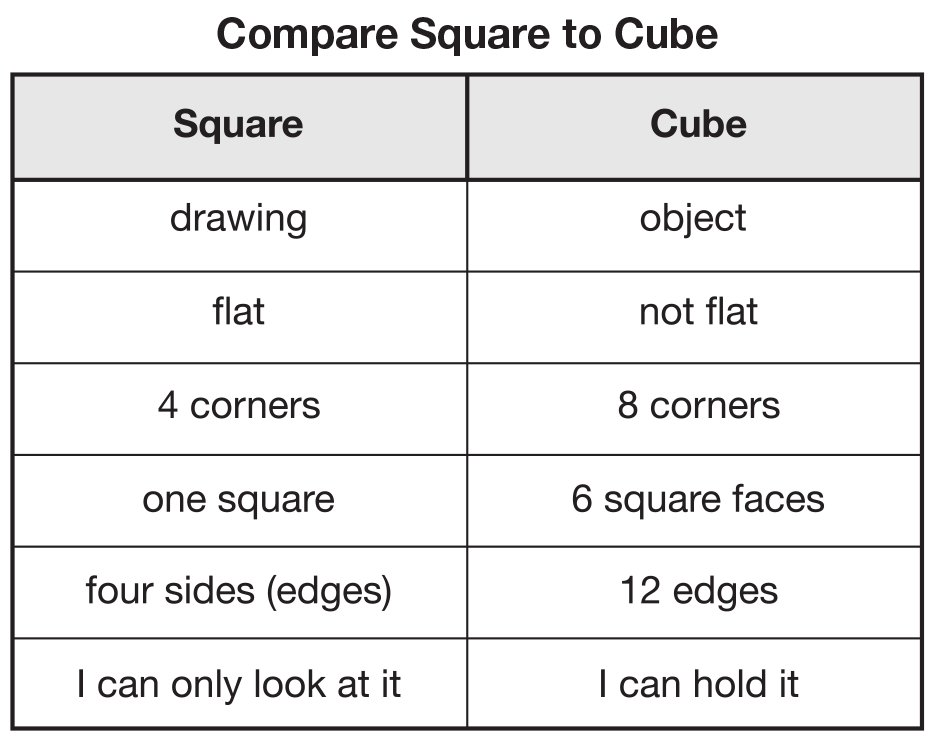
Compare Square to Cube. Ask students to compare the drawing of the square on the display with the cube they have in their hands. Cover up the 3-dimensional
drawing of the cube again to avoid confusion. Suggest that they turn the cube around and look at it from different angles. Give them two to three minutes
to talk to their partner about what is the same and what is different.
Draw a line down the center of a piece of chart paper or a display to make two columns. Label one side “square” and the other side “cube.” Use these or
similar discussion prompts to guide a discussion about the differences students observe. As students share their findings, record them on the display. See
Figure 3 for a possible completed chart.
- Look carefully at the drawing of the square and the cube in your hand. What is different about these two? (Possible responses: The square is flat and
the cube is tall [or takes up space]. The square is a drawing and the cube is an object.)
- What do you notice about the number of corners for each shape? (Possible response: The square has four corners and the cube has 8 corners.)
- What do you notice about the faces or surfaces of the cube compared to the square? (Possible
response: The cube has six faces or surfaces and the square only has one. The faces of the cube are all the same size.)
- How many sides does the square have? (four)
How many edges does the cube have? (12 edges)
- Is there anything that is the same about the drawing of the square and the cube? (Possible
response: All of the sides of the cube are the same size and they all look like squares.)
- What can you measure on the square? (the length of each side; the area the square covers)
- What can you measure on the cube? (the length of each side; the number of units that the cube holds; the area of the faces)
Define Volume. Show the three shapes constructed with connecting cubes prior to the lesson, providing
opportunity for students to examine each shape. See Figure 1.
- What do you notice about each of these shapes? (Possible responses: The shapes are made out of
connecting cubes. Each shape is a different size and shape.)
- How can we measure the amount of space occupied by each shape? (Possible response: You can count the number of cubes in each shape.)
Tell students that the amount of space an object takes up is called volume. We measure volume in cubic units.
To measure these shapes, one connecting cube is one cubic unit.
- What is the volume of each of the shapes? How many cubic units are in each shape? (2 cubic units,
8 cubic units, 9 cubic units)
Volume. Volume can be defined as the amount of space an
object takes up or as the number of cubic units it takes to fill
it. Students need to become familiar with the mathematical
terms and also be able to connect them with their own
language. Over the course of this unit, identify and define the
correct mathematical terms (face, cube, cubic unit, volume)
for the students. During discussions, refer to the
mathematical terms but also use them interchangeably with
language volunteered by the students, e.g., side, corner, etc.
Ask students what they know about volume. That way, you
can quickly distinguish volume as a mathematical term from
the everyday use of volume as the loudness on the television
or radio.