


Elapsed Time
Est. Class Sessions: 2Developing the Lesson
Part 2: Elapsed Time
Use the Number Line to Find Elapsed Time. Ask students to place their individual clocks to the side and to focus on your demonstration clock only. Tell students to think again about the number of minutes in each hour. Ask them to look at your clock and count the minutes by fives from 5 to 60.
Show 10 o’clock on the demonstration clock.
Ask:
Slowly move the minute hand to 10:05 to show that 5 minutes have passed.
Ask:
Remind students that minutes around the clock face are organized like a number line that goes from 0 to 60. Each hour starts at 0 minutes and ends at 60 minutes. Tell them to find the 0 on their desk number lines to represent the 0 minutes after 10 o’clock. Then have them hop to the 5 on the number line to represent the five minutes that have passed when the clock moves from 10:00 to 10:05.
Tell students that 10:05 is now the starting time. Slowly move the minute hand from 10:05 to 10:15.
Ask:
Have students find the 5 on their desk number lines to represent the 5 minutes after 10 o’clock and the 15 on the number line to represent 15 minutes past 10 o’clock.
Ask:
Tell students that 10:15 is now the starting time. Ask students to count by fives aloud with you as you slowly move the minute hand from 10:15 to 10:45. Remind them that they are not to count 10:15, 10:20, 10:25, etc. Because they are trying to find out how much time has passed between the two times, when they start at 10:15, they must begin counting the minutes at 0. From 10:15 to 10:20 is five; to 10:25 is ten; to 10:30 is fifteen, and so on.
Ask:
Use Individual Clocks to Find Elapsed Time. Students will work with a partner to model times on their individual clocks to continue to practice telling elapsed time. Display the How Much Time Has Passed Master. For each question, one student will say and model the start time on his or her individual clock and the other will say and model the end time. Once student pairs have set their clocks, have the students move the minute hand on the start time clock to the end time as they count by fives. Using Question A as an example, students will start at 2:15 and count 5, 10, 15 until the clock shows 2:30. At the end of the activity, both clocks will show the end time. Ask for volunteers to tell how many minutes have passed and to use the demonstration clock to show how they counted by fives to decide.
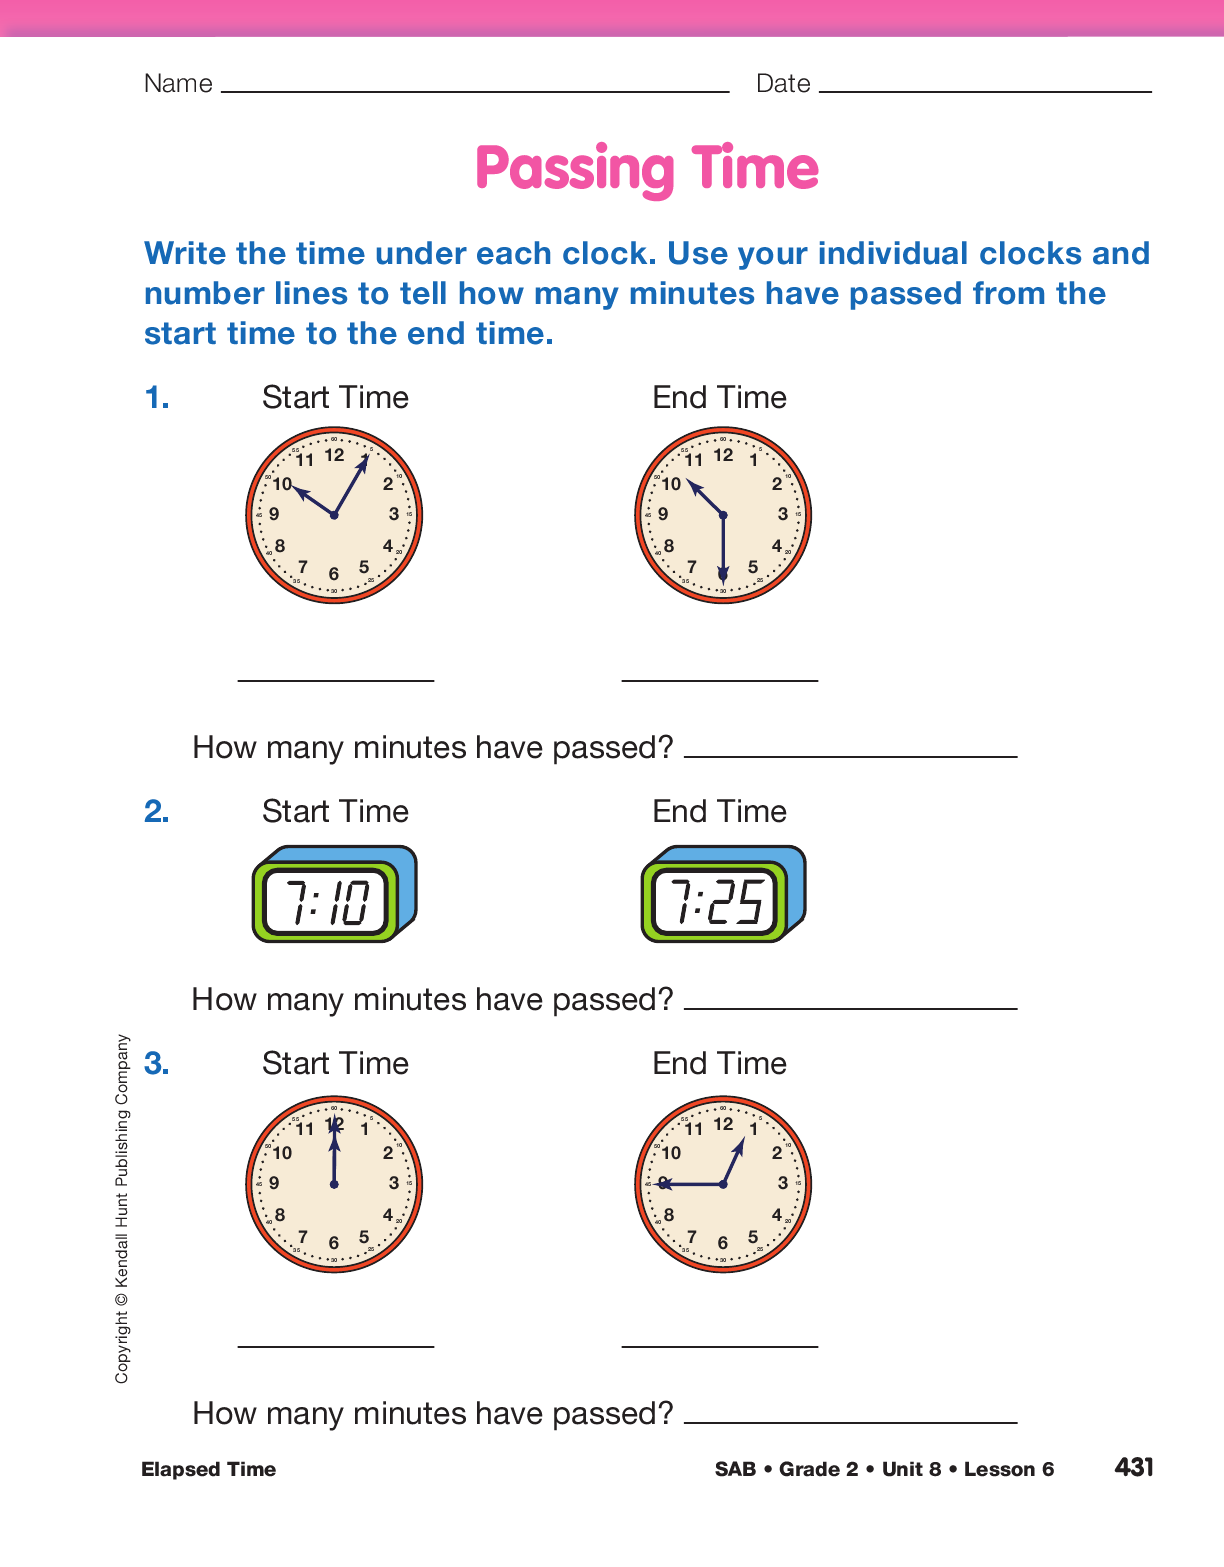
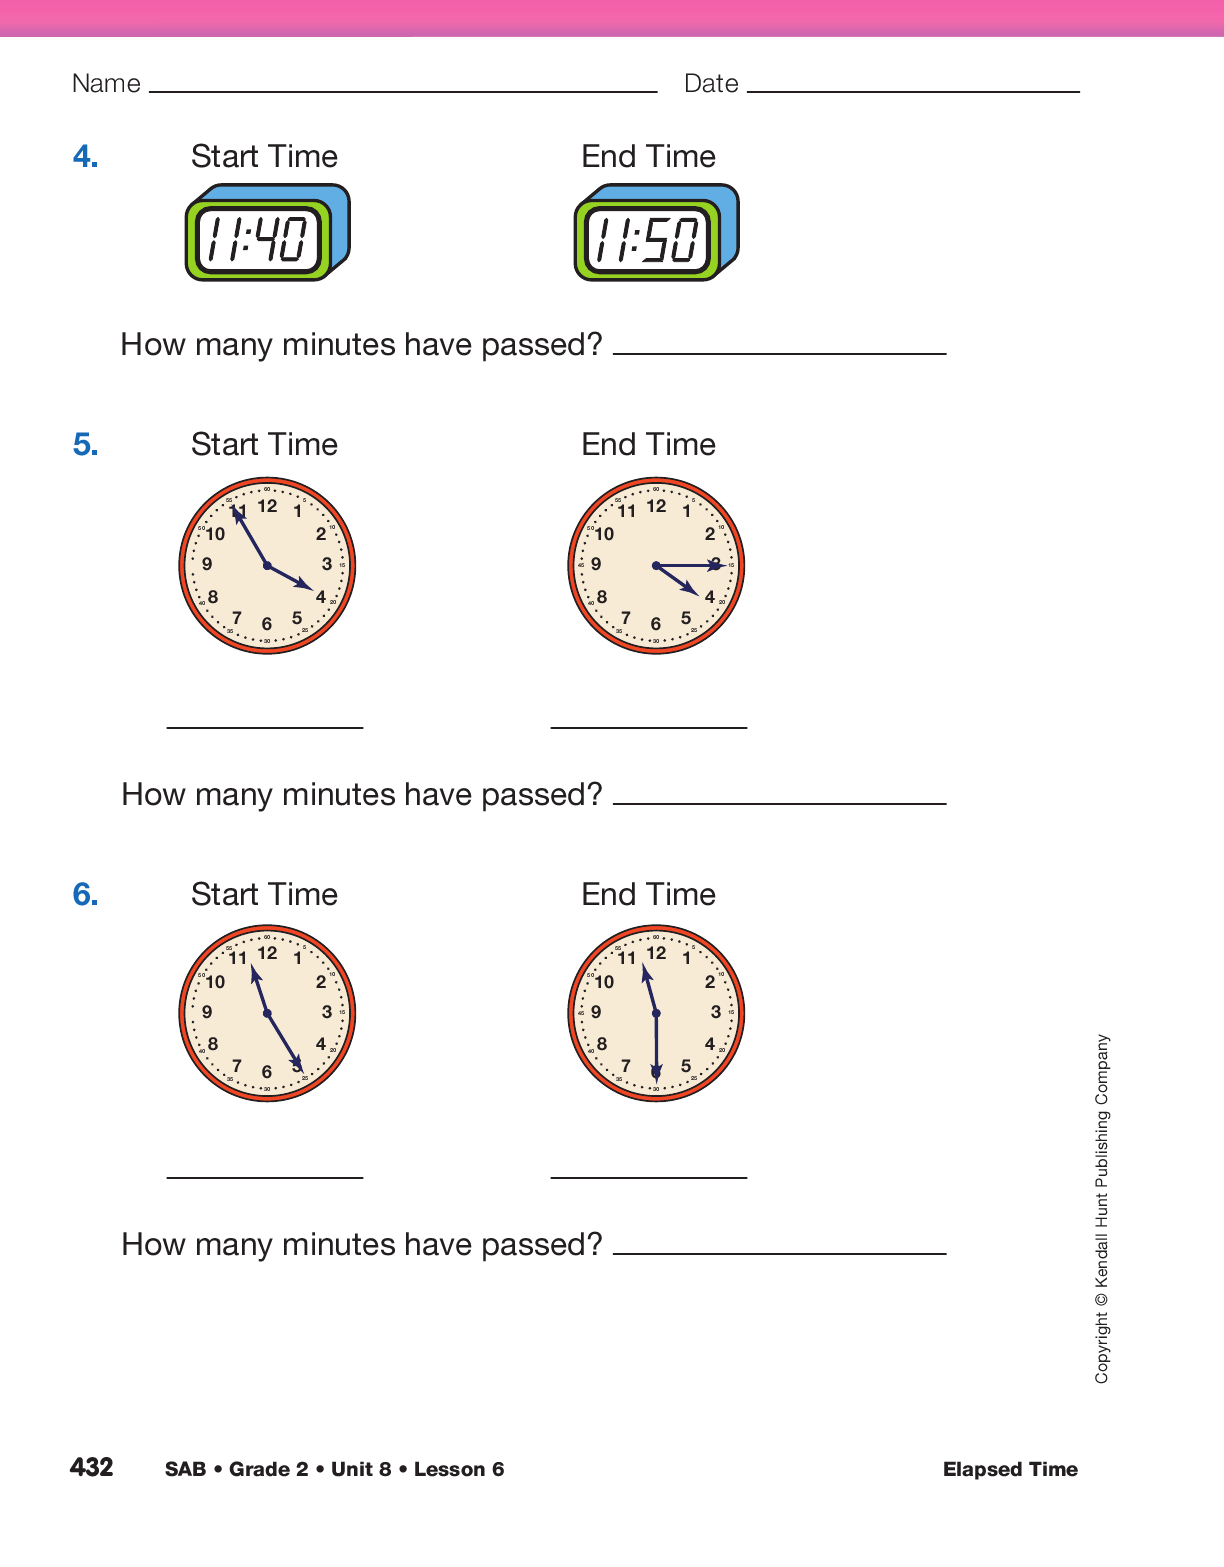
Assign the Passing Time pages in the Student Activity Book to partners. Students will record the times shown on a pair of clocks. Students will see both analog and digital clocks. Students are familiar with digital clocks and were introduced to them in Grade 1 Unit 13 Lesson 5. See Content Note. Then they will determine how many minutes have passed between the start time and end time. Encourage them to model the start time on an individual clock and then count by fives as they move the minute hand to the end time.