|
|
Daily Practice and Problems |
Lesson |
Homework |
Assessment |
Student Book |
Student Activity Book |
|
|
|
|
Teacher Resources |
Teacher Guide - digital |
|
|
|
|
Supplies for Students
connecting cubes
Materials for the Teacher
Display of Rule Machine Master (Teacher Guide)
Display of Guess My Rule (Student Activity Book) Pages 791–793
Unit 12 Assessment Record
marker
white paper. See Materials Preparation.
tape
chart paper, optional
Materials Preparation
Prepare Rule Machine Rows. Fold each sheet of paper in half lengthwise and then fold the paper in half in the
other direction and in half again, so that each sheet of paper has 8 boxes. See Figure 1. Draw a line along the
middle fold. Cut apart the four rows. These will serve as rows of a rule machine. Use a marker to write “Rule:
Double” on one row and “Input” and “Output” on another row and attach them to chart paper or a display. See
Figure 2 for a sample doubling table.
Each student will need two rows: one with an input number to double and another with an output number to
halve. For the input number, choose a different number for each student. For example, use the numbers 6–99
and some three-digit numbers that are easy to double. Reserve the numbers 1–5 for demonstration purposes
on your doubling machine. Record each different input on the left side of the row. For the output number, use
two- and three-digit numbers that are easy to halve. Most of the numbers should be even numbers, but for discussion
purposes, you may want to choose one or two odd numbers. Record each different output on the right
side of the row. You will also need a few blank rows for demonstration purposes.
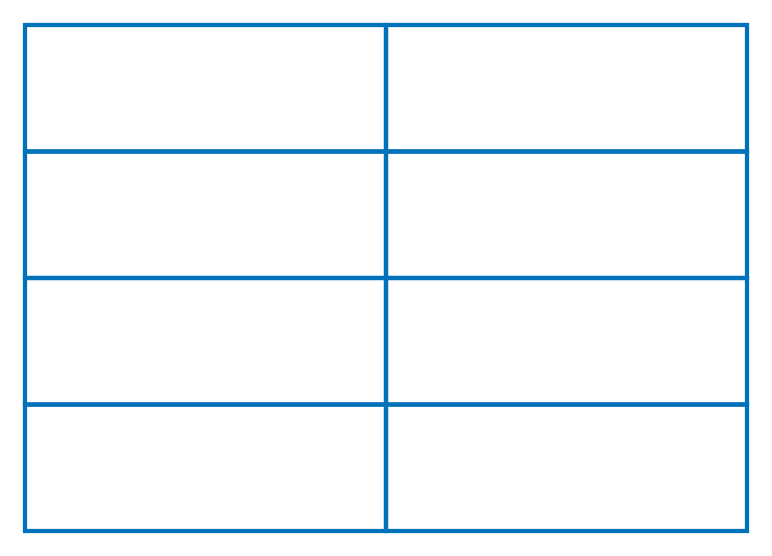
Figure 1: Paper folded into 8 boxes
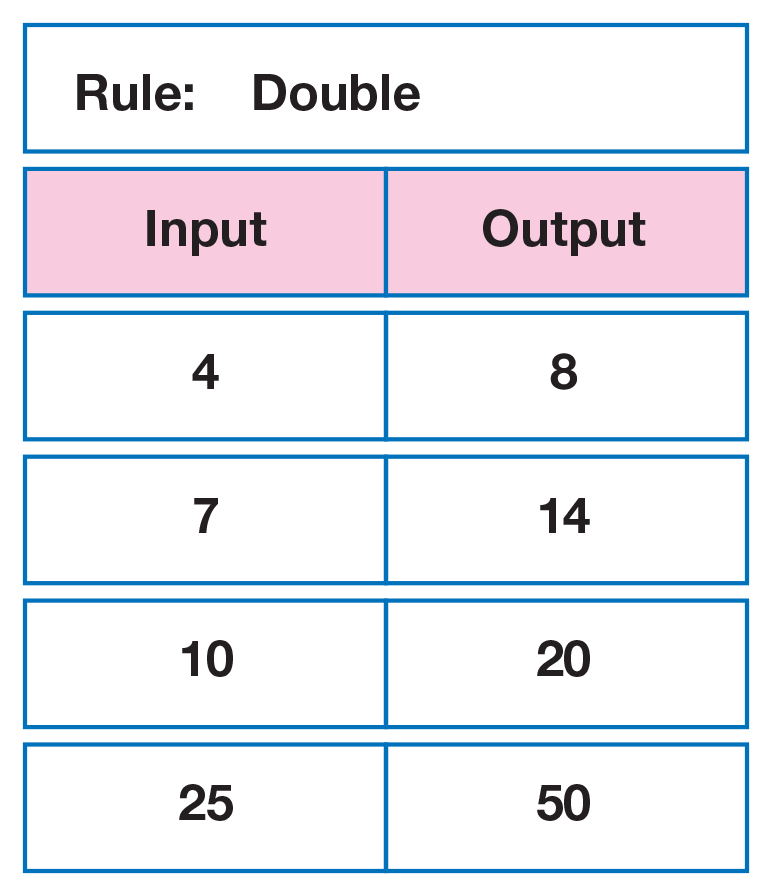
Figure 2: Example of a student-built Doubles Rule Machine


