The Minute Hand. Use the demonstration clock and have students use their individual clocks to begin a discussion of the minute hand.
- Find the blue hand on your clock. How is it different from the red hand? (It is longer than the red hand.)
- What is the name we give to the blue hand? (It is called the minute hand.)
- Look at the blue numbers on your clock. What do these numbers measure? (They measure minutes.)
- If the minute hand travels all the way around the clock, how many minutes will have passed? (60 minutes) How can you tell? (The numbers for minutes go to 60.)
Have students use their individual clocks to skip count by fives around the clock and stop at 60. Pause at each group of five on the demonstration clock as you move the minute hand around.
- What do the marks between each group of five on the clock mean? (Those marks show each minute on the clock.)
Connect the Minute Hand Intervals to the Number Line. Display the Clock Number Line you prepared before the lesson. Tell students that this number line shows the minutes in one hour. Orient students to the number line.
- Point to zero on the number line. Tell students that you started to read zero minutes after the hour and read for 15 minutes. Show that time on the Clock Number Line.
- Point to zero again and tell students that you read for 30 minutes. Show that time on the Clock Number Line.
- Point to zero again and tell students that you read till half-past the hour. Show that time on the Clock Number Line.
- Point to zero again and tell students that you read for 60 minutes. Show that time.
- Point to zero again and tell students that you read for 70 minutes. Show that time. (Show 60 minutes and then go back to the start at zero and count 10 more minutes after the hours.)
- If I started reading at 9:00, what time did I finish? (Ten minutes after 10:00; I read for one hour and then another 10 minutes after that hour.)
Wrap the Clock Number Line around the teaching clock, overlapping zero and sixty, to demonstrate how you start over on a clock. Point out to students that zero and sixty meet. The minutes in an hour start at zero and go to sixty only to start over again.
Another way to illustrate the concept that the 0 and 60 are both the starting and the ending point for minutes is to draw a race course on a display where the course is a circle and the start and end point are in the same place.
Encourage students to review any patterns they notice about the arrangement of minutes.
- The minutes are in groups of five.
- The minutes go up to 60.
- The minutes go around the clock.
- Both 0 and 60 are in the same place on the clock.
Move the Minute Hand. For this part of the lesson, tell students that they will focus on just the minute hand and how it moves on the clock. Remind them that when they are using the minute hand they need to focus on the blue numbers that show minutes on the clock. Ask them to begin by setting their clock to 10:00 while you model this on the demonstration clock.
- How many minutes will pass if you move the blue minute hand from the sixty to the blue 5 on the clock face? (5 minutes)
- What are some things that you think you can do in 5 minutes? (Answers will vary but may include activities like brushing your teeth, lining up and walking to the gym, or waiting in the line to get lunch or milk.)
Ask students to move the blue minute hand on their individual clock to show five minutes after ten or 10:05 as you model this on the demonstration clock.
Use questions similar to the following to discuss the movement of the hands on the clock.
- Look at both hands on the clock. After five minutes have passed, where is the red hour hand pointing? (It is still pointing at the ten.)
- What blue number is the minute blue hand pointing at? (It is pointing at the blue 5.)
- What red number is the blue minute hand pointing at? (It is pointing at the red 1.)
- Which of these two numbers, the red one or the blue five, tells you the number of minutes that has passed? (the blue five)
- Which hand moved the most in five minutes? (The blue hand or the minute hand.)
- How do say this time? (10:05 or five minutes past ten.)
- How do you write the time? (10:05)
Continue to move the minute hand around the clock to show 10:10.
- How many minutes past the hour is it? What blue number is the minute hand pointing to? (10 minutes past the hour; the blue 10.)
- How many groups of five minutes have passed? (2)
- What red number is the minute hand pointing at? (The red number is 2.)
- Where is the hour hand pointing? (It is a little past 10.)
- How do we write the time? (10:10)
Continue to move the minute hand in five-minute increments until you reach the 60-minute mark. Make sure students note that the hour hand has now moved from 10 o'clock to 11 o'clock.
- What happened to the blue minute hand? (It went all the way around the clock.)
- What does that tell you about how many minutes have passed? (60 minutes)
- What happened to the hour hand? (It moved to the next number, the eleven.)
- What does that tell you about how much time has passed? (One hour or 60 minutes has passed.)
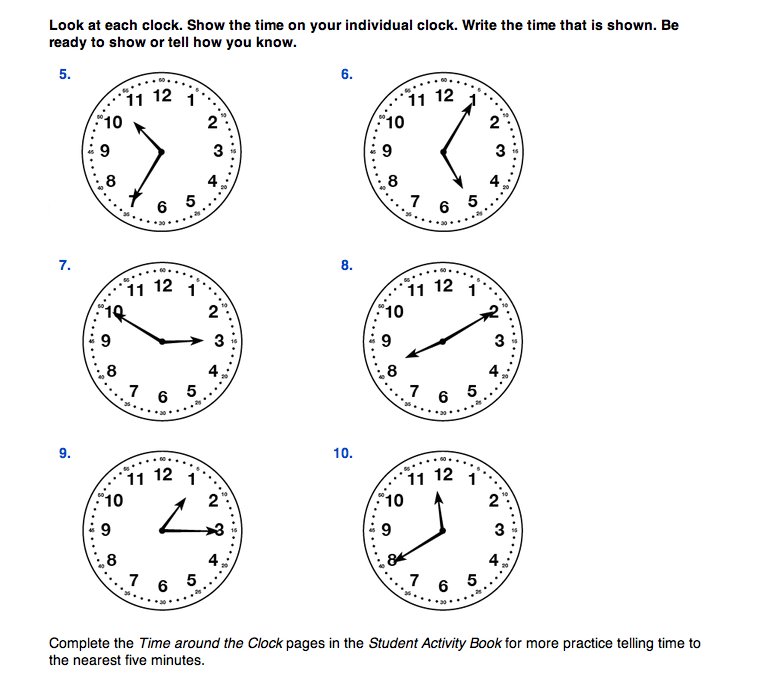
This activity helps students sense the proportional movement of the hour hand to the minute hand. As the minute hand moves a fraction of the way around the clock the hour hand moves the same fraction of the way from one hour to the next. Use the Using the Minute Hand section of the Time to the Nearest Five Minutes pages in the Student Guide to further develop this concept. After reading the short vignette, ask students to complete Questions 4–10.
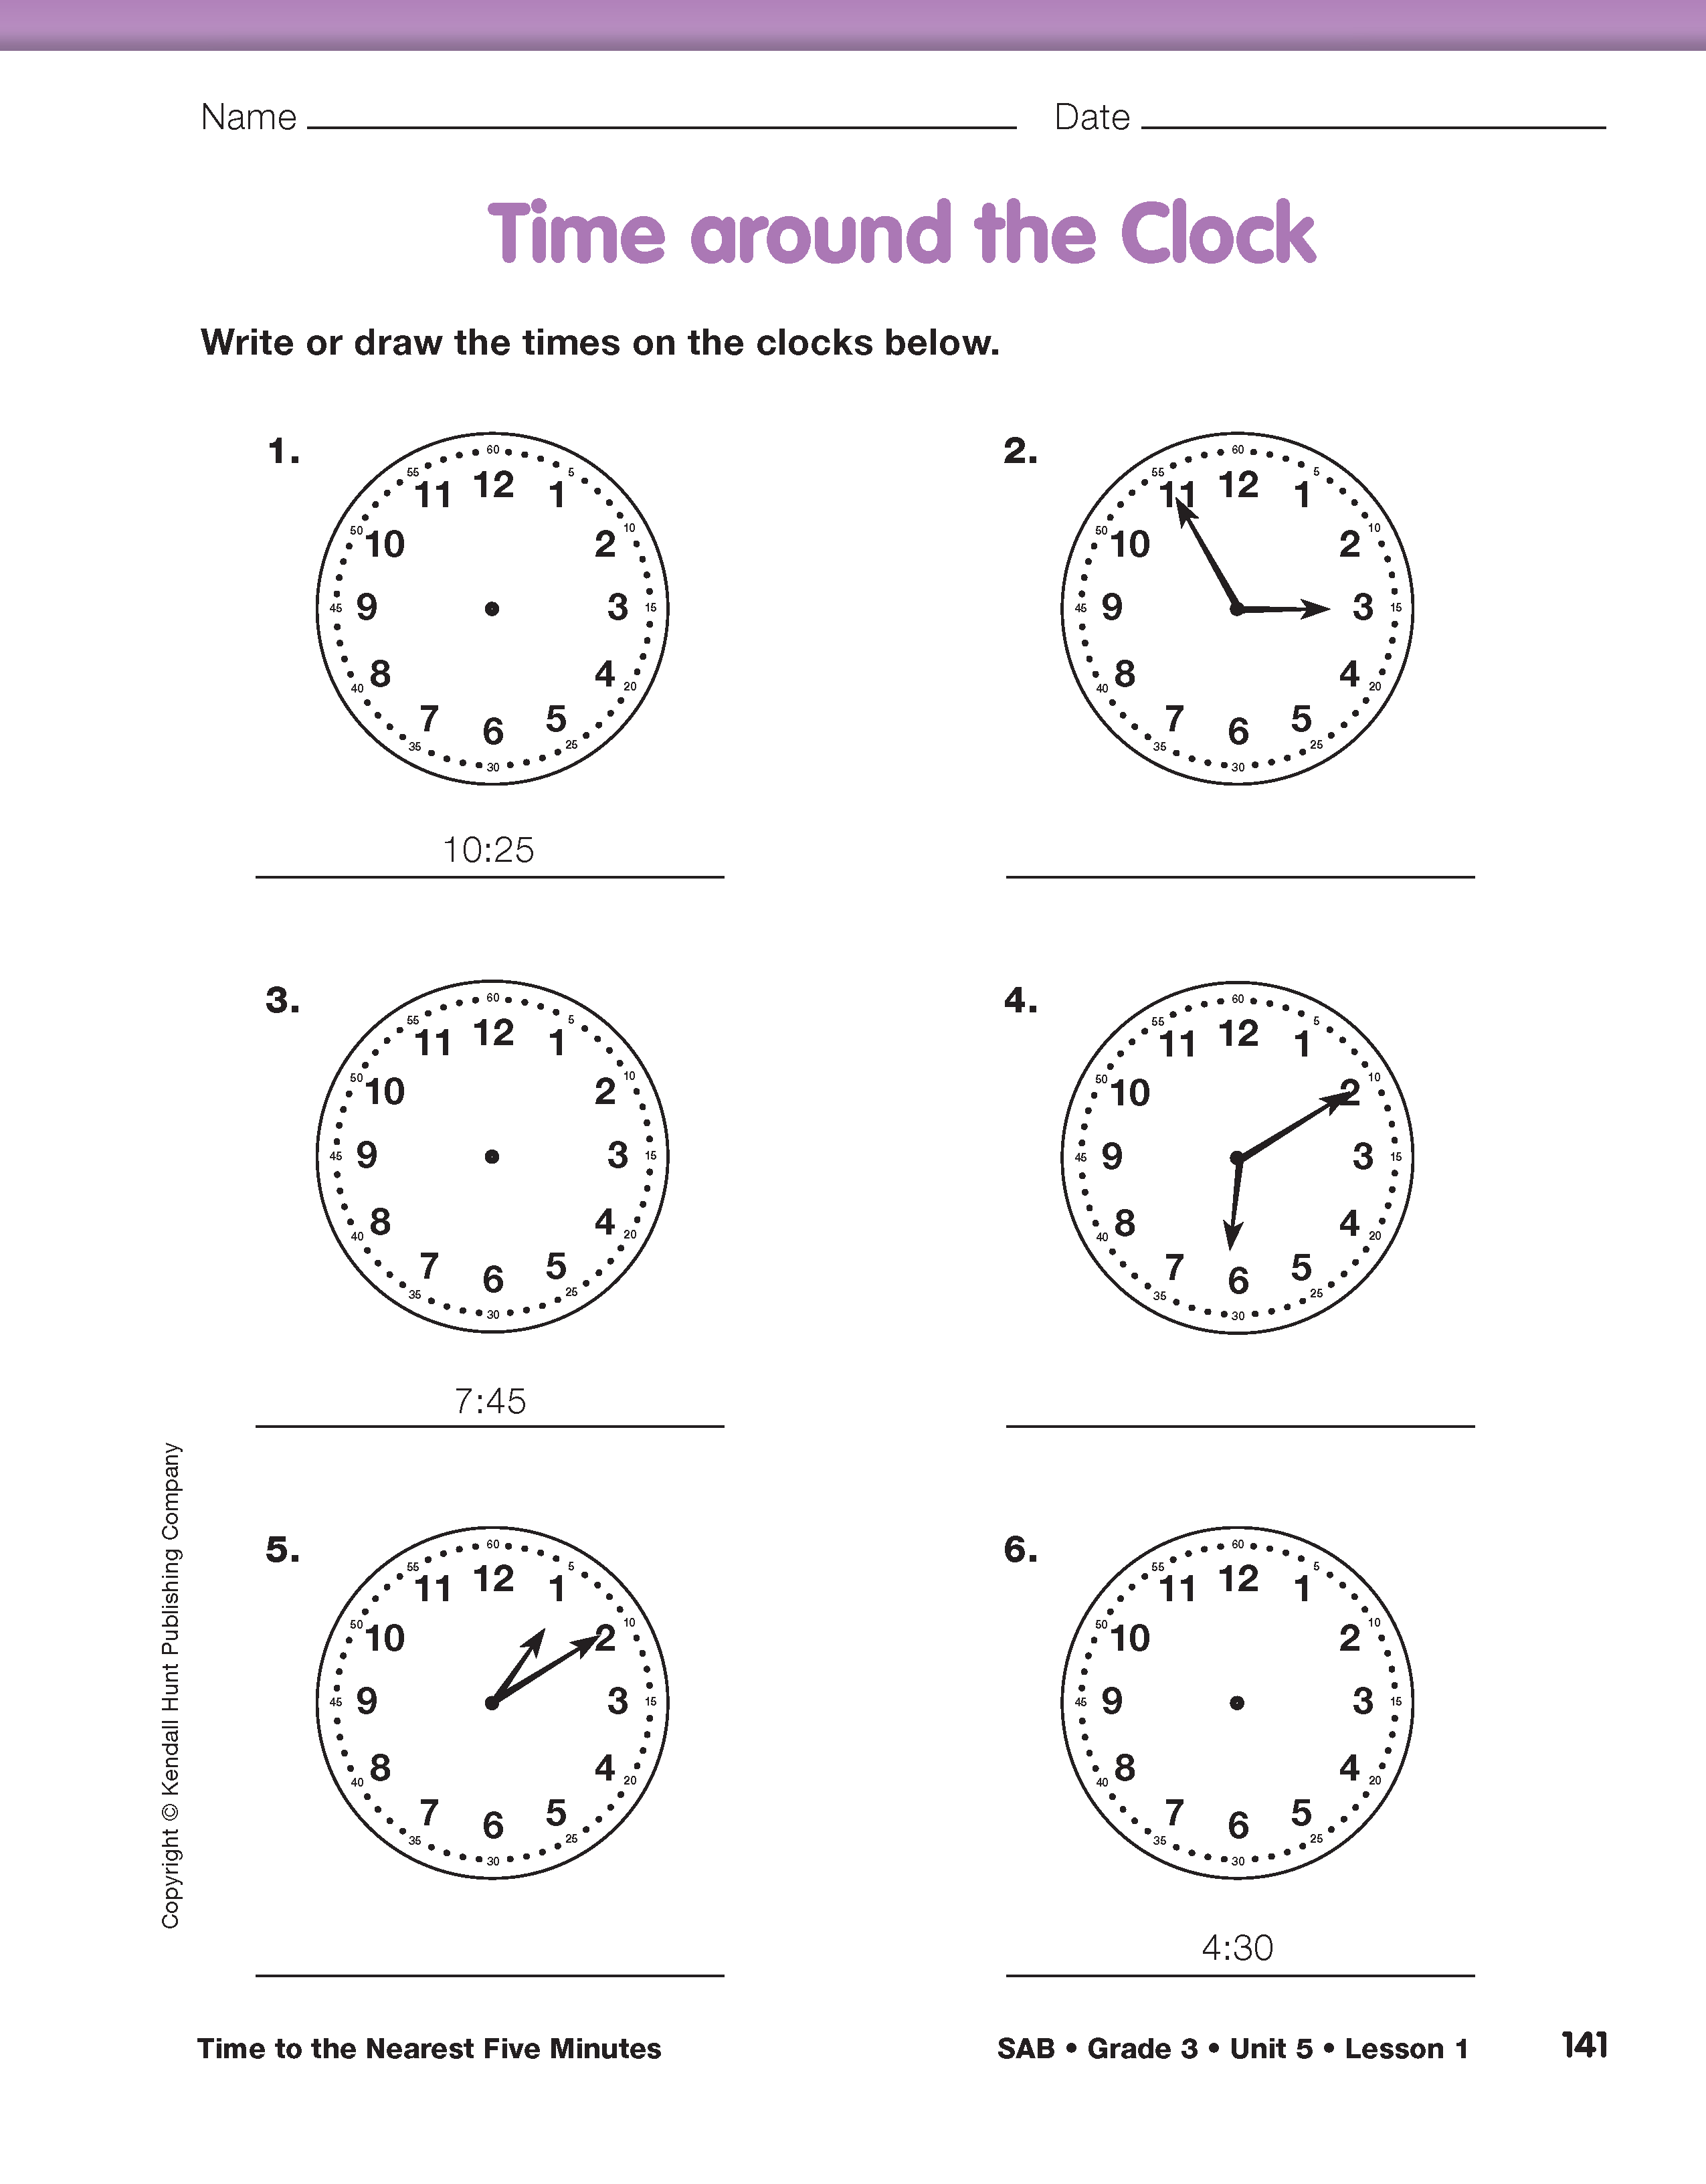
In Question 4, students further explore the relationship between the movement of the minute hand and the hour hand using the half hour, since students are already familiar with half hours. In Questions 4A–C, students should recognize that at 1:30 the minute hand is showing 30 minutes past the hour.
If students are having difficulty understanding that 30 minutes is equal to half an hour, the number line developed earlier in the lesson can be used to provide another visual model for students. When the number line is folded in half, students will be able to see that one half of 60 is 30. It may also be helpful to shade half of the number line a different color and then wrap the number line around the clock.
In Question 4D, students identify that the hour hand has moved halfway between the one and two on the clock face. Students should recognize that while the minute hand moved halfway around the clock, the hour hand also moved halfway between the hour of one o'clock and two o'clock.
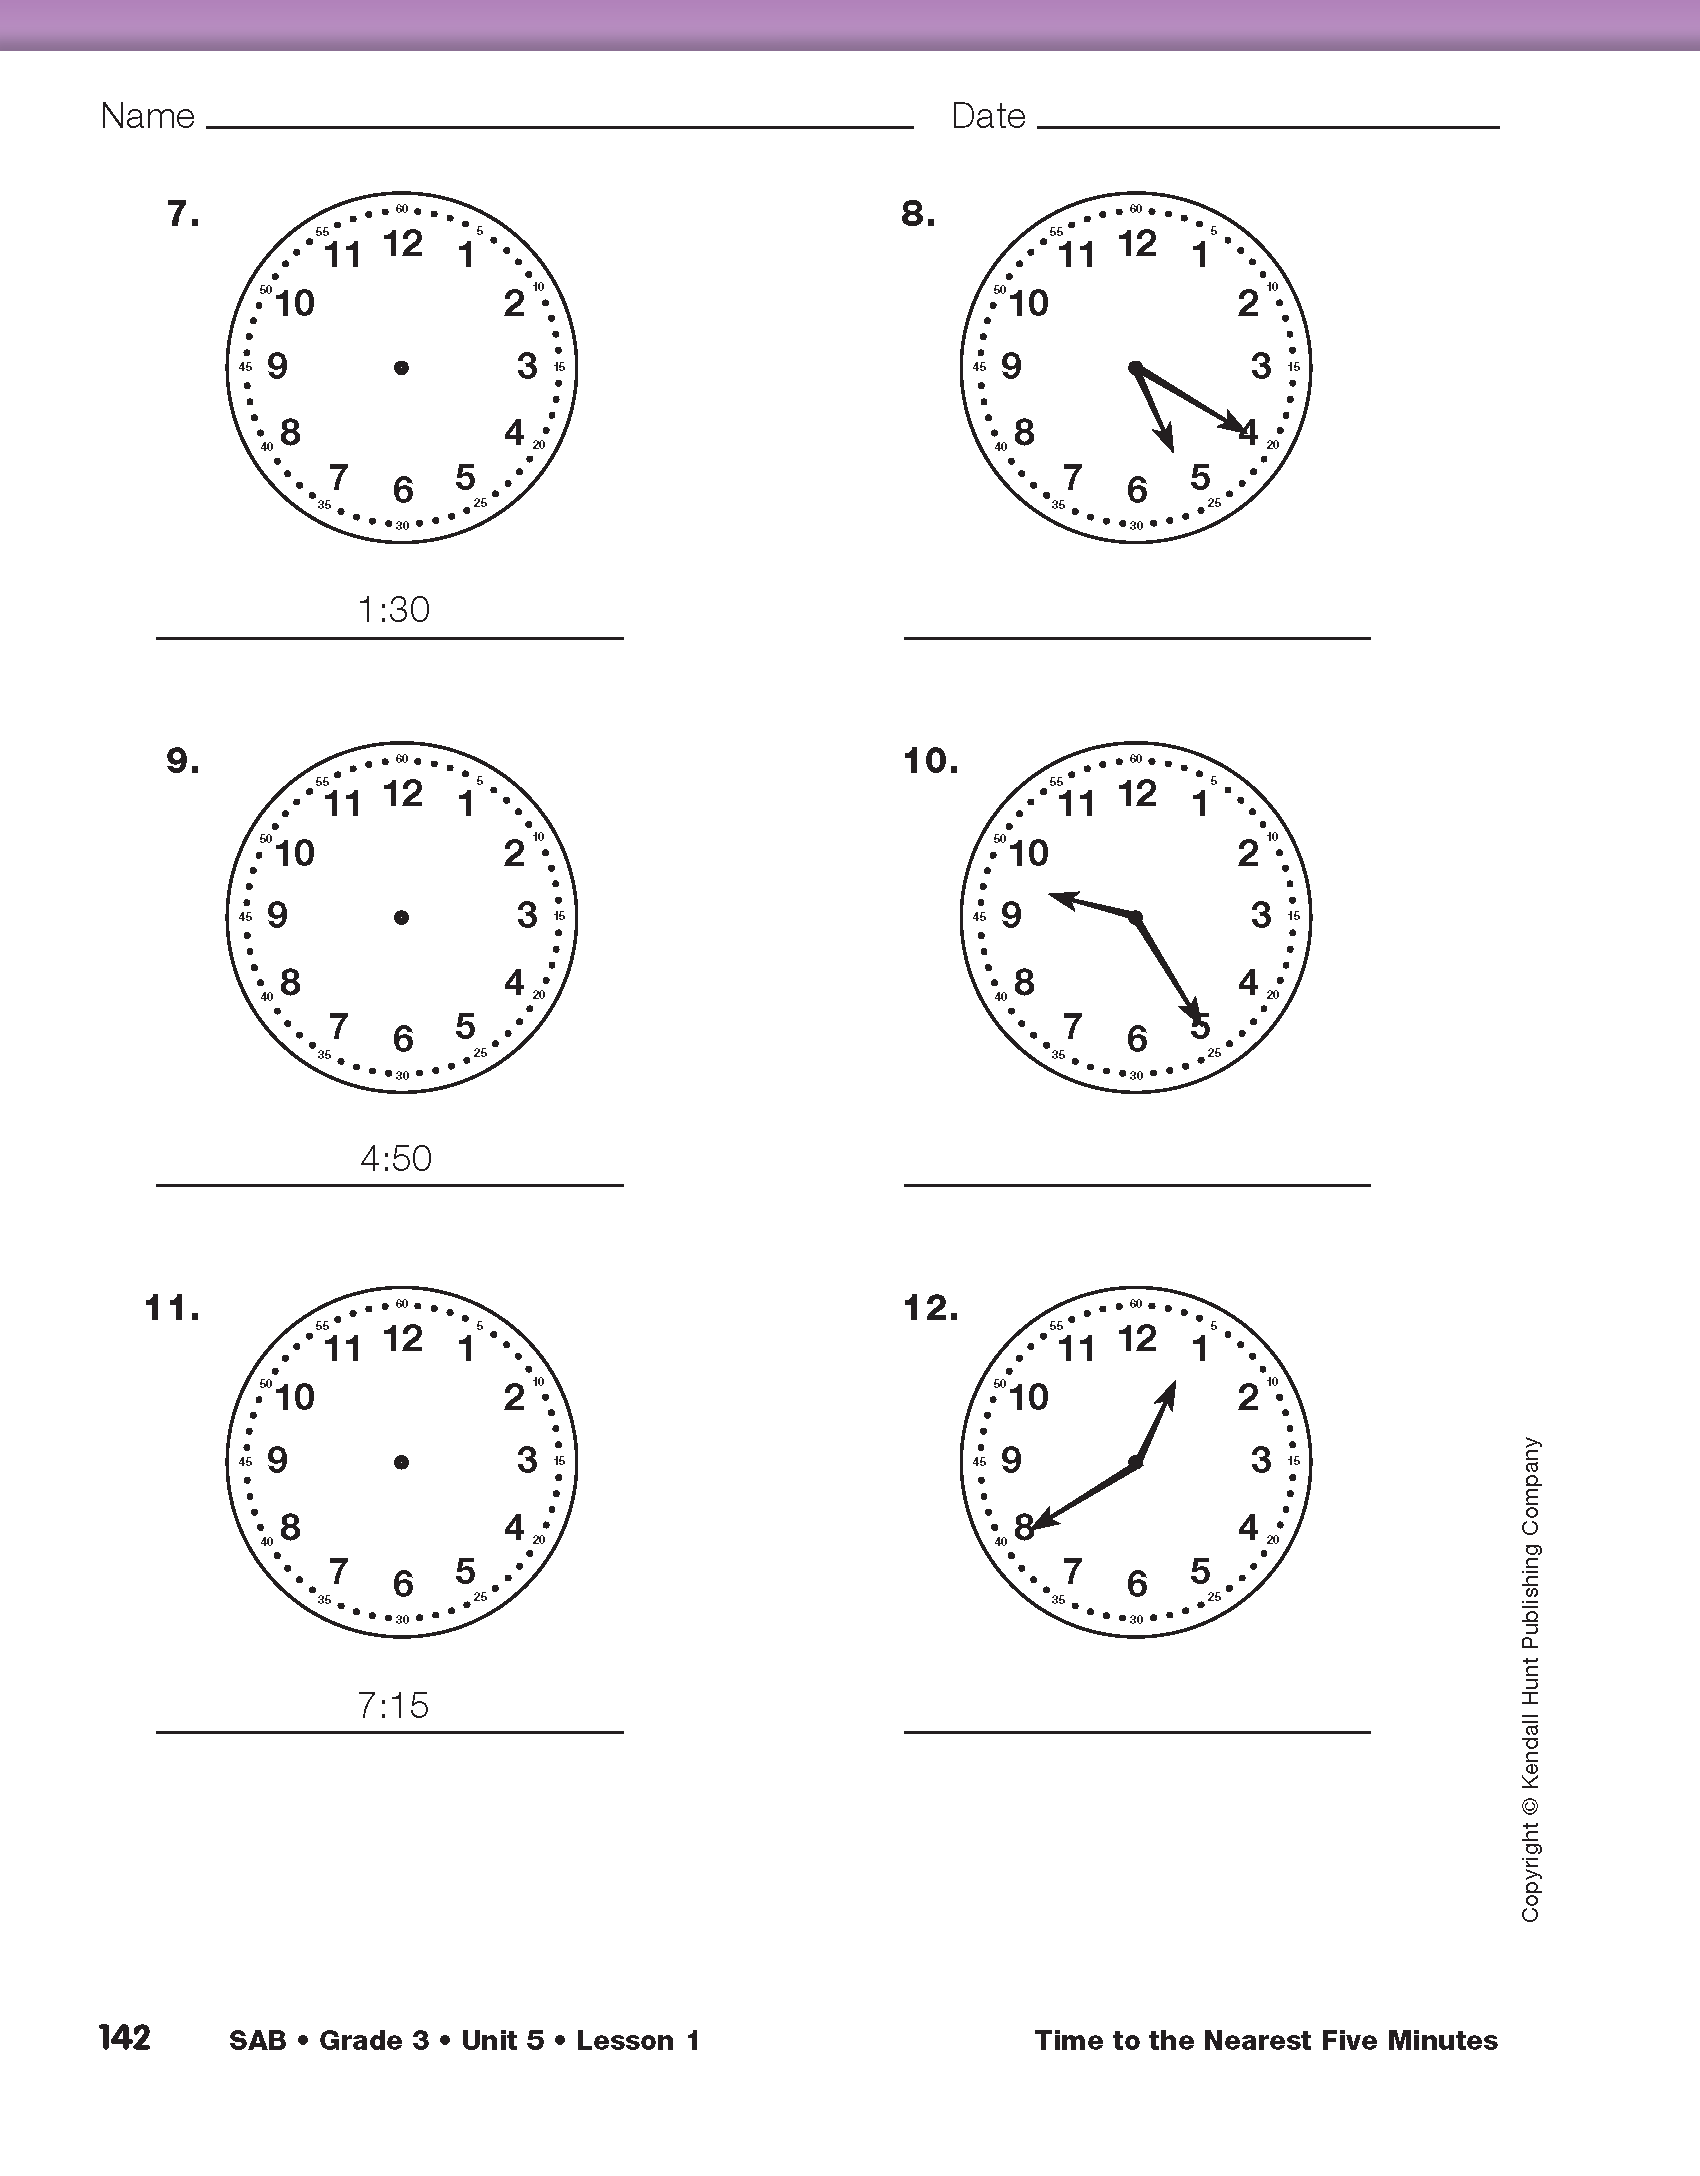
As students complete Questions 5–10, help them find the times by encouraging them to find the hour and then move the minute hand in five minute increments around the clock, counting by fives.
Assign the Time Around the Clock pages in the Student Activity Book to provide additional practice with telling time to the nearest 5 minutes. These pages can also be completed as homework.