Use Hour Hand to Tell Time. Display the demonstration
clock.
- What do you notice about the numbers on the
clock face? (Possible responses: There are big red
numbers and little blue numbers on the clock.
The red numbers are from 1 to 12 and the blue
numbers count by 5s to 60. Not all the blue numbers
are there. There are blue dots between the
blue numbers.)
- What do the red numbers on the clock represent? (hours)
- What can you do in about an hour? (Possible
responses: Math class is about an hour; my soccer
game is about an hour.)
- What will we be doing about an hour from now? (Responses will vary.)
- How many hours are shown on the clock face? (12)
- What do the blue numbers on the clock represent? (minutes)
- What can you do in about a minute? (Possible
responses: tie my shoes, sing a song, brush my
teeth, wash my hands)
- How many minutes does the clock face show? (60)
- What is another name for 60 minutes? (1 hour)
- What do you notice about the hands you see on
the clock? (Possible response: There are two
hands, one is blue and one is red. The blue hand
is longer than the red hand. The blue hand points
to the blue numbers, or to the minutes, and the
red hand points to the red numbers, or the hours.)
- Why do you think we call it a "hand"? (Possible
response: Maybe because it points to the hour the
way you can point with your hand or the fingers
on your hand.)
Remind students that the longer hand, the blue hand
on the demonstration clock, is used to measure minutes
and the shorter hand, the red hand on the
demonstration clock, is used to measure hours.
Explain to students that in the beginning of the lesson
they are going to think about how the hour hand
can be used to tell time.
Set the hands on the demonstration clock to
12 o'clock. Write "12:00 AM" on the board or display.
- Let's pretend it's midnight. What are you usually
doing at midnight? (sleeping)
Point out that the times between 12:00 midnight and
12:00 noon are followed by the abbreviation AM.
They were probably sleeping at 12:10 AM. The times
after 12:00 noon are followed by the abbreviation
PM. The Content Note provides further definition of
these two abbreviations.
The 12-hour clock is a time convention in which the twenty-four
hours of the day are divided into two periods, each
twelve hours in length. 12:00 is either designated as
midnight or noon. The abbreviation AM (ante meridiem or
"before midday") is used to designate the period of time
between one minute after midnight and one minute before
noon. The abbreviation PM (post meridiem or "after
midday") is used to designate the period of time between
one minute after noon and one minute before midnight.
Move the hour hand around the clock to show time
passage through the night. Ask students to focus on
the hour hand as it moves from hour to hour. Have
students count each hour with you as you move the
hand around the clock (1 o'clock AM, 2 o'clock
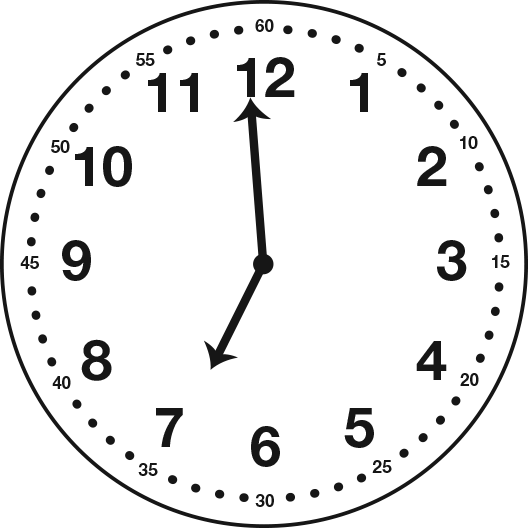
AM … 6 o'clock AM). Set the hour hand so it is just
before 7 o'clock. See Figure 1.
- Between what two hours is the hour hand? (It is
between 6 o'clock and 7 o'clock.)
- What time does the clock show? Is it AM or PM?
Who can show how to write this? (Possible
response: It is almost 7:00 AM.)
- What are you doing at 7 AM in the morning? (Possible responses: waking up, eating breakfast,
brushing teeth, showering)
Move the hour hand to 12 o'clock noon as students
continue to count each hour (7 o'clock AM, 8 o'clock
AM, … 12 o'clock PM).
- We started at 12 o'clock midnight and the hour
hand traveled all the way around the clock. How
many hours have passed? (12 hours)
- What time is it now? (12 o'clock again)
- Is it 12:00 AM or 12:00 PM? (PM)
- Is it nighttime or daytime at 12:00 PM? (daytime)
- What is the name for 12 o'clock in the middle of
the day? (noon)
- What might you be doing at noon? (Possible
response: eating lunch)
- How many more hours until 12 o'clock midnight
again? (12)
Tell students they are now going to focus on the
movement of the hour hand throughout a single
hour. Begin at the nearest hour (e.g., one o'clock).
Review with students that an hour has 60 minutes
and point out the 60 on top of the demonstration
clock. Show students the passage of a whole hour on
the demonstration clock. As you move the blue hand
around the face of the clock, focus student attention
on the movement of the hour hand. Ask where the
hour hand starts (e.g., pointing directly at the one)
and where it ends (e.g., pointing directly at the two).
Discuss where the hour hand is at various times during
an hour. For example, when the hour hand is just
past 2, it is a little after 2 o'clock. When the hour
hand is closer to 3, it is almost 3 o'clock.
Continue to review using the hour hand to tell the
approximate time throughout the afternoon and
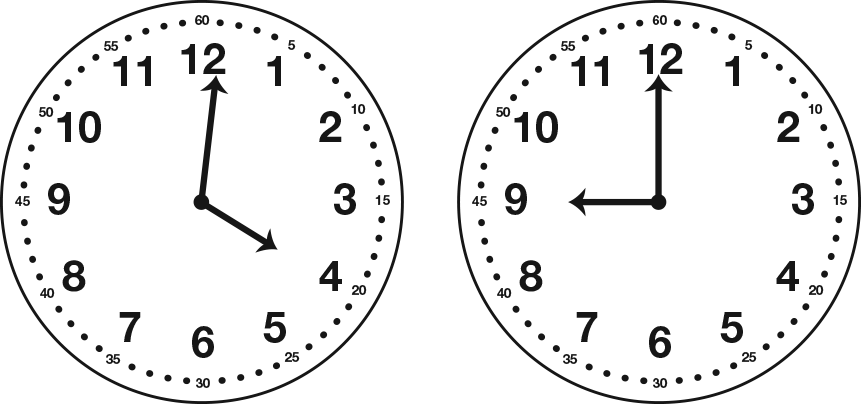
evening hours. For example, set the hour hand to
show a little after four o'clock or about nine o'clock.
See Figure 2.
Use these or similar discussion
prompts to guide the review:
- Between which two hours is the hour hand?
- To which hour is the hour hand closest?
- Is the hour hand before or after that hour?
- What would you estimate the time to be? How do
you know?
- What are you usually doing at this hour [add AM or
PM to clarify]?
End the activity with the hands pointing directly at
12 o'clock again.
- Where is the hour hand now? (pointing directly at
the 12)
- How many hours are there from midnight one
night to midnight the next night? How many hours
are there in a day? (24 hours)
- How many times does the hour hand have to travel
all the way around the clock in one day? (twice)
Use Minute Hand to Tell Time to the Nearest Half
Hour. Distribute individual clocks to students. As
students show times on their individual clocks, periodically
ask them to hold the clocks up so that you
can check their work. Tell students that until now
they have focused on the hour hand and the large red
numbers to tell what hour it is. Using the demonstration
clock, point to the blue hand and remind students
that it is called the minute hand. Direct their
attention to the blue numbers and tell them these
numbers tell them how many minutes have passed.
Set the clock at 10 o'clock, for example, and have
them watch the two hands as you make a complete
circle with the minute hand. Ask students to repeat
the process on their individual clocks.
- What time did the clock show when you started? (10 o'clock)
- What time did it show when you stopped? (11 o'clock)
- How much time passed? (one hour)
- How many minutes is that? (60 minutes)
- How far do you think the minute hand goes in a
half hour? How did you decide? (30 minutes;
Possible response: If I think about half of a sandwich,
it means there are 2 equal parts of the sandwich.
If I think about cutting 60 minutes in half,
each half is 30 minutes because 3 tens + 3 tens =
6 tens.)
Have students take their hands and cover half of
their clockfaces. Use a piece of paper to cover half
of the demonstration clock's face.
- Look at the blue numbers on your clock. How
many minutes is your hand covering? How do you
know? (My hand is covering 30 minutes. Possible
response: I can count by fives as I go from number
to number.)
Set the minute hand on the demonstration clock to
the 60. Ask students to move the minute hand on
their individual clock so that it also points to 60.
Since they are focusing only on the minute hand, it
is not important if the hour hands are different on
each clock. Move the minute hand slowly around the
clock as students move the minute hand on their
individual clocks. Together, count the minutes that
pass by fives.
- When the blue hand or minute hand travels all the
way around the clock face how many minutes
have passed? (60)
Set the demonstration clock to six o'clock and ask
students to set their individual clocks to show the
same time.
- Using the hour hand, what time does the clock
show? Write this on the board. (6:00)
- Look at the minute hand. Where is it pointing when
it is 6 o'clock? (The minute hand is pointing at
the blue 60.)
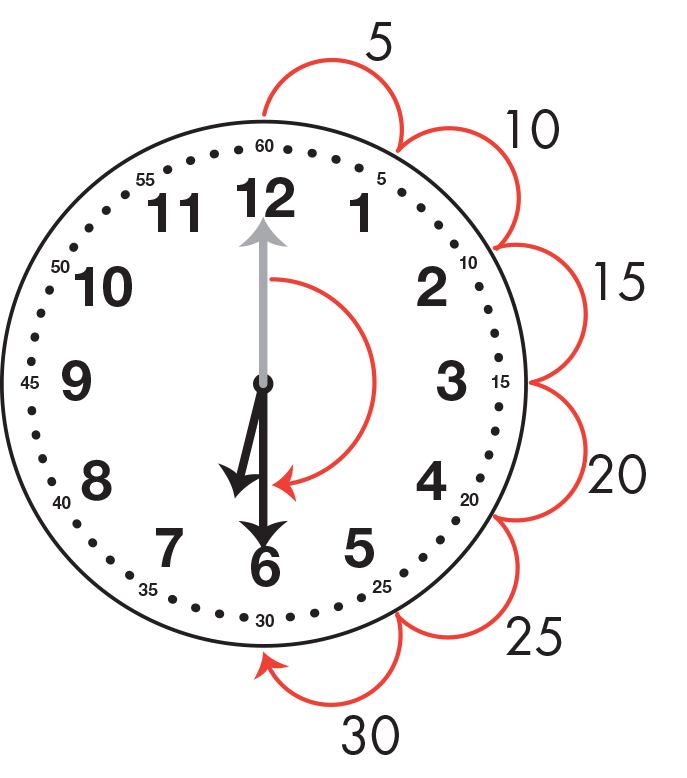
Ask students to count by fives as you move the
minute hand to show that 30 minutes have passed.
See Figure 3. Students should also move the minute
hand on their individual clocks.
- Where is the blue minute hand pointing? (Possible
response: It is pointing at the blue 30.)
- How many minutes have passed when the minute
hand moves from the 60 to the 30? How do you
know? (30 minutes; Possible response: I can
count by fives: 5, 10, 15, 20, 25, 30.)
- What time does the clock show? (6:30)
- If I want to move the minute hand to show a half
hour more has passed, where should I stop the
minute hand? (pointing straight up at the blue 60-minute mark)
- Two half hours is how many minutes? How do you
know? (60 minutes; 30 minutes in one half hour
plus 30 minutes in another half hour is 60 minutes
in one whole hour.)
Introduce Time to the Nearest Fifteen Minutes.
Set the demonstration clock to six o'clock and ask
students to set their individual clocks to show the
same time.
- If the minute hand goes halfway around the clock
in 30 minutes, how far do you think it goes in 15
minutes? How did you decide? (It would point to
the blue 15. Possible response: I remember moving
the minute hand from number to number and
counting by fives from the 12. 5, 10, 15 minutes
is half as much as 30 minutes.)
As you move the minute hand on the demonstration
clock, have students count by fives as they move the
minute hand on their clocks to show that 15 minutes
have passed.
- Where is the minute hand pointing now? (Possible
response: It is pointing at the blue 15.)
If a student responds that the minute hand is pointing
at the three, remind him or her that the red three tells
the hour and the blue numbers along the outside
edge show the minutes that have passed. See the
Content Note.
An analog clock uses at least two distinct scales to show
the time. One scale represents the hours and is divided
into 12 units. The other scale represents the minutes and is
divided into 60 units. The minutes on the demonstration
clock are shown along the outside edge of the clock face.
Each mark represents 1 minute with numeric markers
displayed every 5 minutes. As students identify the position
of the minute hand on the clock face, make sure they are
using the scale that relates to minutes passed rather than
the scale that indicates the hour.
- How many minutes have passed? (15 minutes)
- What time does the clock show? How would you
write this? (6:15)
Direct students' attention to the demonstration clock.
Set the clock for 7 o'clock, for example. As you
move the minute hand to show 7:15, have students
count aloud by fives as you ask what time the clock
shows. Set the clock back to 7 o'clock and repeat the
process for 7:30 and again for 7:45. Ask student volunteers
to write the time shown on the board.
Ask students to set their individual clocks to another
hour, for example 11 o'clock. Repeating the same
process, ask students to show you 11:15, then 11:30,
and then 11:45 on their clocks. Repeat as necessary.
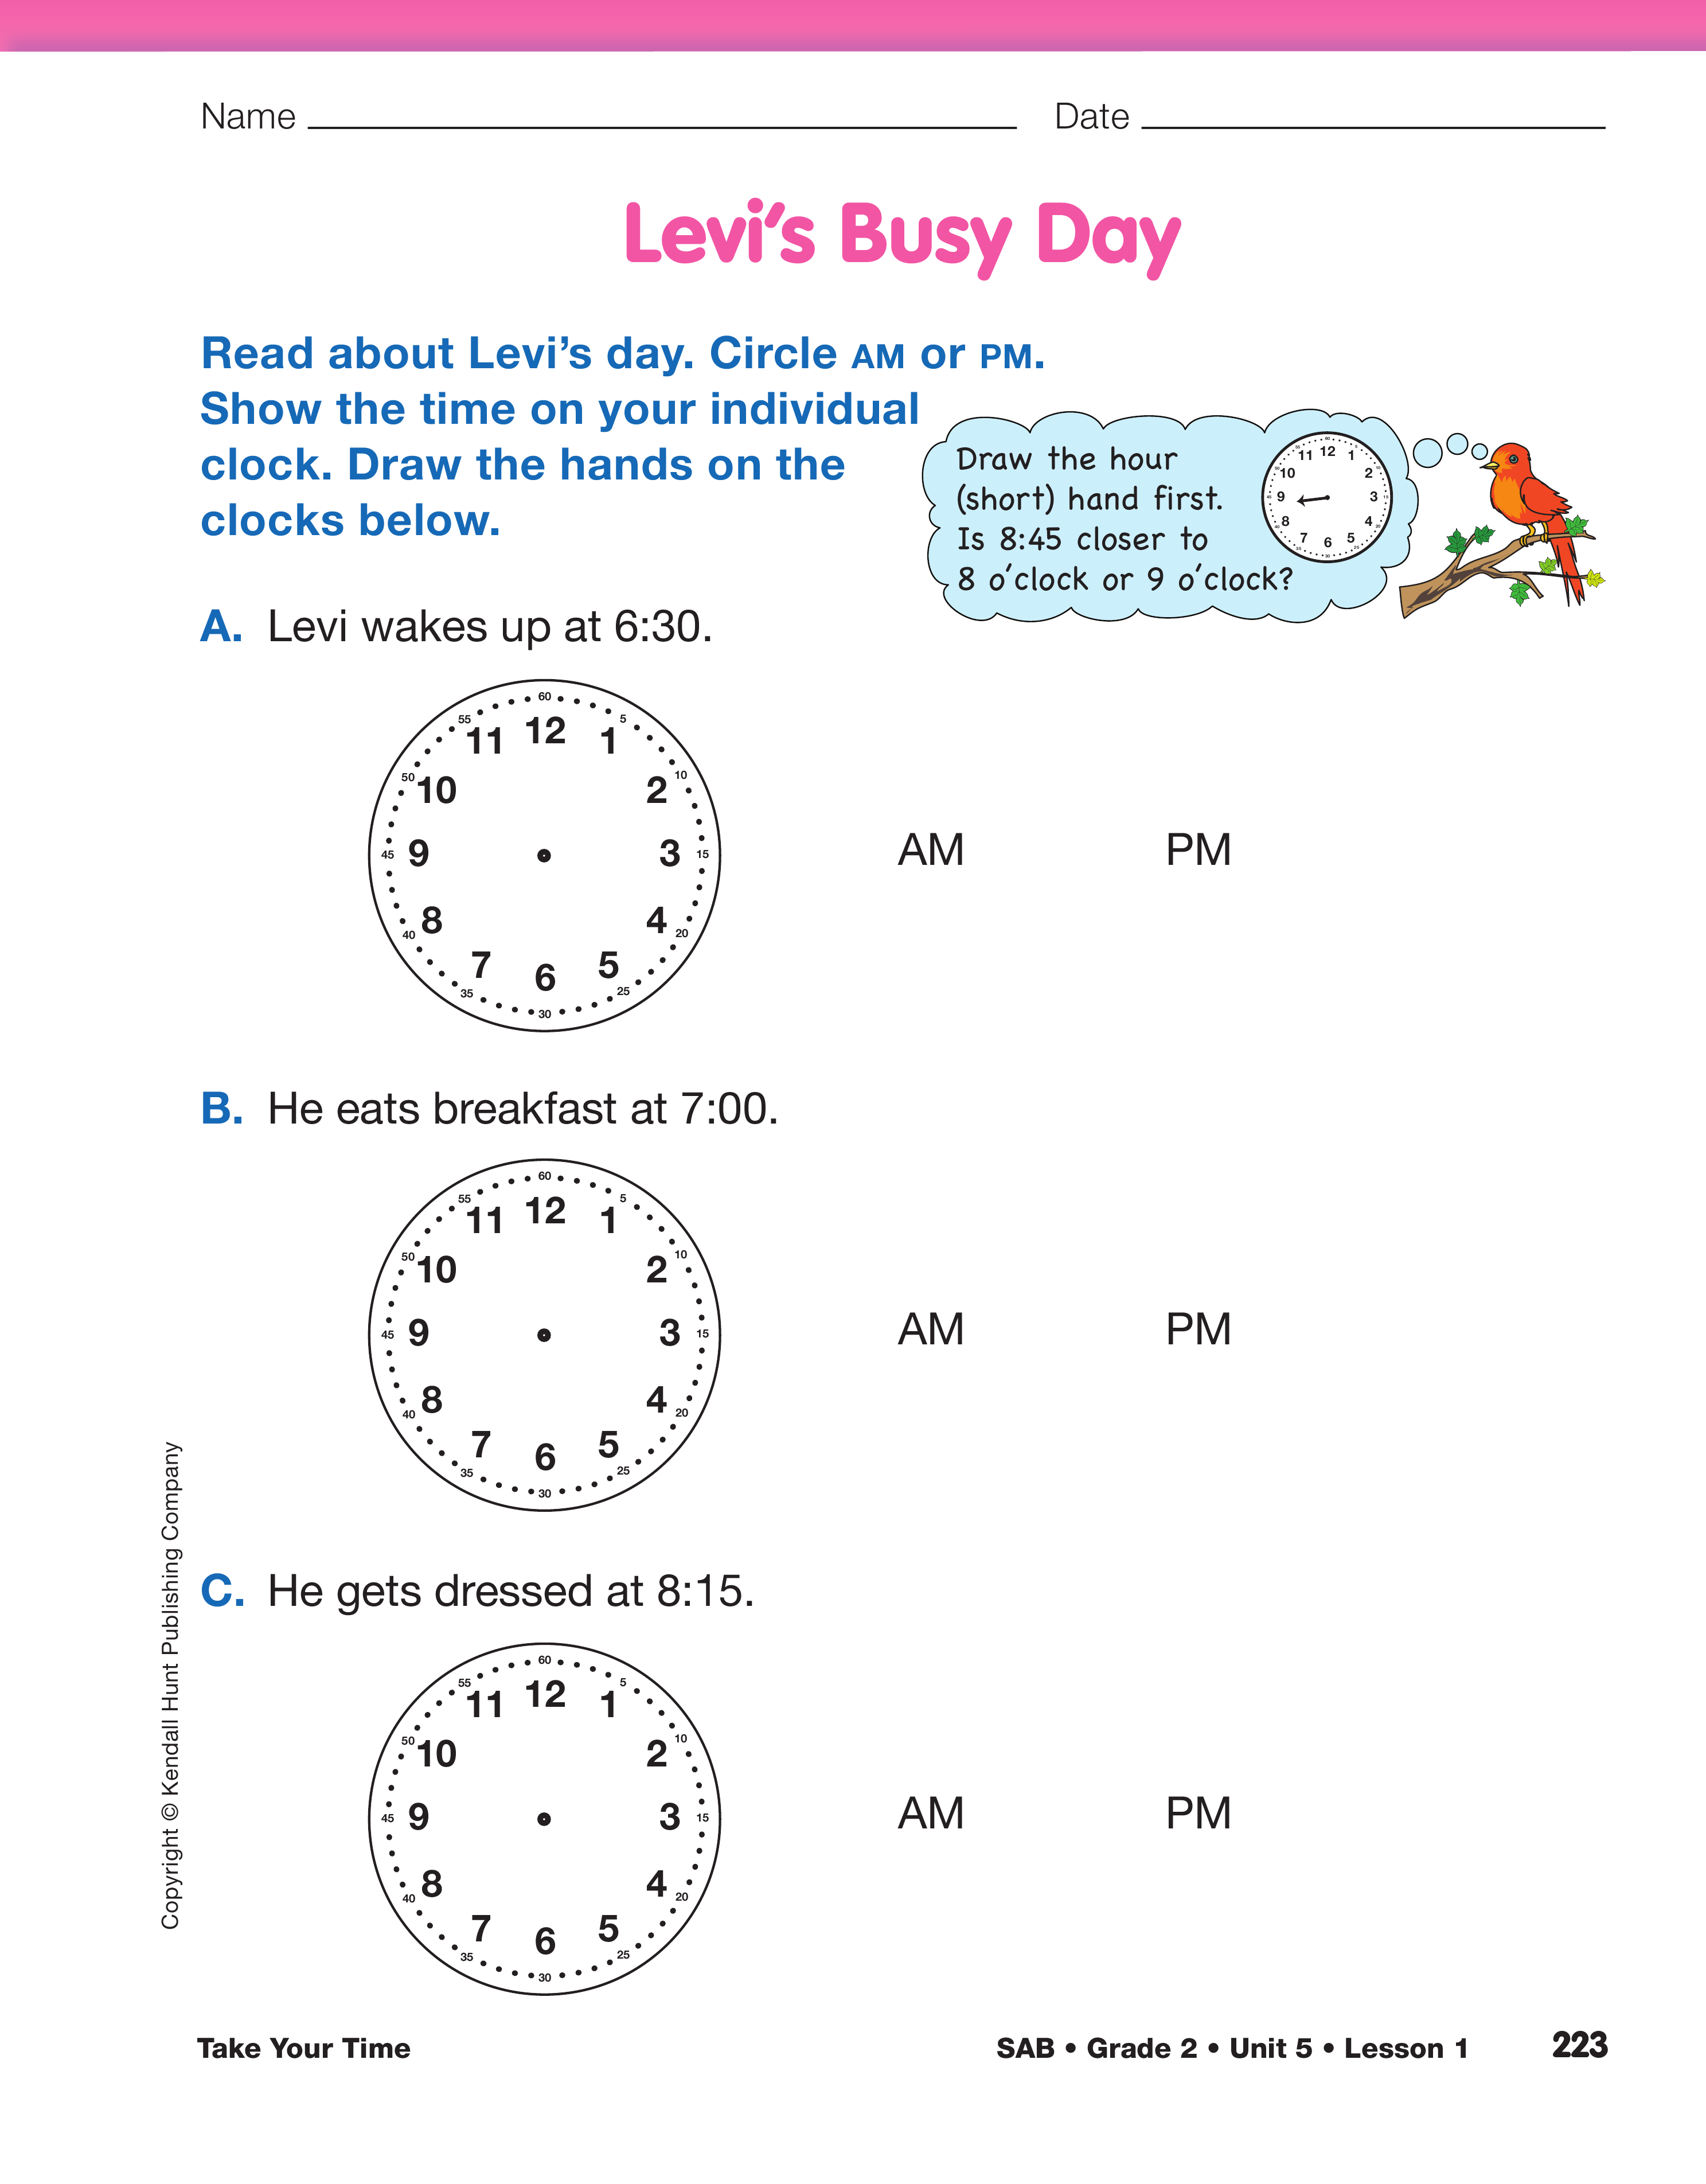
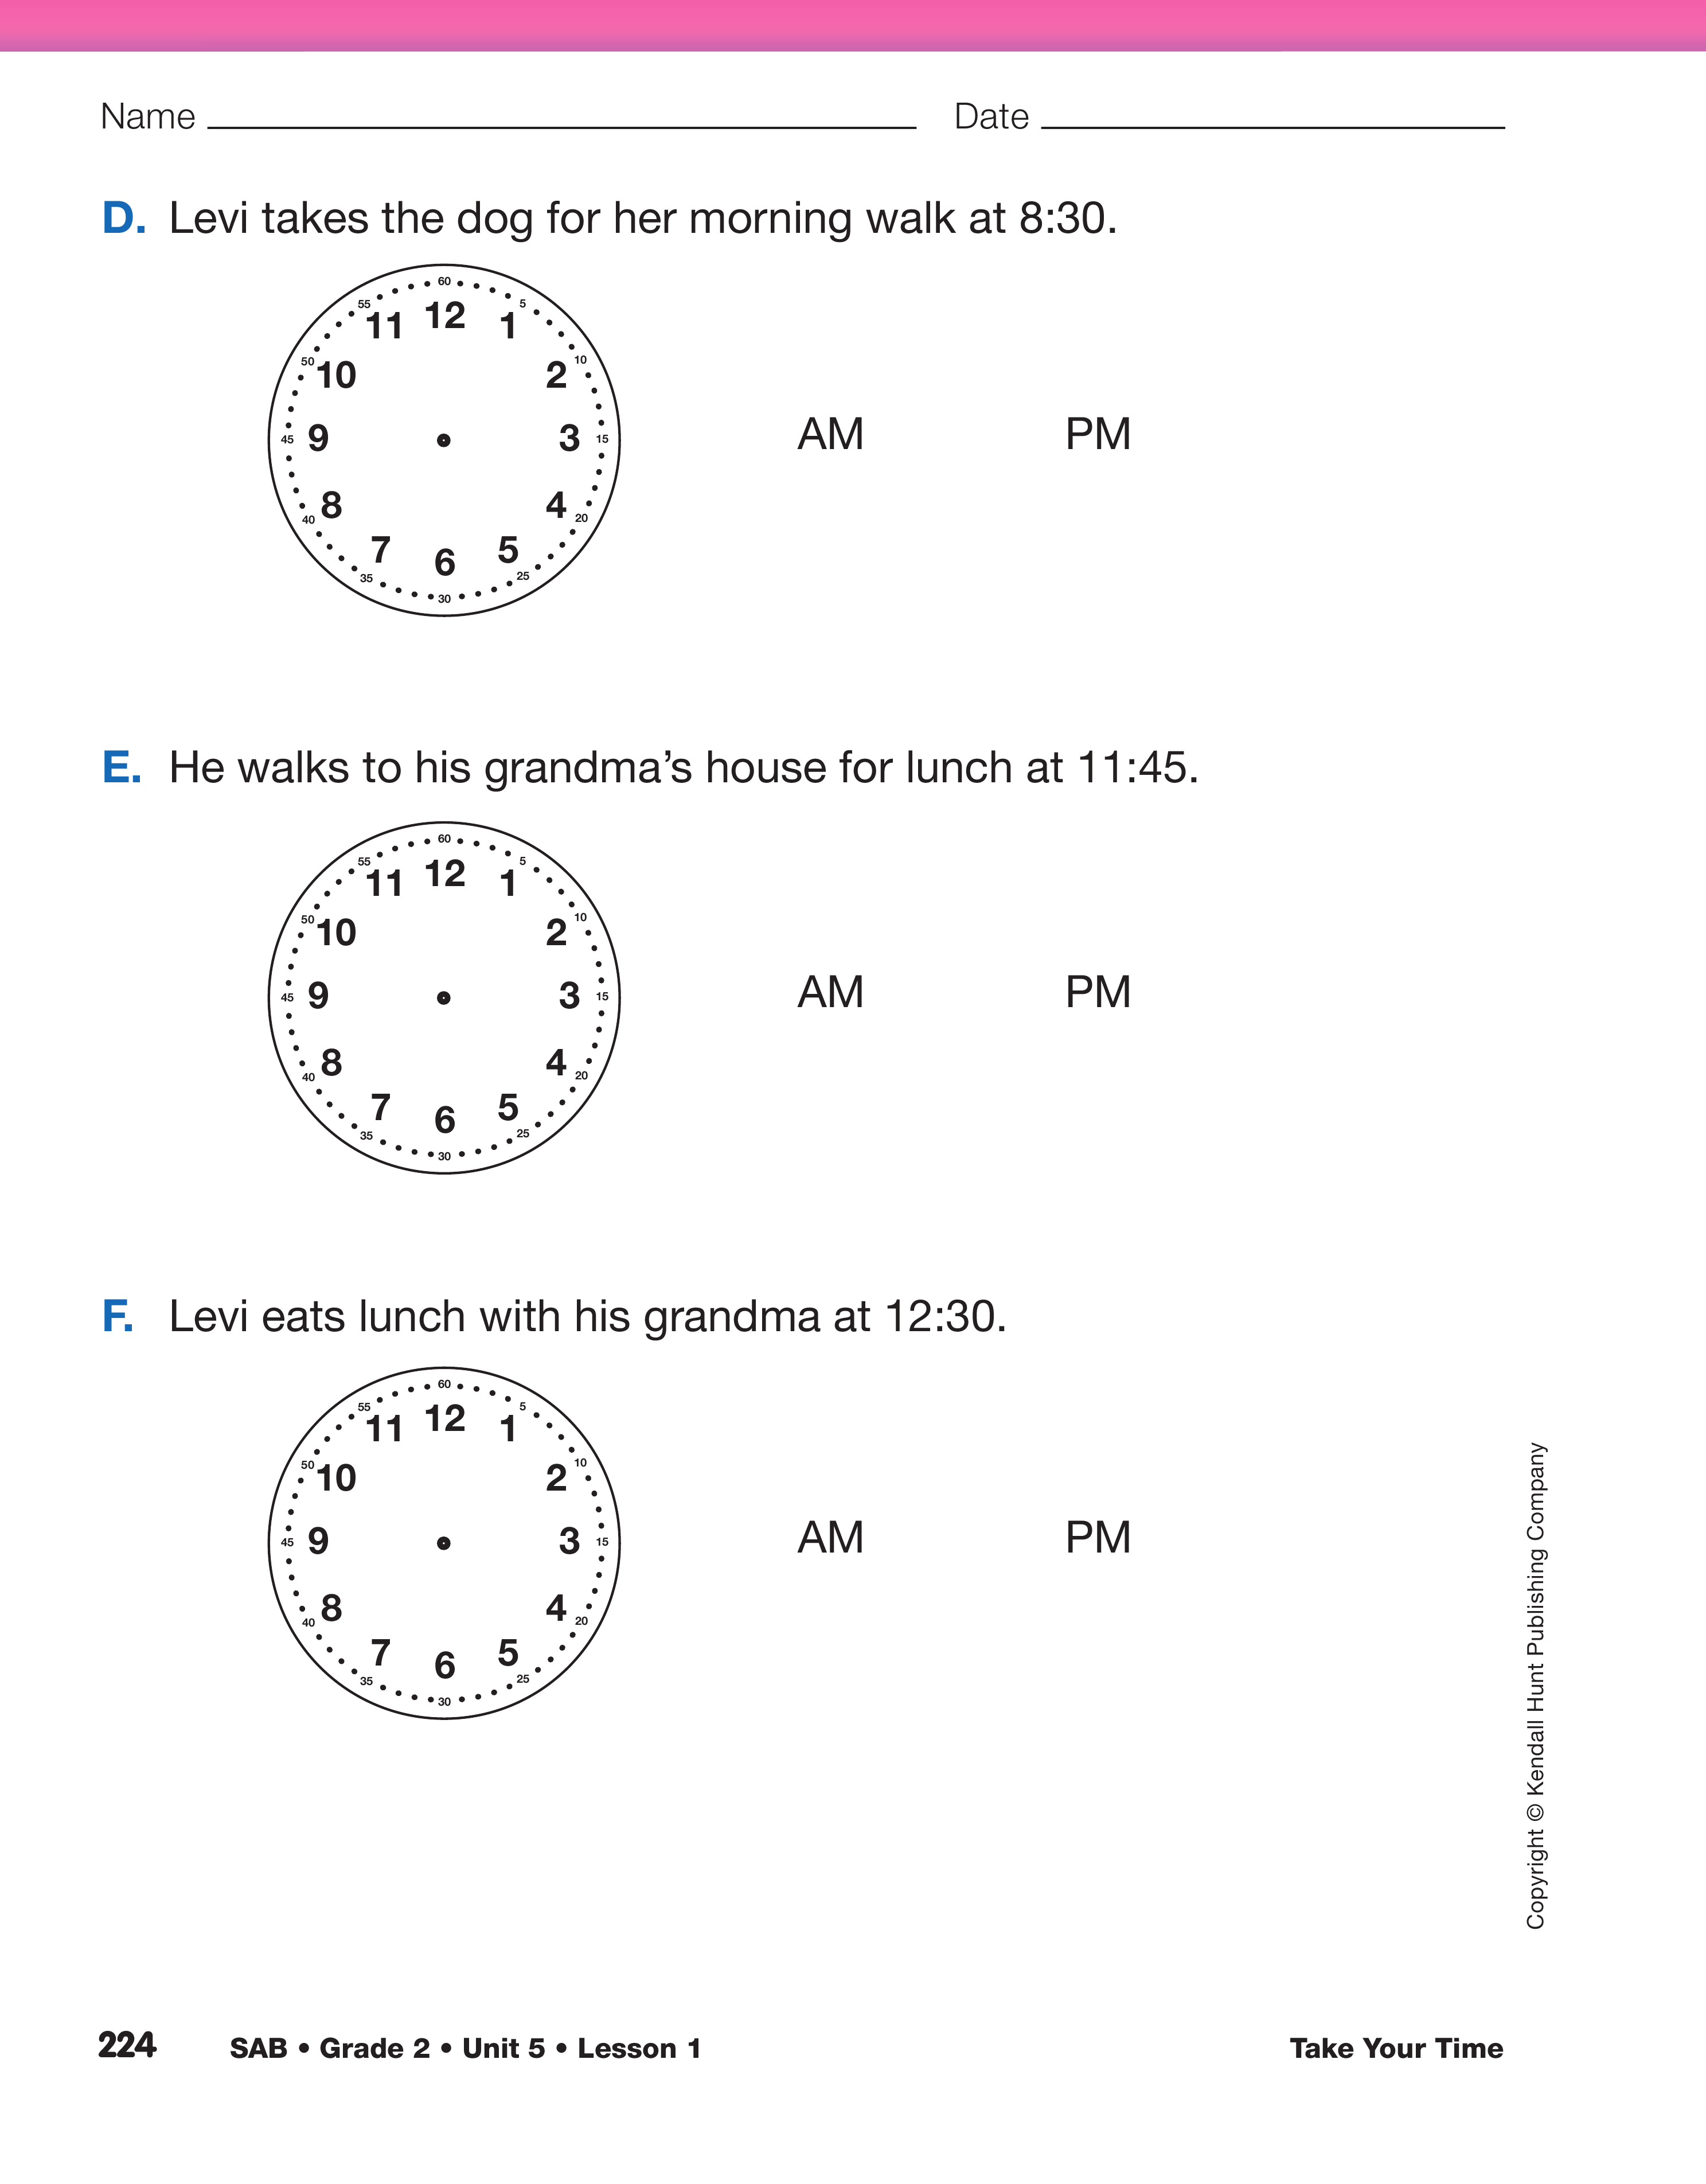
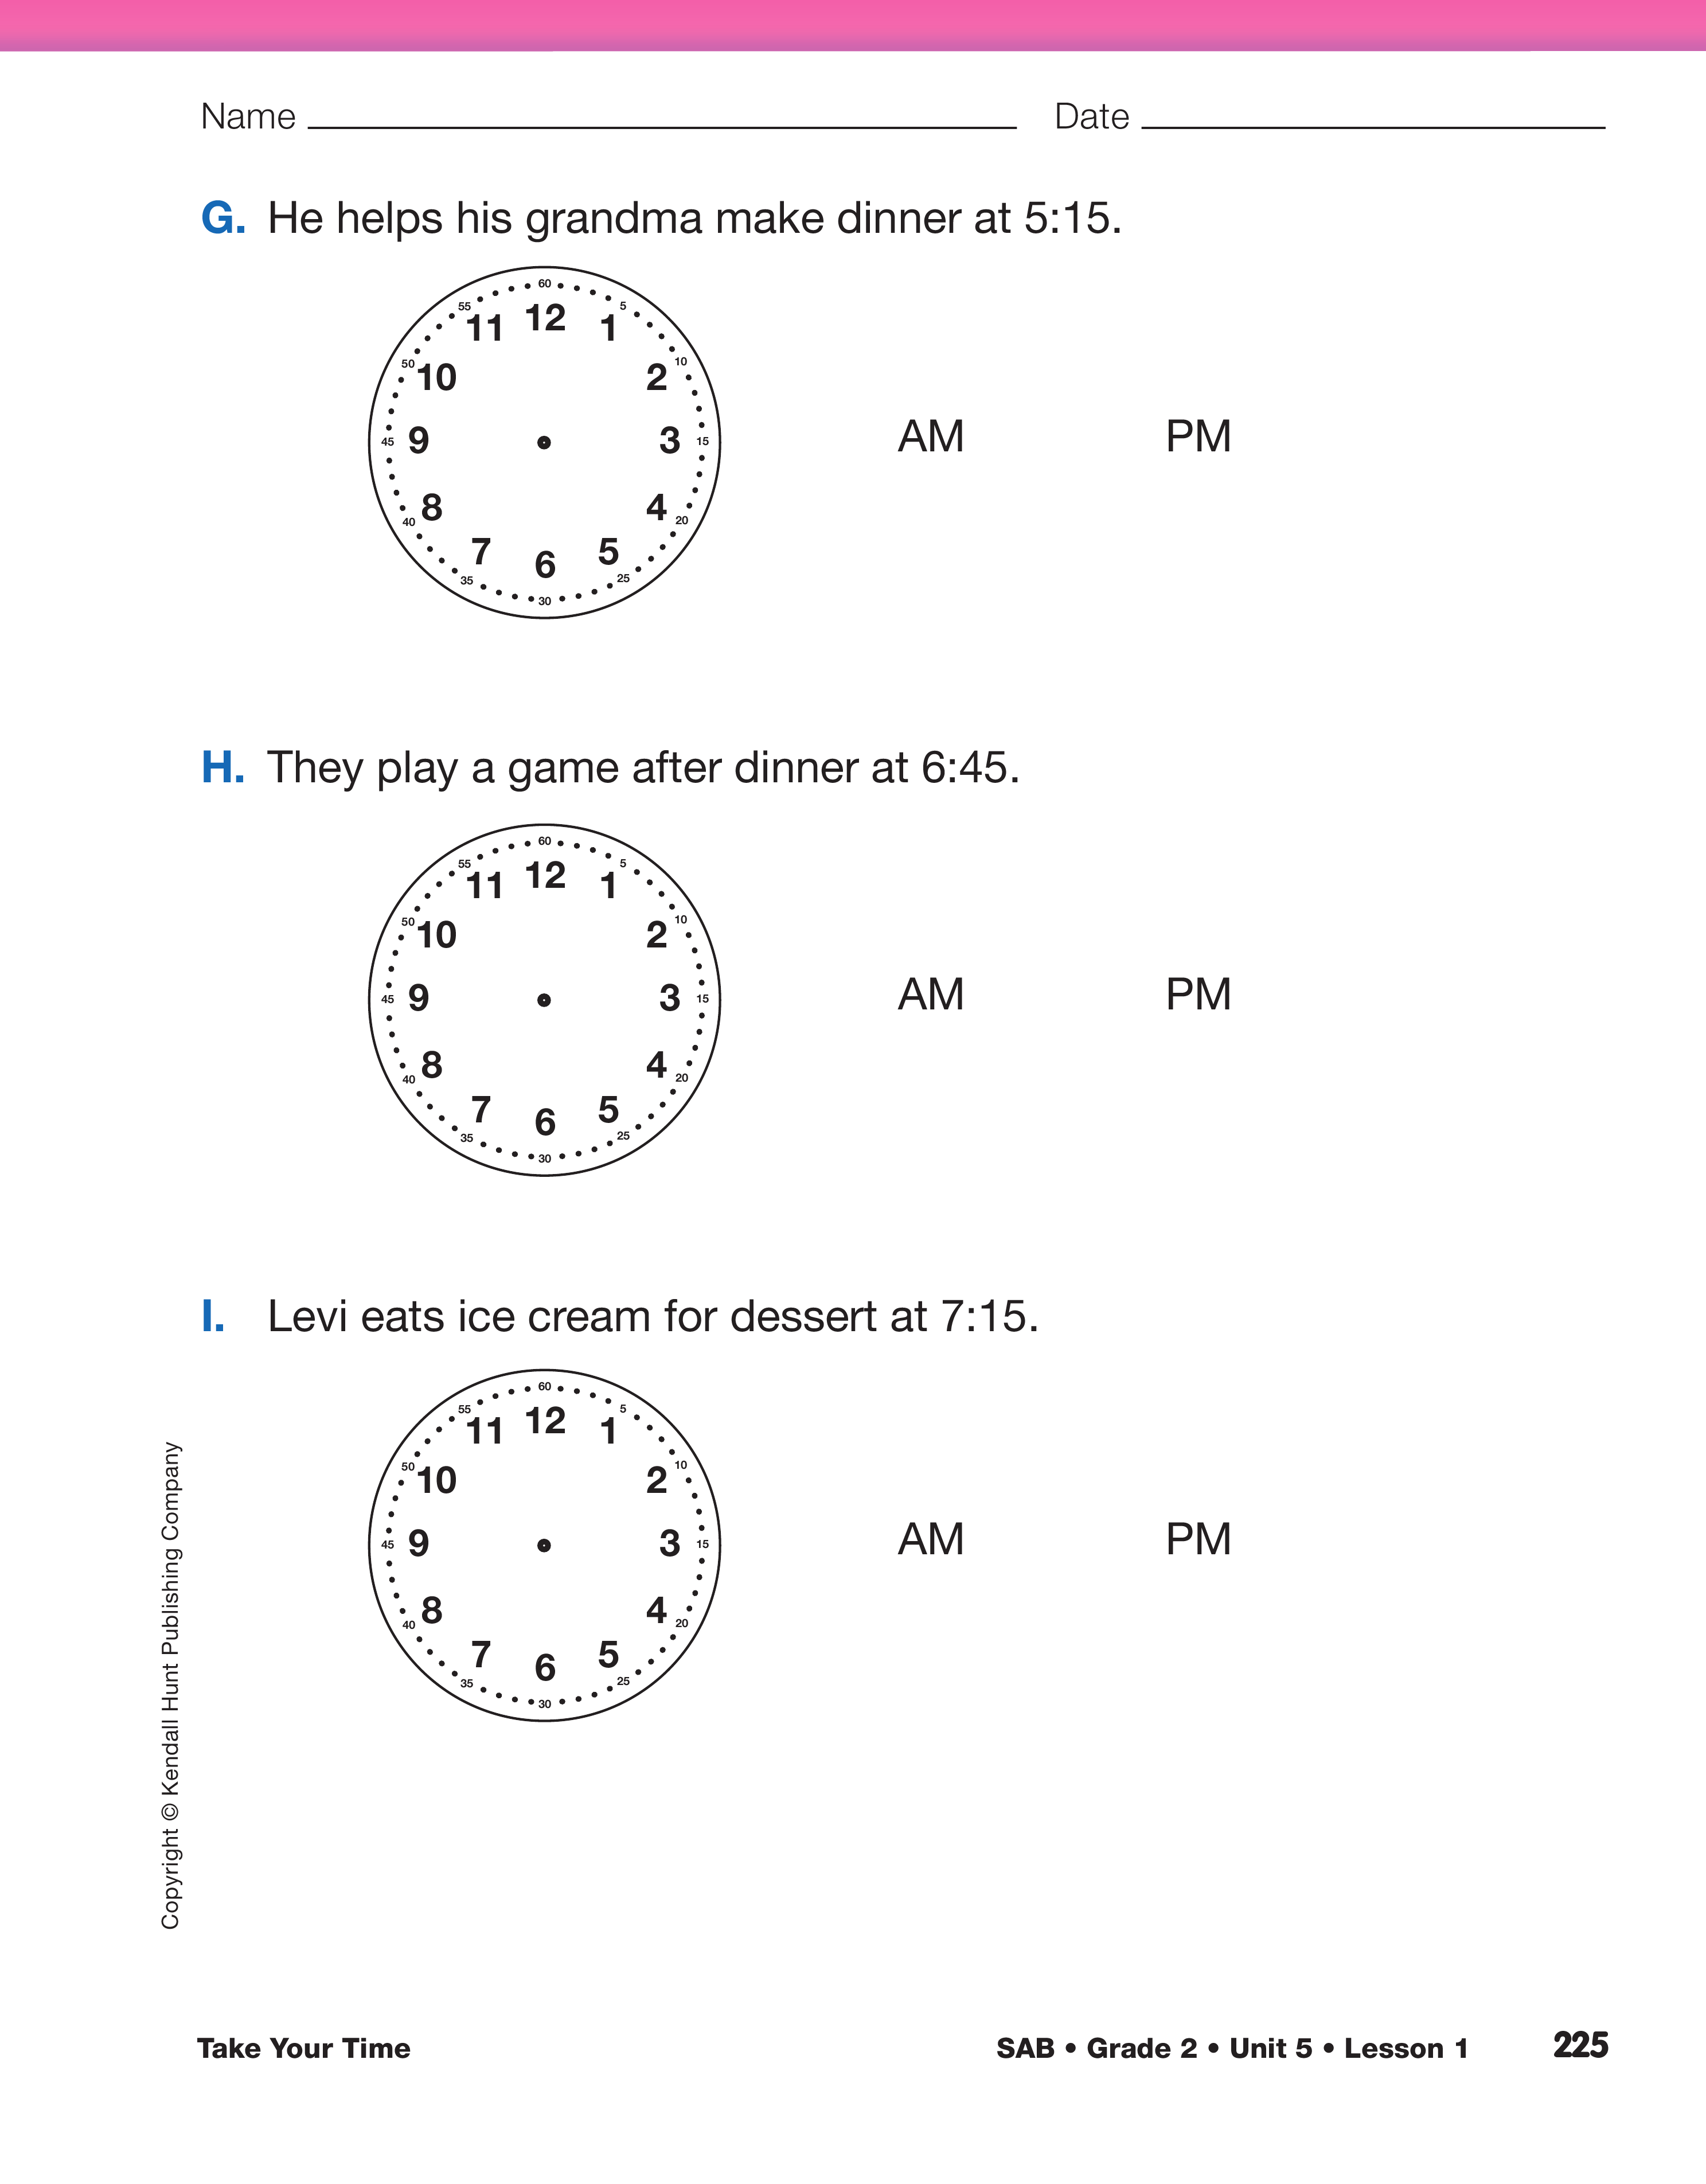
Assign the Levi's Busy Day pages in the Student
Activity Book. Students will practice reading and
writing time to the nearest fifteen minutes using analog
clocks. They will use the activity described to
determine whether the time given is AM or PM. For
each problem, students will first model the time on
an individual clock and then draw the hands on a
clock.
Drawing Clock Hands. Before students draw the hands on
a clock face, have them model the time on their individual
clocks. Then they can record the hands' positions on paper.
Ask them to draw the hour hand first and to think about the
time. To which hour is the time closer? For example, at
4:15, the hour hand is closer to the 4, but at 4:45 it is
almost 5:00. Remind students that the hour hand does not
cover the number on the clock, but the minute hand can.
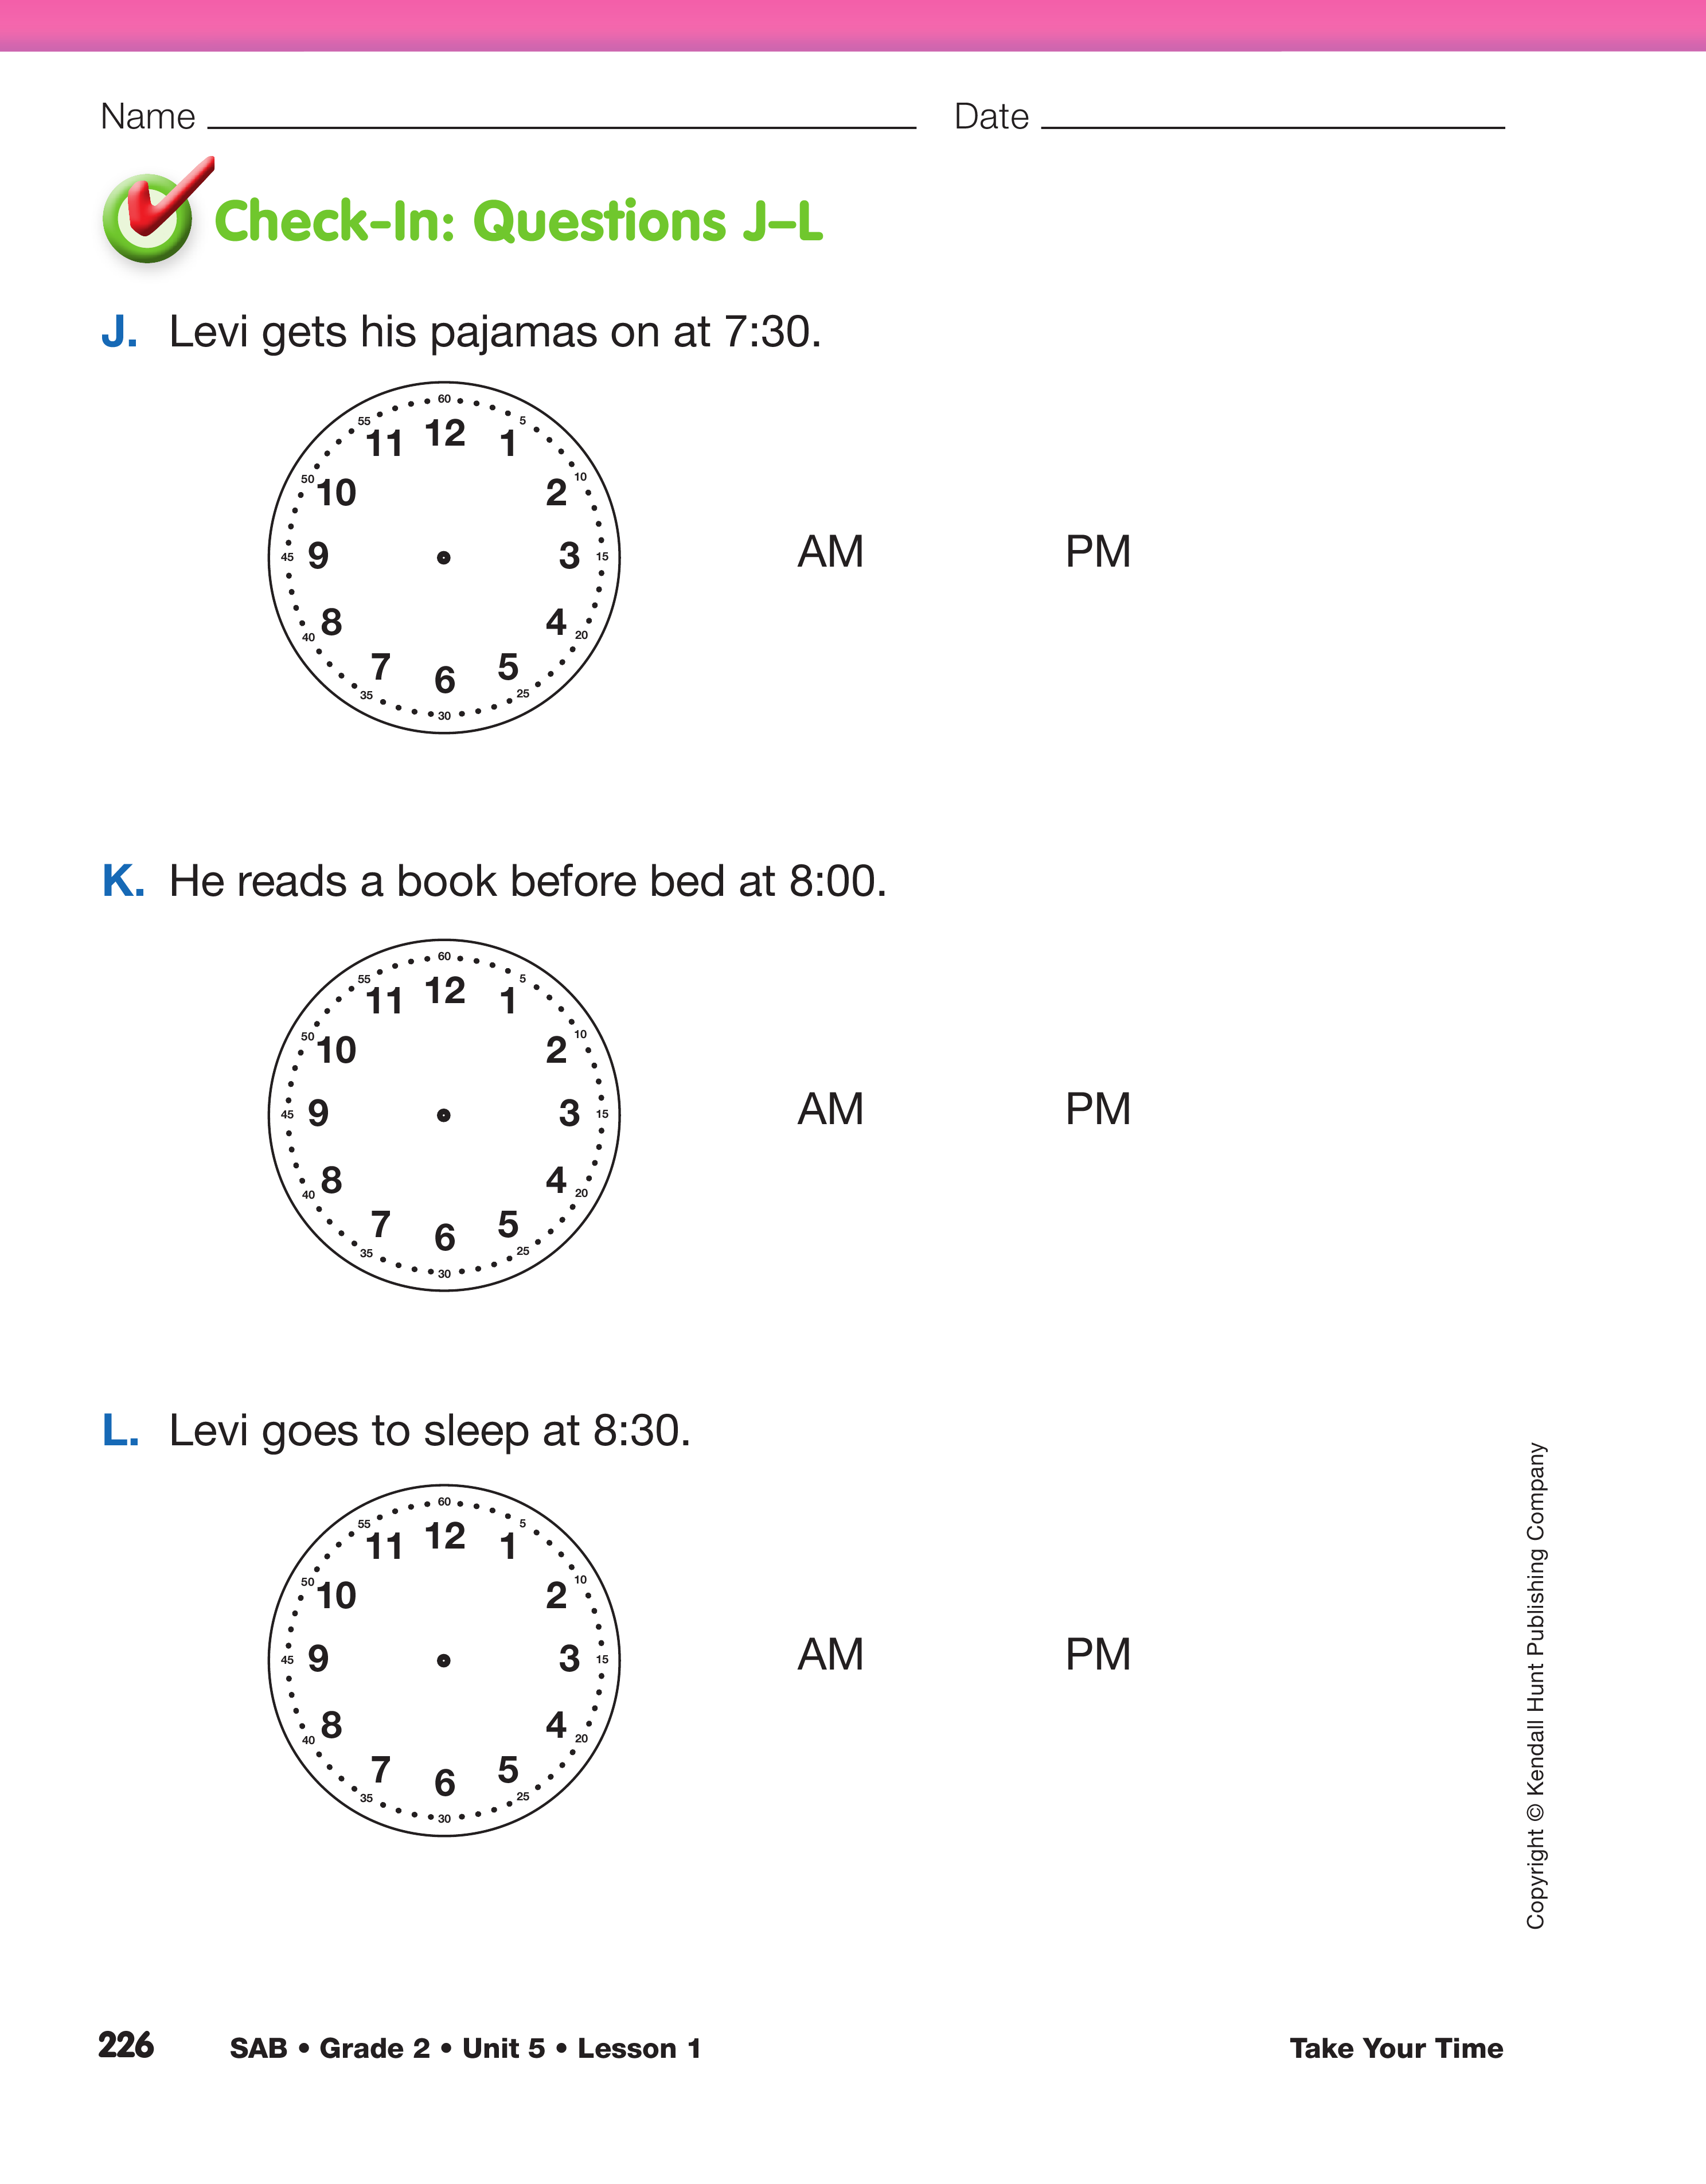
Use Check-In: Questions J–L on the Levi's Busy Day pages
in the Student Activity Book to assess students' abilities to
read and write time to the nearest hour and half hour using
analog clocks [E9].
Use the I Have, Who Has game as targeted practice.
Upon completion, choose several questions and ask
students to explain how they determined whether the
time given was AM or PM. Ask students to model the
time on their individual clocks and to hold them up
for you to see. For each time, ask the following
questions.
Using 11:45 (Question E) as an example:
- Between which two hours is the hour hand? (11 and 12)
- To which hour is the hand closer? (12)
- Where is the minute hand pointing? (at the 45)
- Starting at 0, let's count by fives until we reach
where the minute hand is pointing. (5, 10, 15 … 45)


