


Comparing Lengths
Est. Class Sessions: 2Developing the Lesson
Define Intervals. Direct students' attention to the Number Intervals display you prepared and the class number line. Ask them to describe what they see in the diagram and what they think it represents. Write the term interval on the display. Explain that an interval is all the numbers that are included in a group of consecutive numbers. The first interval is 1–10.
Place self-adhesive notes on 1 and 10 on the number line and ask:
Place self-adhesive notes on 11 and 20 on the number line. Ask:
Continue with other numbers until students confidently place numbers into intervals. In addition to the number line, have a 100 Chart and ten frames readily available to help students verify answers.
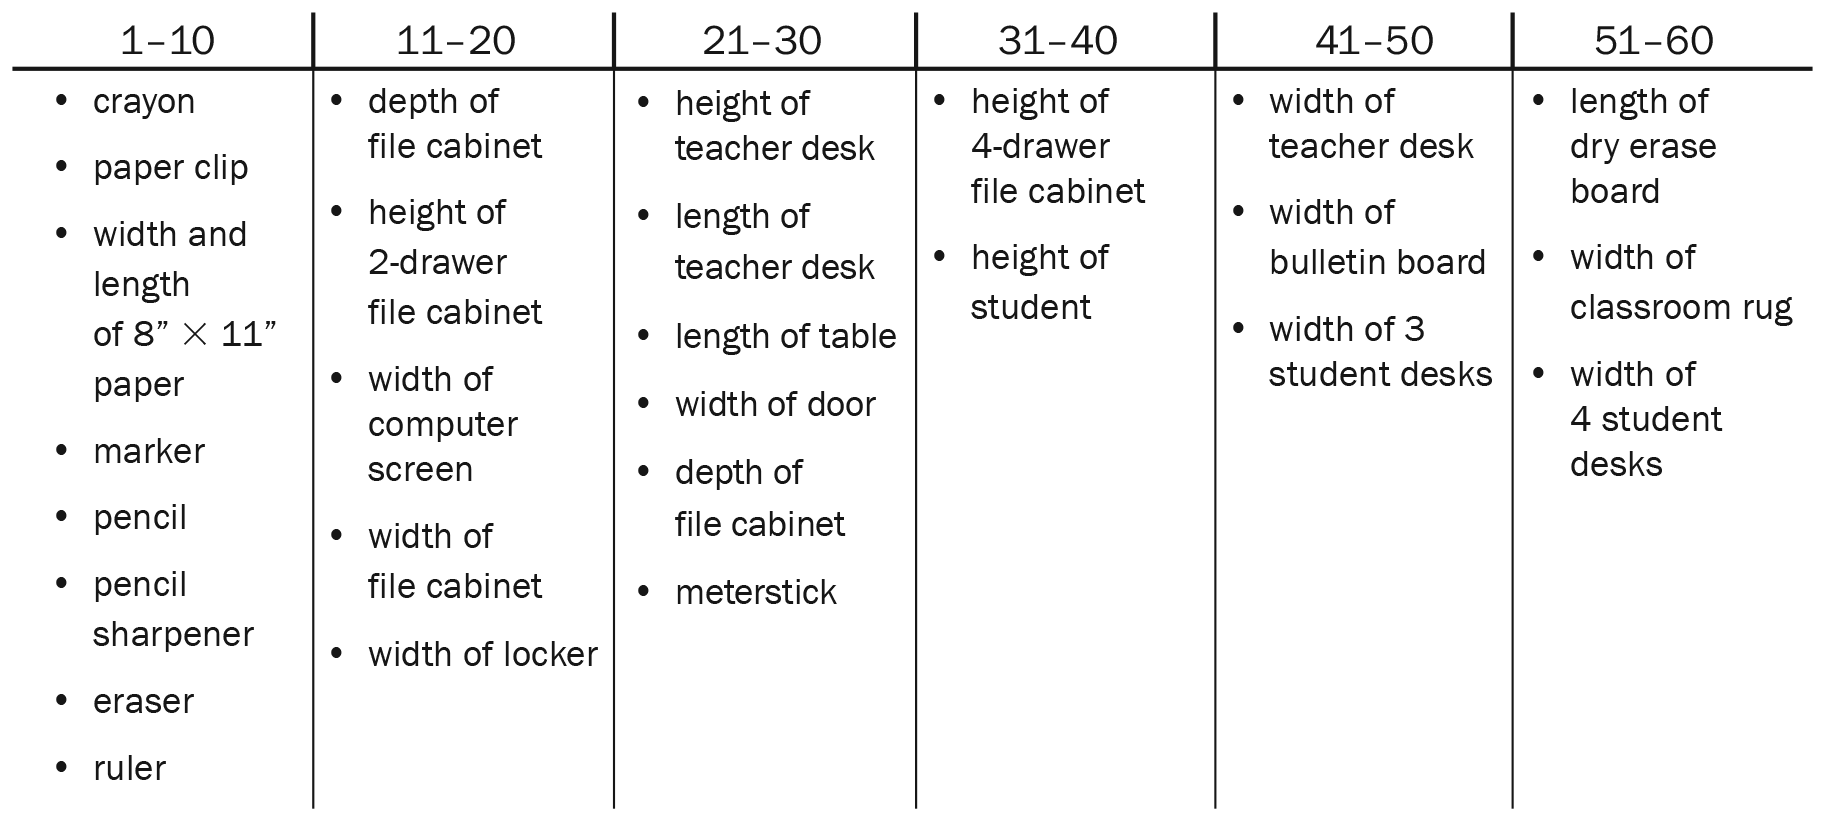
Measure and Sort by Interval. Use connecting links to generate a list of objects to measure in each interval. Record student responses on chart paper and add to the index cards you prepared if needed. See Figure 2 for a suggested list of objects for each interval.
Ask:
Continue writing suggestions for each of the intervals. Students may suggest objects that do not fit within a particular interval but adjustments can be made after they measure the objects. Tell students that they are going to measure one of the objects on this list with a partner and place that measurement in an interval.
Ask:
Review the measuring advice the class generated in Unit 7. Remind students to:
- place one end of the link chain at the beginning of the object.
- hold the chain of links taut and stretch it across the object.
- measure again to make sure your first measurement is accurate.

Demonstrate how to break off the chain where the object ends. Students should also decide what to do about parts of links.
Instruct each pair of students to make a 60-link chain that alternates colors in groups of ten links. Have pairs check one another's chains by holding them next to each other to see that the ten-link sections match. Tell students that once their chain is complete they are to come and get an object to measure.
Give each pair one of the index cards you prepared before the lesson or from the list of objects the class generated. See Materials Preparation. Explain that the card has the name of an object they will measure.
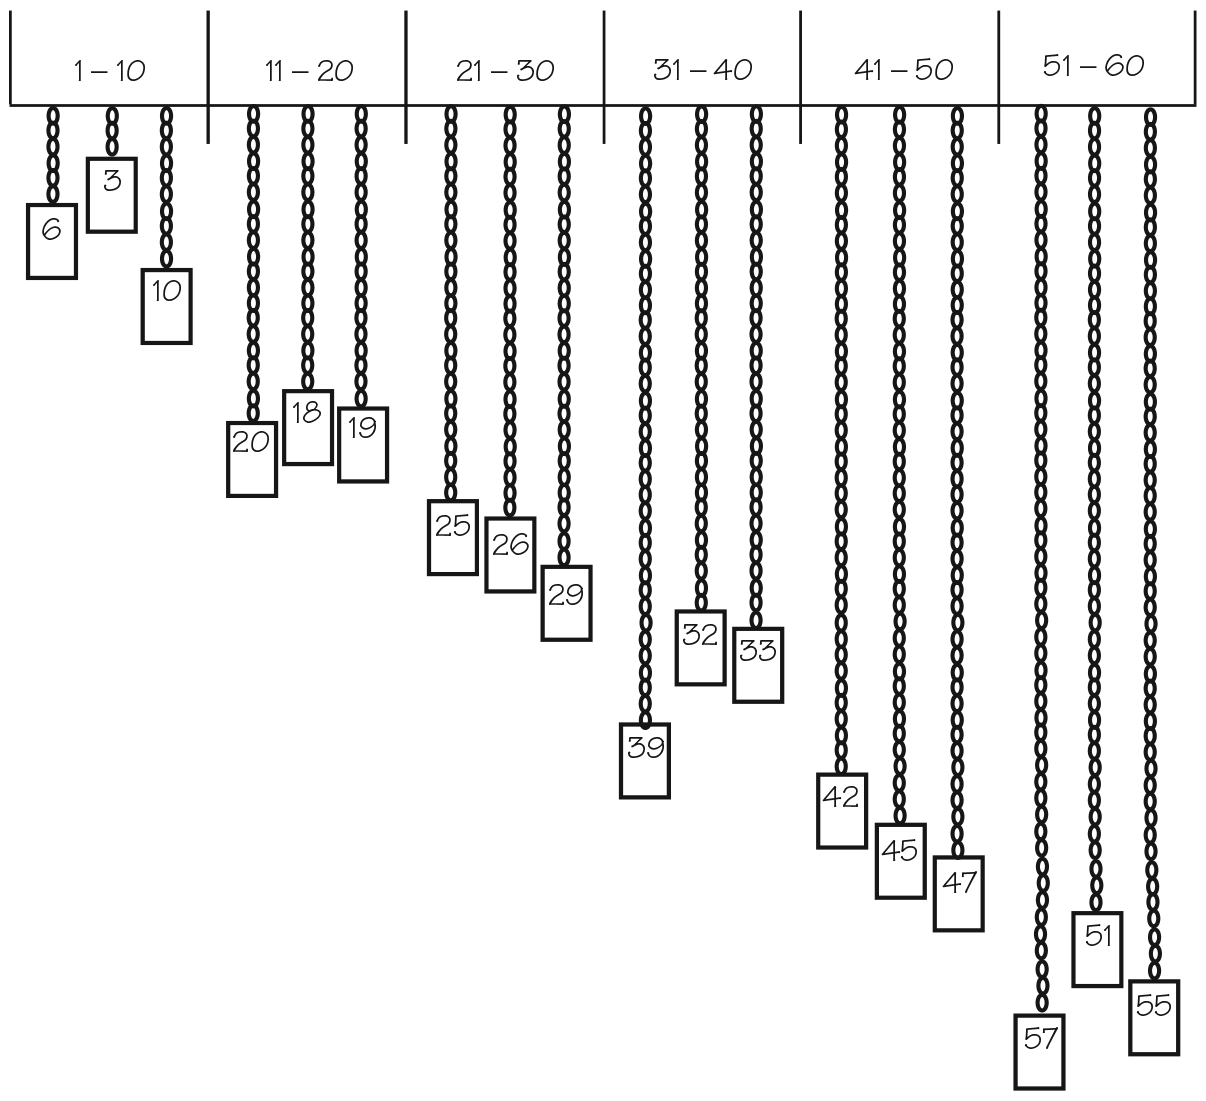
Give each student pair one blank index card as they complete their measurements. Have students draw their object and write its name and length in links. Then have student pairs tape their card and link chain under the appropriate interval on the display. See Figures 3 and 4.
Compare and Order Numbers. As students finish taping up their cards and chains, invite them to discuss their measuring results. Ask them to explain how they chose intervals.
Choose one of the chains (e.g., a 32-link chain) and ask:
Help students to see how many tens there are in each chain of links by looking at the number of groups of 10 links in alternating colors. You may need to hold up a chain that is 30 links long and a chain that is 40 links long to demonstrate to students that the length of a chain of 32 links is between 30 links and 40 links. Students may also refer to the class number line or a 100 Chart to find and verify the correct intervals for their chains.
After all the chain links are taped to the chart, have the class look at each of the chains within each interval and put them in order. Choose two chains in the first interval (e.g., 7 links and 4 links).
Ask:
After students make predictions, have them verify their answers by comparing the two chains. Follow this procedure until all the links are in order from shortest to longest. Discuss the lengths of the chain.
Ask: