


Measuring Volume of Containers
Est. Class Sessions: 2–3Developing the Lesson
Part 2. Measuring Volume with Metric Units
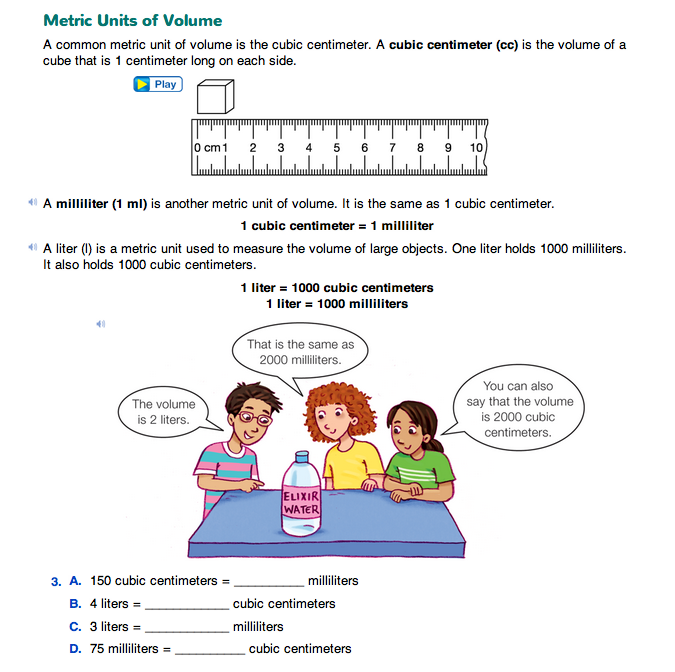
Introduce Metric Volume Units. Direct students to the Metric Units of Volume section of the Measuring Volume of Containers pages in the Student Guide. This section introduces some common metric units for measuring volume: cubic centimeter, milliliter, and liter. Reinforce the students' understanding of a cubic centimeter by asking them to measure the length of each side of a centimeter connecting cube. They will find that each side is one centimeter long. Remind students that the volume of a cube where the length of each side is 1 centimeter is 1 cubic centimeter.
Once students understand what a cubic centimeter is, introduce the milliliter and liter as two other metric units for measuring volume.

Make sure students understand that one milliliter is the same as one cubic centimeter and that one liter is equal to both 1000 milliliters and 1000 cubic centimeters.
To further explore the relationship between cubic centimeters, milliliters, and liters, ask:
Continue to ask questions similar to these until students are comfortable converting between milliliters, cubic centimeters, and liters. Assign Question 3 for additional independent practice.
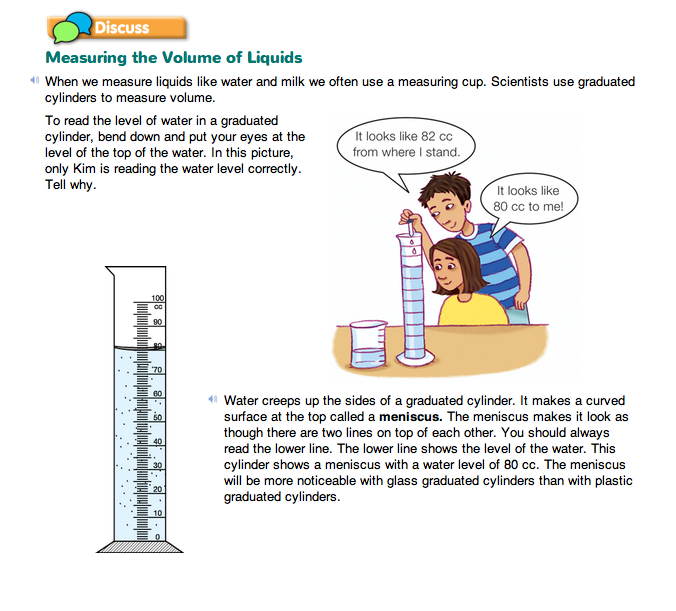
Use a Graduated Cylinder. Use the Measuring the Volume of Liquids section in the Student Guide to introduce students to the graduated cylinder. This section explains how to read the level of a liquid in a graduated cylinder and defines the term meniscus.
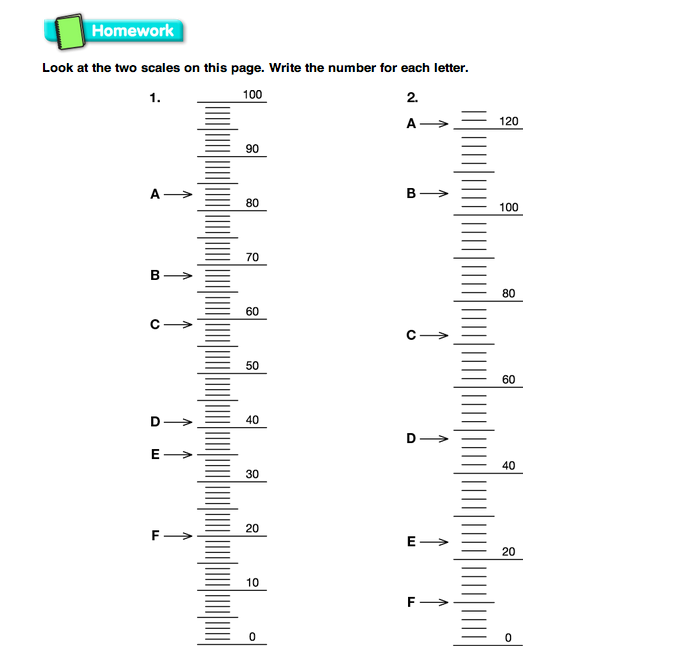
Have students practice reading the scale on a graduated cylinder and a meniscus before they begin their work with actual graduated cylinders. Three different scales are provided as Masters in the Teacher Guide. Students can practice reading the scale or scales that match the graduated cylinders that you are using in your classroom or they can practice reading all three scales. Display the Scale 1 with Blowup Master to practice reading scales of 1 cc calibrations for numbers shown every 10 cubic centimeters. Display the Scale 2 with Blowup Master to provide students with practice reading scales of 2 cc calibrations with numbers shown every 10 cubic centimeters. Students can practice reading a scale in 2 cc increments with numbers shown every 20 cubic centimeters using the display of the Scale 3 with Blowup Master.
Use the display of the Meniscus Master to show students the double-line appearance of a meniscus. Use this display to show students that the lower line shows the correct level of the liquid in the cylinder. Allow time for students to practice reading the graduated cylinder. Direct them to pour a specific amount of water into their graduated cylinder, for example, 100 cc in a 250 cc graduated cylinder or 50 cc in a 100 cc graduated cylinder. Students should fill the graduated cylinder a little below the desired level and then use an eyedropper to raise the water gradually to the proper level. Observe students to make sure they are reading the cylinder at eye level.

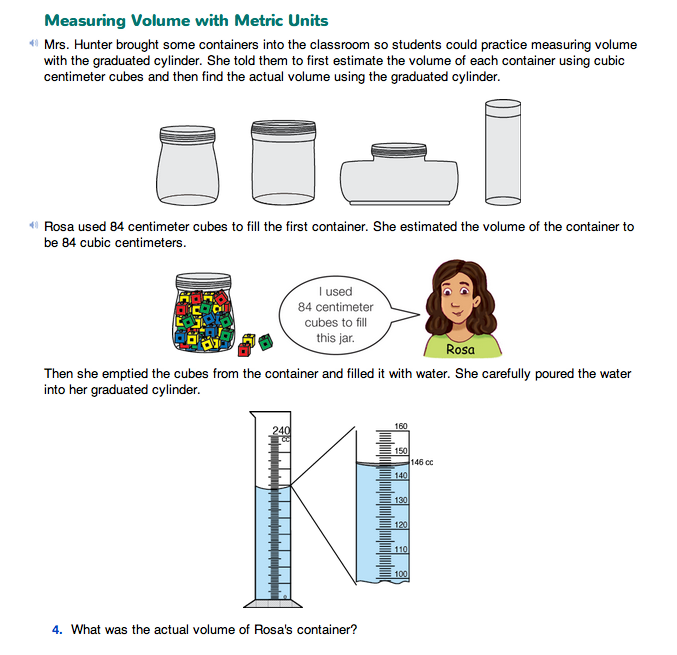
Measure the Volume of Containers Using Metric Units of Measure. Students will work in small groups for this activity. Make sure each group has a dishpan or similar container, a graduated cylinder, an eyedropper, several small containers, two handfuls of centimeter connecting cubes, and some paper towels. Direct students to the Measuring Volume with Metric Units section in the Student Guide. The vignette describes how Rosa uses centimeter connecting cubes to estimate the volume of a small container. After estimating the volume at 137 cubic centimeters she empties the cubes from the container and fills it with water. Rosa then carefully pours the water from the container into a graduated cylinder. Have students discuss Questions 4–6 in their groups before discussing them with the whole class.
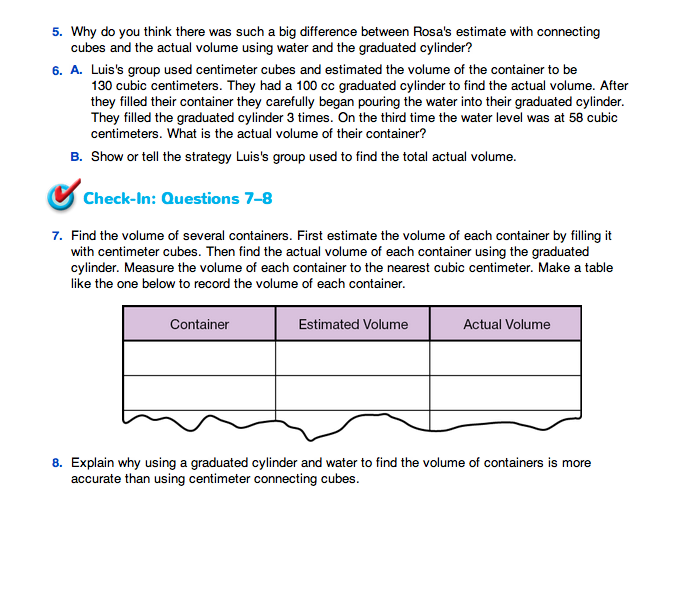
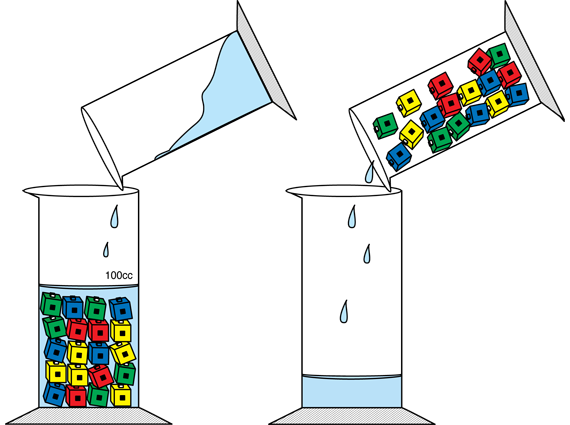
In Question 4, students are asked to read the scale on the graduated cylinder to find the actual volume. Remind students that they should read the bottom line to see that the volume is146 cubic centimeters. Students are asked to explain if Rosa's estimate was reasonable in Question 5. Since there are spaces left between the cubes when they are put into the container, the estimate of 84 cubic centimeters is reasonable. To help students understand why there is such a difference between measuring the volume of a container with centimeter connecting cubes and measuring with water and a graduated cylinder, have students place loose connecting cubes in a 250 cubic centimeter graduated cylinder so they fill about 100 cubic centimeters of the cylinder. If you are using a 100 cubic centimeter graduated cylinder, you may want to add cubes to only 50 cubic centimeters. Then slowly pour water into the cylinder until the cubes are just covered. Slowly pour the water from the first graduated cylinder into a second graduated cylinder so students can see the volume of space left by the cubes. See Figure 2.
In Question 6, students are introduced to a scenario in which the volume of their container is greater than the volume of the graduated cylinder they are using to find the actual volume. For Question 6A, students see that Luis and his group filled the 100 cc graduated cylinder three times. The first two times they filled it to the 100 cc mark and the third time to the 58 cc mark for a total volume of 258 cubic centimeters. In Question 6B, students are asked to explain why Luis and his group used this strategy.