Mr. Origin. The name Mr. Origin is derived from the mathematical term “the origin,” which is the name given the point (0, 0) on the coordinate plane. Students can think of Mr. Origin as specifying the place where we “begin measuring” coordinates.
Introduce Mr. Origin. Mr. Origin is used to help students locate an origin and understand how to use coordinates to describe distance and location in the real world, on maps, and with graphs. To introduce Mr. Origin to the class, have students read the Mr. Origin section in the Student Guide.
- How does Mr. Origin help you find the location of an object on a map? (Possible response: Mr. Origin stands at the origin and helps identify the directions of the x- and y-axes.)
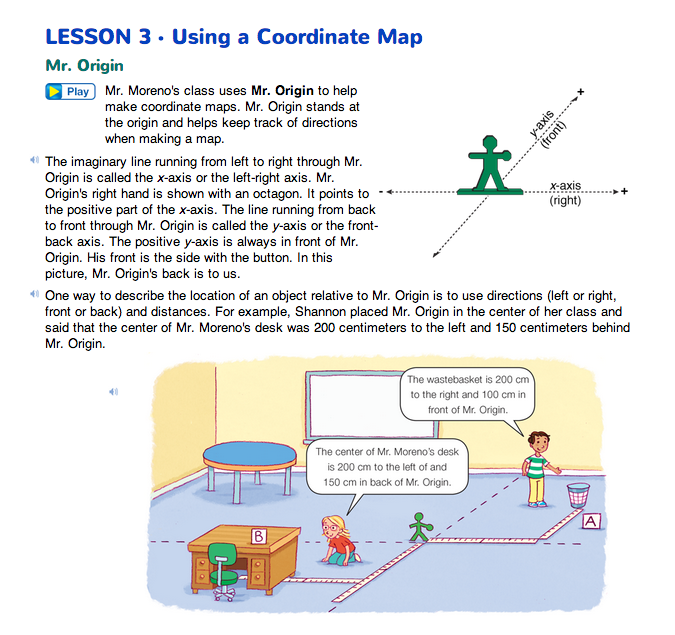
- Look at Mr. Origin. Where is the x-axis? (Possible response: Mr. Origin's right hand is showing an octagon that points to the positive part of the x-axis. The other hand points to the negative part of the x-axis. The imaginary line running leftright through Mr. Origin is the x-axis.)
- Look at Mr. Origin. Where is the y-axis? (Possible response: The positive y-axis is always in front of Mr. Origin. His front is the side with the button. The negative y-axis is always in back of Mr. Origin. The imaginary line running from back to front through Mr. Origin is called the y-axis.)
- Why is it important to be able to tell the difference between Mr. Origin's front and back and his left and right? (Possible response: You need to know the direction in relation to the origin, and his right/left and front/back show those directions. Just like the student in the Romeo story, these directions need to be correctly identified to locate points on the coordinate grid.)
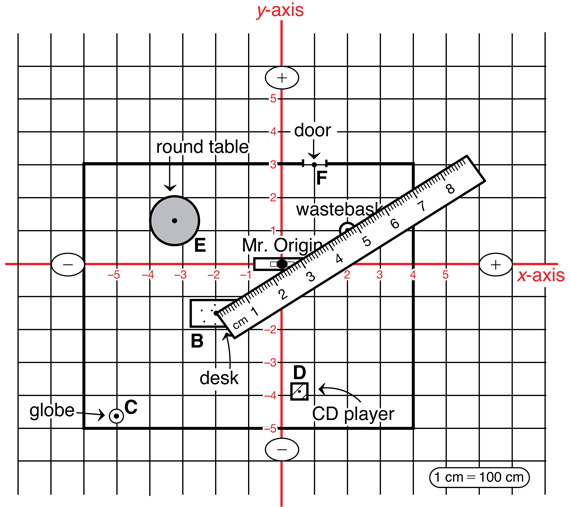
The origin is the point (0, 0) on a coordinate graph. Objects are located on a flat surface (like the floor of a classroom) similarly to the way points are located on a graph. Point out that once we have placed Mr. Origin at a specific location, we can imagine the x-axis running left to right through Mr. Origin's arms and a y-axis running front to back through the center of Mr. Origin. Mr. Origin's right arm has an octagon. It points to the positive side of the x-axis, or positive numbers. Mr. Origin has a button on his front and it points to the positive side of the y-axis.
- Look at Mr. Origin. The floor is not covered with graph paper. How can Mr. Origin help you locate [object]? (Possible response: I can measure the distance to the object along the x-axis and along the y-axis to find the location of the object.)
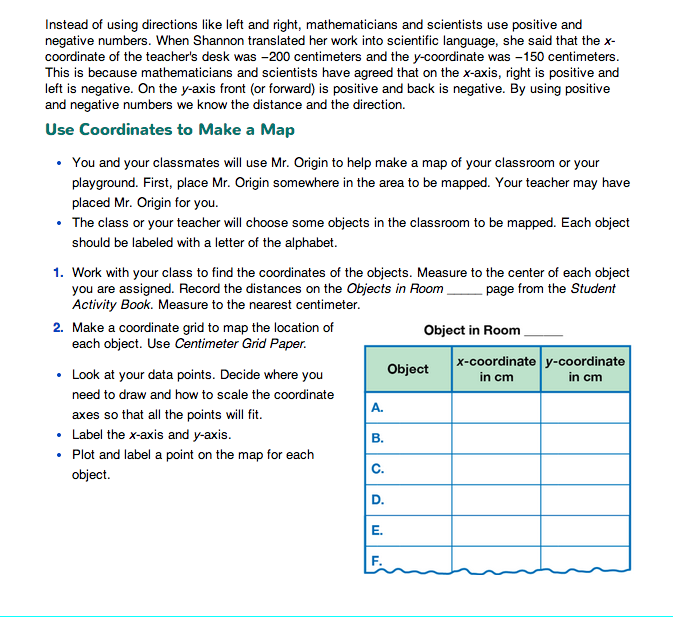
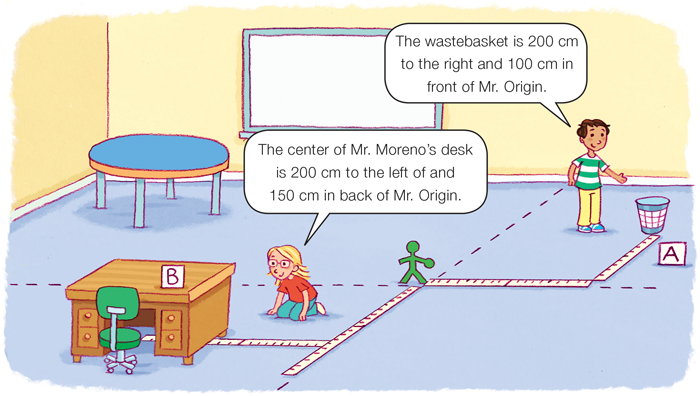
Direct students' attention to the picture of Mr. Origin in Mr. Moreno's classroom in the Student Guide and the metersticks placed perpendicular to him on the classroom floor.
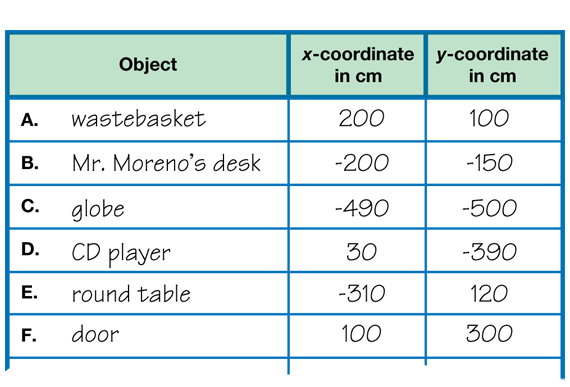
- Shannon says the center of Mr. Moreno's desk is 200 centimeters to the left of Mr. Origin and 150 centimeters behind Mr. Origin. Name the coordinates for the location of Mr. Moreno's desk. (−200, −150)
- Why is Shannon measuring to the center of the desk and not the edge of the desk? (Possible response: Each object is located at a point on the grid so the center seems like a consistent way of locating the objects.)
- What do you think would happen if each of us used our desk as the starting point instead of Mr. Origin? (Possible response: Since each desk is in a different place, each of us would locate Mr. Moreno's desk with different coordinates.)
- Should everyone start measuring from Mr. Origin? (Yes, then the distance and direction is consistent.)
- Looking at the metersticks, what is the location of the wastebasket? (Possible response: 2 metersticks or 200 centimeters to the right of Mr. Origin on the x-axis, and 1 meterstick or 100 centimeters in front on the y-axis from Mr. Origin. The ordered pair would be (200, 100).)
Find Coordinates for Making a Map. Direct students' attention to the Mr. Origin figure you place in the room and the Use Coordinates to Make a Map section of the Student Guide. Tell students that they are going to work together to make a map of the objects in the classroom. Show students to the x- and y- axes that you laid down with masking tape and the labeled objects. Choose an object to the right and front of Mr. Origin.
- Look at Mr. Origin. Where is the [object]? (Possible response: to the right and front of Mr. Origin)
- How far to the right? (Possible response: I do not know but I could use a meterstick to measure the distance.)
- How far in front? (Possible response: I do not know but I could use a meterstick to measure the distance.)
- What unit of measure should you use? (centimeters)
- Why not meters? (Possible response: It will be easier to place locations in centimeters on a map.)
Ask three students to demonstrate how to measure these distances from Mr. Origin. Be sure students are measuring the distance between the center of Mr. Origin and the center of the object.
- What is the location of this object? (Possible response: The wastebasket is at (200, 100).)
Now identify an object to the left and in back of Mr. Origin.
- Look at Mr. Origin. Where is the [object]? (Possible response: to the left and behind Mr. Origin.)
- How far to the left?
- How far in back?
Measurement Accuracy. The data collection part of this activity consists of finding the x-and y-coordinates of the objects using metric measure. A proper tool for measuring distances in the classroom is the meterstick. In general, the accuracy of measurement is reflected in two ways: the accuracy of the measurement tool used and the use that is made of that measurement.
In this case, it is suggested that students make their measurements to the nearest centimeter since this makes the calculations for the scale map easier. Later, students will make a scale map, predict the actual distance between two objects, and check their prediction.
Ask three students to demonstrate how to measure these distances from Mr. Origin. Be sure students are measuring the distance between the center of Mr. Origin and the center of the object.
- What is the location of this object? (Possible response: The desk is at (−200, −150).)
Your students will be making predictions about distances between some of these objects. If this part of the activity runs into another day, you will need to mark where the objects are so the predictions can be checked the next day.
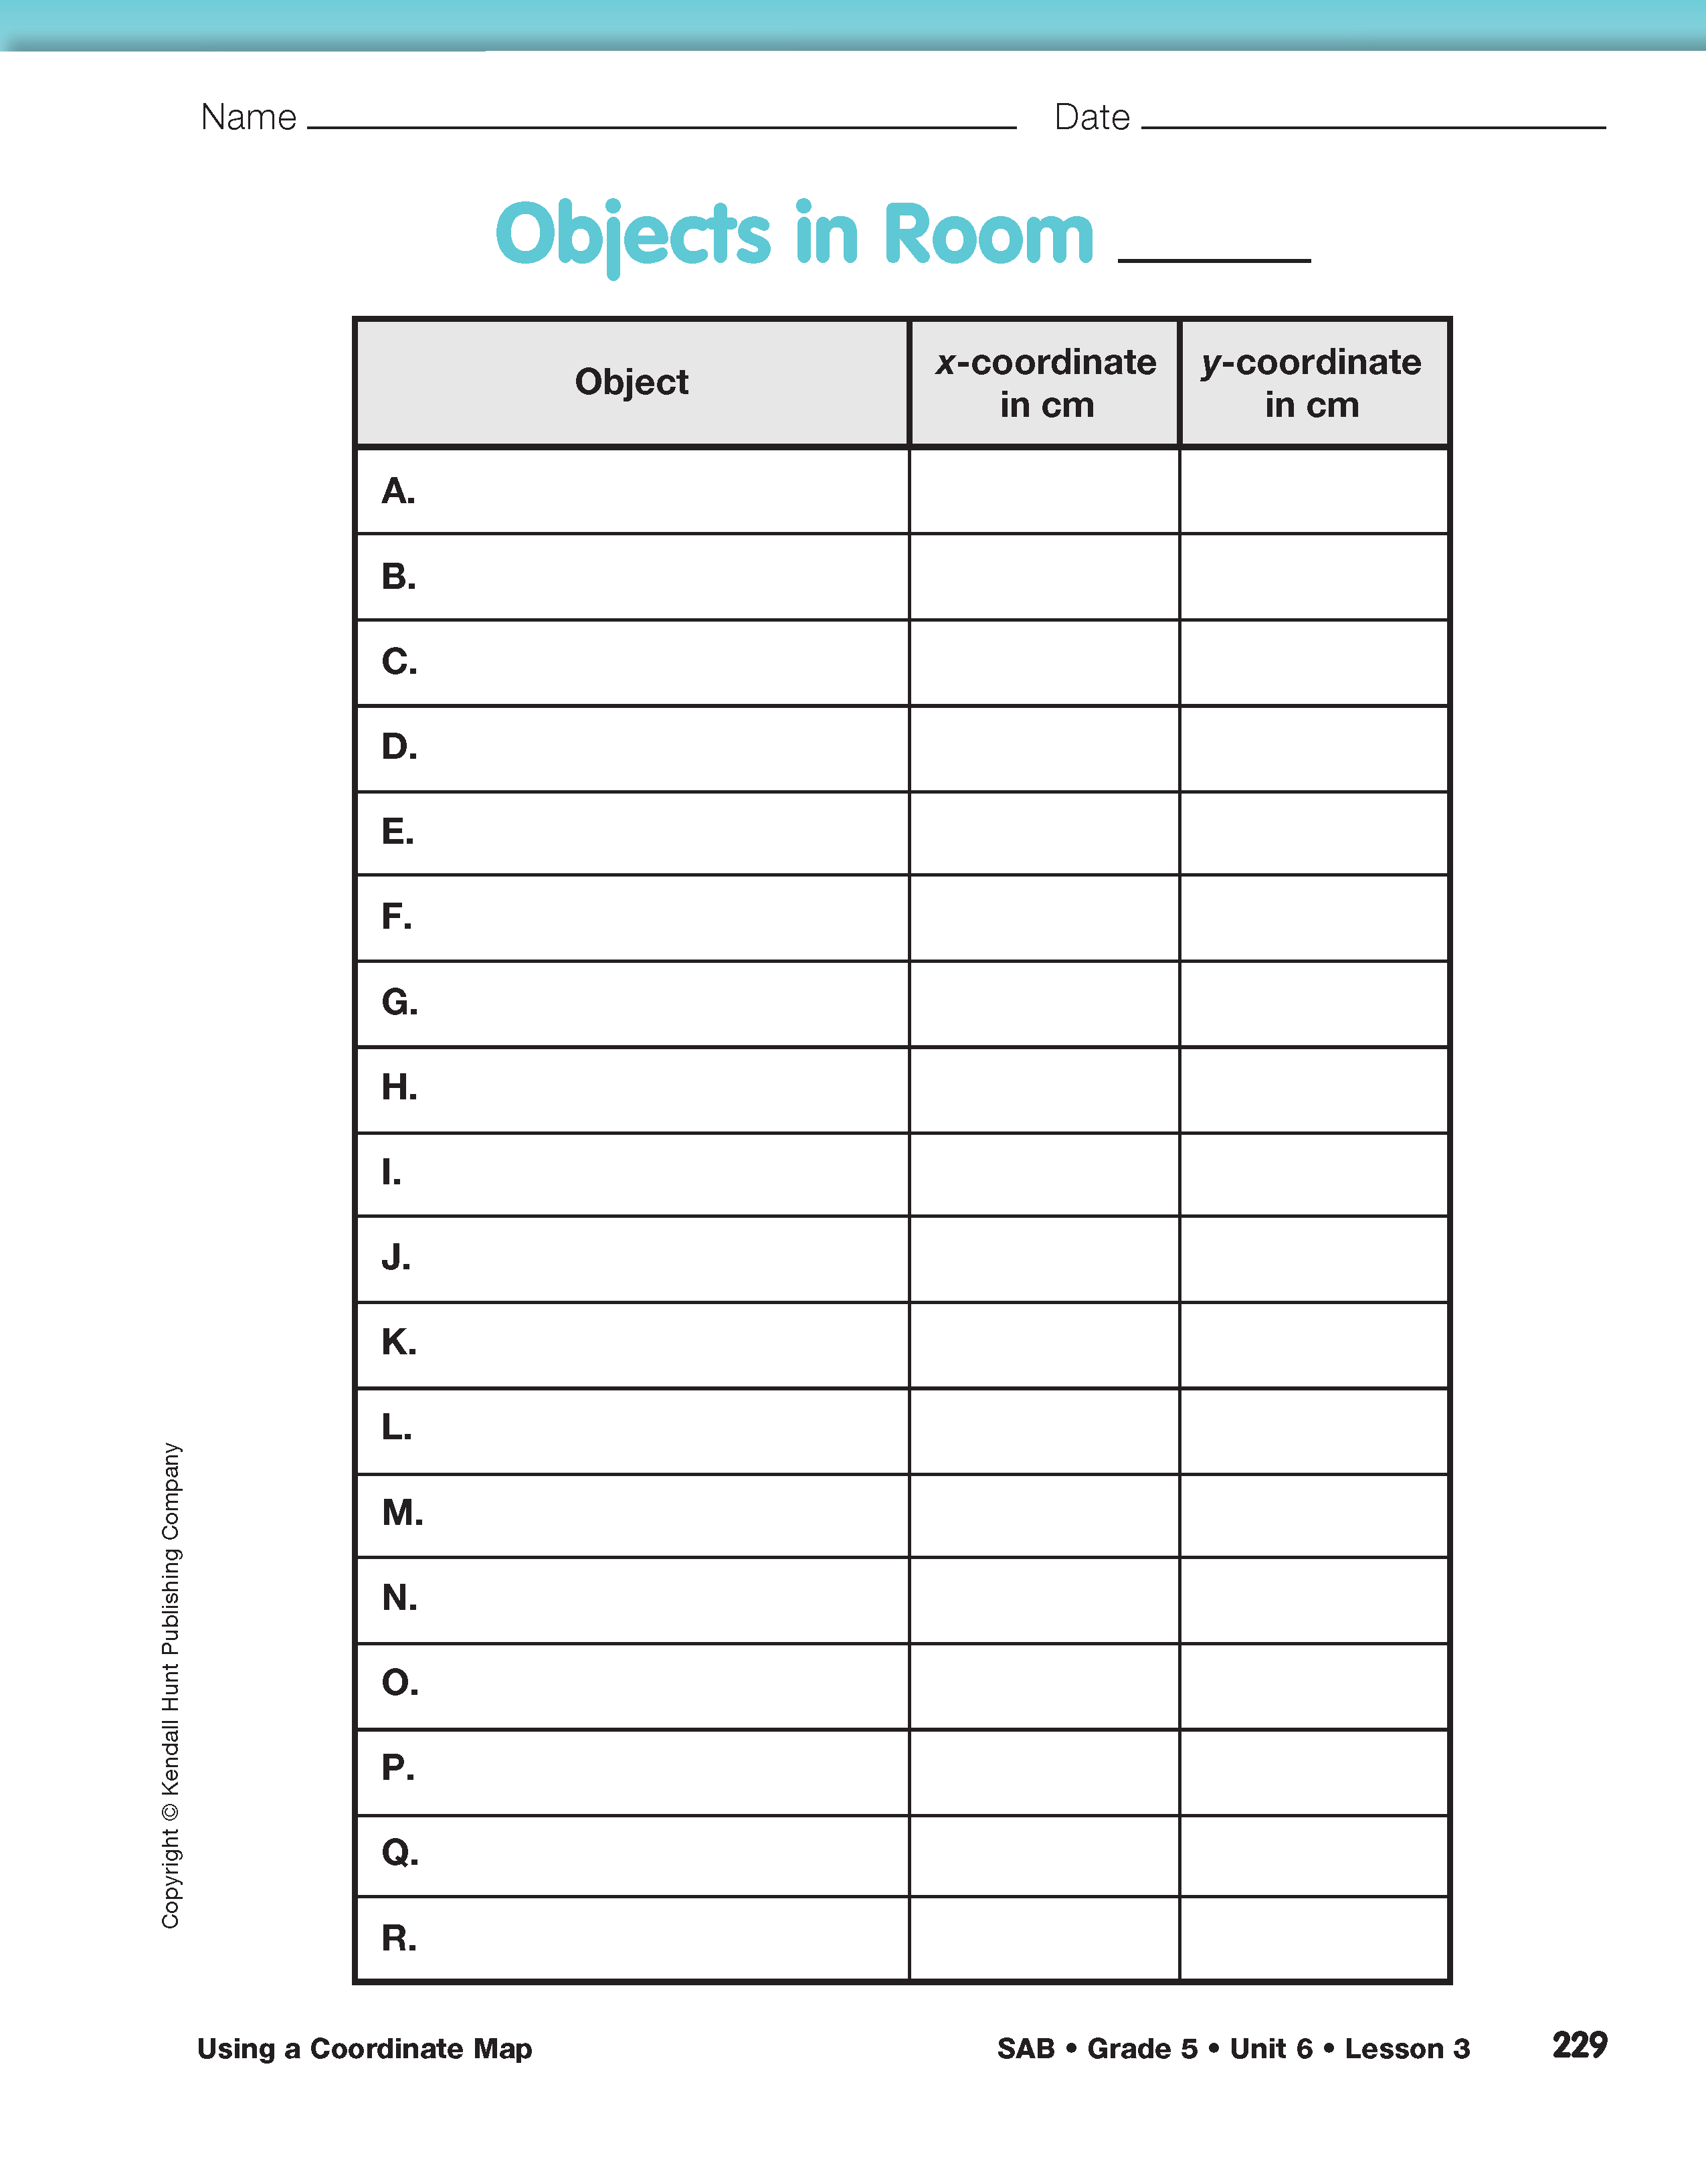
Display the Objects in Room _____ page from the Student Activity Book you prepared and ask students to remove the same page from their book. Assign each group 2 objects from the list to locate. Instruct students to measure and record the measurements on their table and on the display. Students then copy the locations of all the objects onto their table to have the information handy when making the map. See Figure 2.
Draw a Coordinate Map. As described in Question 2, each student will need a copy of Centimeter Grid Paper to make a map of the objects in the room. Students first decide on a map scale to use. The simplest scale is 1 cm = 100 cm or 1 cm = 1 m. An improper choice of scale can result in a map that does not fit on the graph paper or a map that is too small to be useful. The objects were within a 8 × 10–meter space, so all objects fit nicely on the graph paper in the landscape layout. If your space is similar, you can use the same scale. See the map in Figure 3 for a map based on the data in Figure 2.
- Start with the horizontal scale. Since you are using centimeter grid paper, you can have 10 units going left and right and 8 units going up and down. If 1 cm represent 100 centimeters, can you fit your greatest value on the grid?
- If it doesn't fit, is it possible to rotate the paper so you have 8 units left or right and 10 units going up and down? If the data does not fit, change the scale and try again.
Once students have labeled the coordinate grid, students should work independently to plot the location of each object. Students should then label each point with the corresponding letter. Students also might choose to sketch each object on the map as shown in Figure 3, but this is not needed for the activities in this lesson. To sketch the objects they will need to know the dimensions of the objects. For example, Mr. Moreno's desk is a little less than 100 cm high and about 150 cm wide, so the desk on the graph will cover 1 unit high and 1.5 units wide.