Plotting and Describing Shapes
Est. Class Sessions: 2–3Developing the Lesson
Part 1: Use Coordinates to Plot Shapes
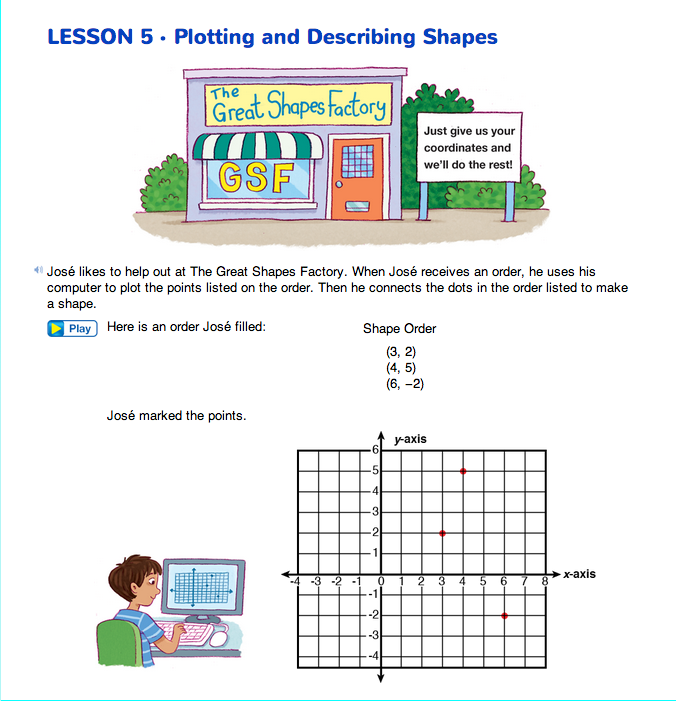
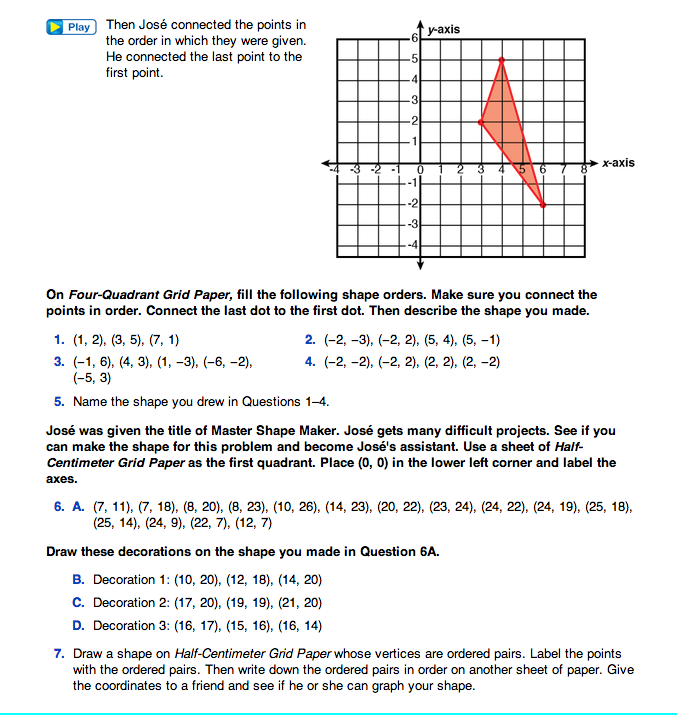
Plot Shapes. Have students read the introduction of the Plotting and Describing Shapes pages in the Student Guide. José takes shape orders that consist of ordered pairs. He plots these points and connects the points in the order listed to make shapes. Discuss José's example shape.
Ask:
Display the first page of the Plotting and Describing Shapes pages in the Student Guide.
Direct students' attention to the coordinate grid.
Give each student a copy of Four-Quadrant Grid Paper Master and ask them to help José make the shapes described in Questions 1–4 and name the shapes in Question 5.
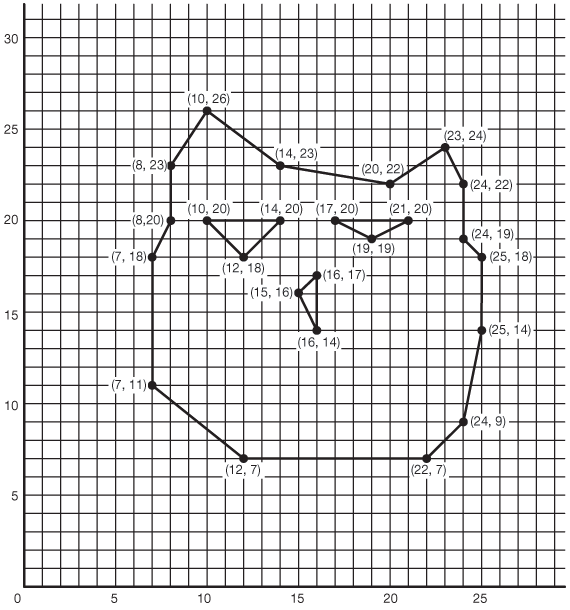
In Question 6 students plot a complicated figure on Half-Centimeter Grid Paper. It is best to use the entire sheet as the first quadrant. The lower left hand corner of the grid is (0, 0). None of the ordered pairs have negative coordinates. The resulting shape is a picture of a head of a cat. The three decorations form two eyes and the nose as shown in Figure 1. As an extension, ask students to draw whiskers on the cat and then give the coordinates of the points that need to be connected.
In Question 7 students make up their own shapes. They draw a shape on Half-Centimeter Grid Paper. The shape should consist of straight lines. Tell students it does not matter which point they choose to begin with in the list. Students exchange their lists with a partner and each person draws the shape from the list of ordered pairs they were given. Students should compare drawings to make sure the original and the new drawing is the same. If not, they should correct any mistakes. Questions 6 and 7 can be assigned as homework.


