


The Hour and Half Hour
Est. Class Sessions: 1–2Developing the Lesson
Review the Hour Hand. To begin this lesson show students the one-handed clock prepared for Unit 9 Lesson 9.
Ask:
Set the hour hand on the clock to 12 o'clock. Ask students to count each hour with you as you move the hand around the clock. Now set the hour hand so it is just before three o'clock. See Figure 1.
Ask:
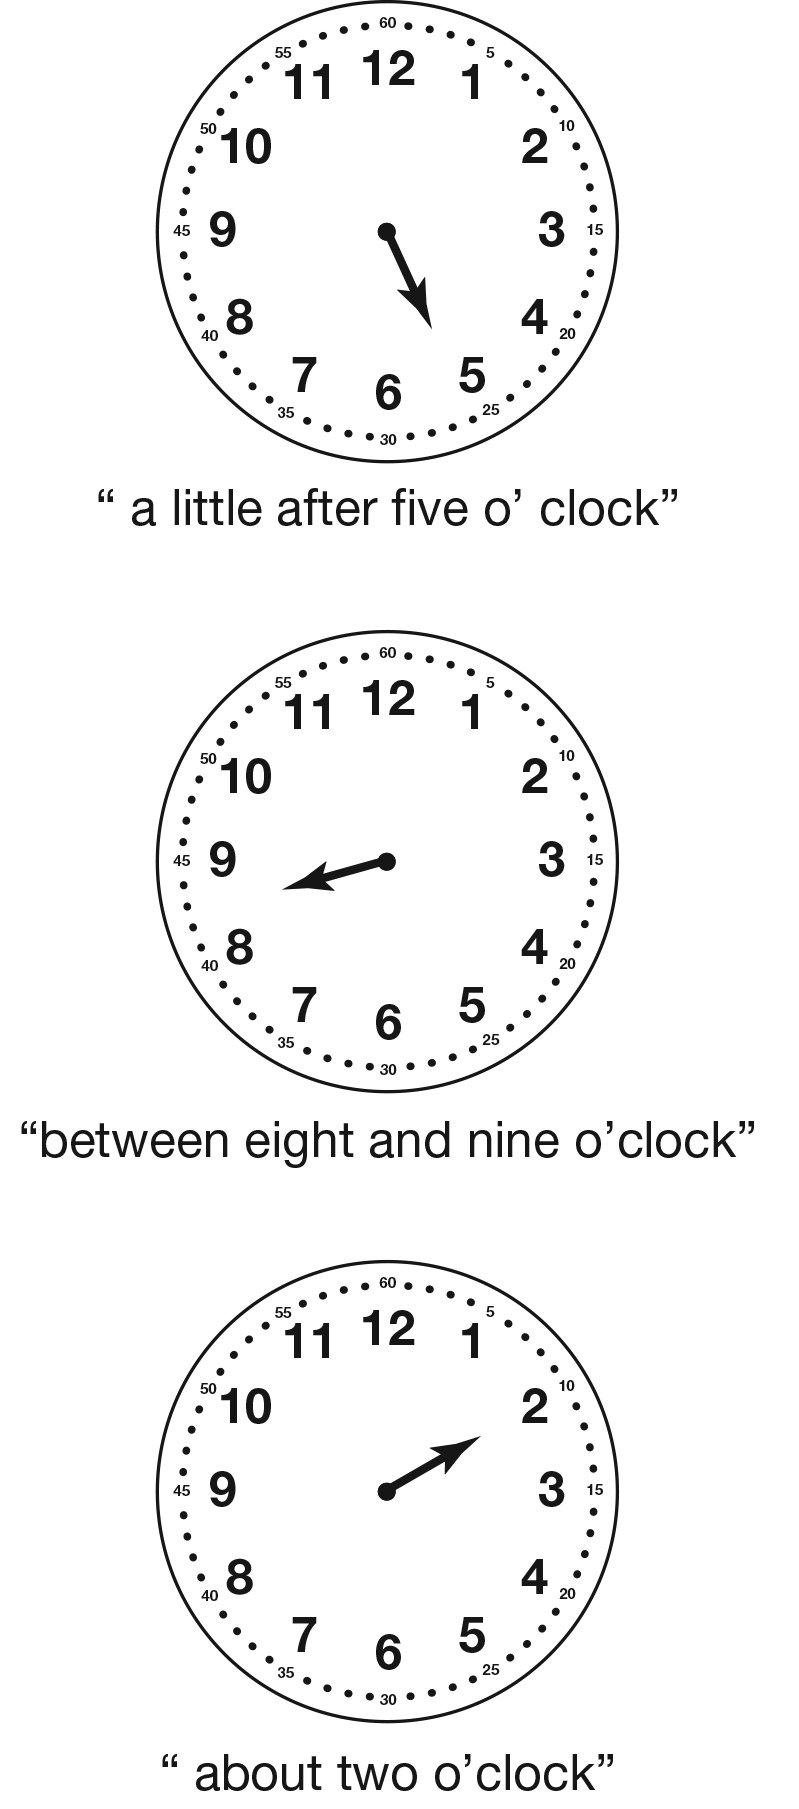
Continue to review using the hour hand to tell the approximate time. For example, set the hour hand to show a little after five o'clock, half-way between eight and nine o'clock, or about two o'clock. See Figure 2.
Use these or similar discussion prompts to guide the review:
Introduce the Minute Hand. Ask students to look at their individual clocks as you display the demonstration clock. Place the demonstration clock near the one-handed clock.
Ask:
Explain that while the red numbers and the red hand on the demonstration clock show us the hours, the blue numbers and the blue hand represent minutes. Tell students that they are going to focus on the minutes that are shown on a clock.
Set the minute hand on the demonstration clock to the 60. Ask students to move the minute hand on their individual clock so that it also points to 60. Since they are focusing only on the minute hand, it is not important if the hour hands are different on each clock. Move the minute hand slowly around the clock as students move the minute hand on their individual clocks. Together, count the minutes that pass by fives.
Ask:
Set the demonstration clock to six o'clock and ask students to set their individual clocks to show the same time.
Ask:
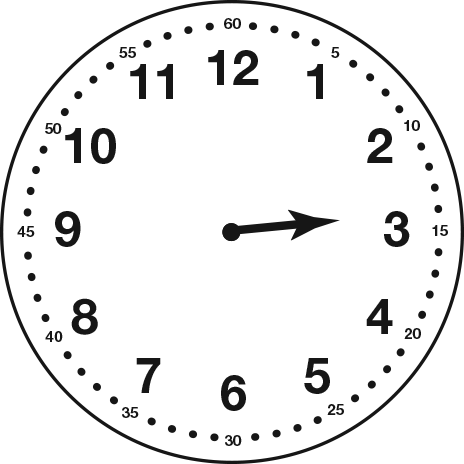
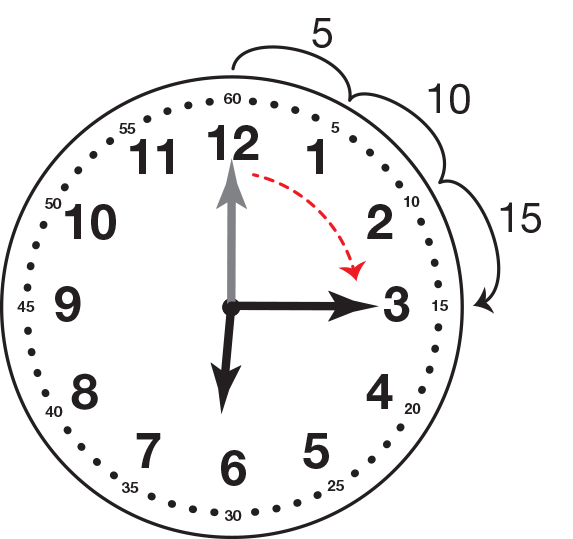
Ask students to count by fives as you move the minute hand to show that 15 minutes have passed. See Figure 3. Students can also move the minute hand on their individual clock.
Ask:
If a student responds that the minute hand is pointing at the three, remind him or her that the red three tells the hour and the blue numbers along the outside edge show the minutes that have passed. See the Content Note.

As you move the minute hand on the demonstration clock have students continue to count by fives as they move the minute hand on their clocks to show that 30 minutes have passed.
Ask:
Continue to move the minute hand to show that 45 minutes have passed and then that 60 minutes have passed. Students should identify where the minute had is pointing and how many minutes have passed for each 15 minute segment of time. Your demonstration clock and their individual clocks will now read seven o'clock.
Tell and Write Time to the Nearest Half Hour.
Ask students to look at the hour hand on the demonstration
clock.
Ask:
Explain to students that each time the minute hand travels 60 minutes around the clock one hour passes. To illustrate this, have them observe the movement of the hour hand on the demonstration clock as you move the minute hand slowly around the clock so that the hour hand moves from 7 o'clock to 8 o'clock.
Ask:
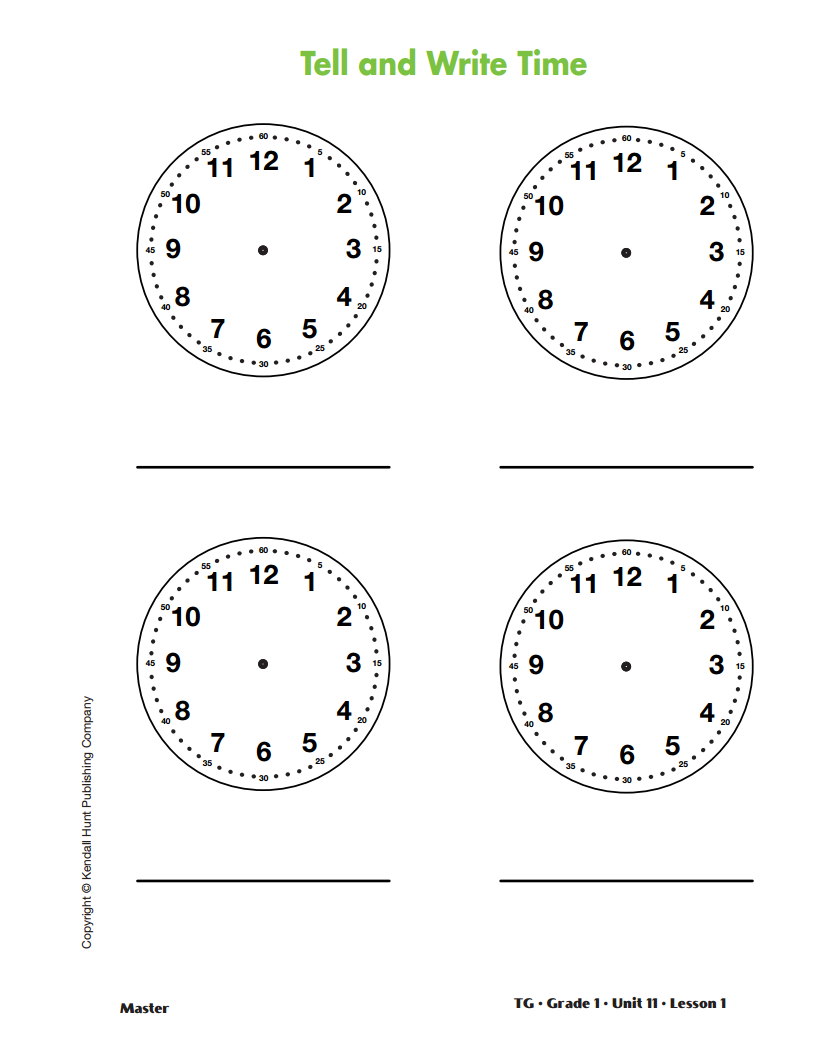
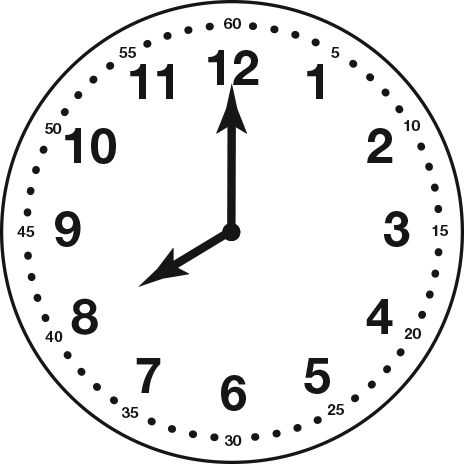
Display the Tell and Write Time Master. Draw the hour hand and minute hand to show 8 o'clock on the first clock face and write the notation 8:00 under the clock. See Figure 4. Explain this is one way to write the time for 8 o'clock. Explain that the first number tells you the hour and the numbers after the colon tell you how many minutes it is after the hour. Ask students to set their individual clocks to show 8 o'clock.
Now move the minute hand, counting the minutes by fives, to show that 30 minutes have passed as students move the minute hand on their individual clocks. Have students notice the position of both the hour and minute hand.
Ask:
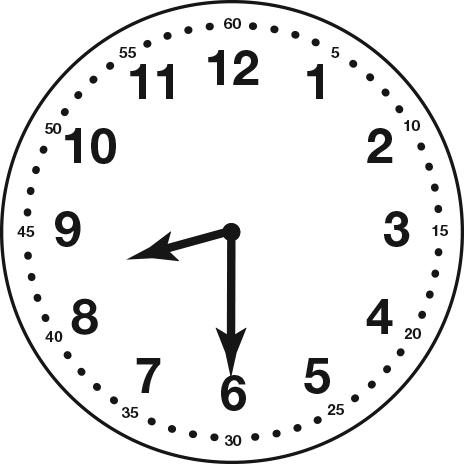
Draw the hour and minute hands on the second clock on the display of the Tell and Write Time Master. See Figure 5. Explain that when the minute hand moves halfway around the clock and stops on 30 minutes a half of an hour has passed. That means it is halfway between 8 o'clock and 9 o'clock. Write the notation 8:30 under the clock on the display. Explain that to record this time you write the hour as 8 and then write the 30 to show that 30 minutes have passed. Explain that you read this notation as "eight-thirty."
Use the third clock on the display of the Tell and Write Time Master to show 9 o'clock. Write the notation 9:00 under this clock. Have students move the minute hand on their individual clock as you move the minute hand on the demonstration clock from 8:30 to 9:00.
Count the minutes by 5s starting with 35 and ending with 60.
Ask:
Use similar discussion prompts to continue practicing telling time to the nearest hour and half hour. Move the minute hand on the demonstration clock. Encourage students to count the minutes by 5 as you move the hand and to move the minute hand on their individual clocks. Record the times and time notations on additional display copies of the Tell and Write Time Master.
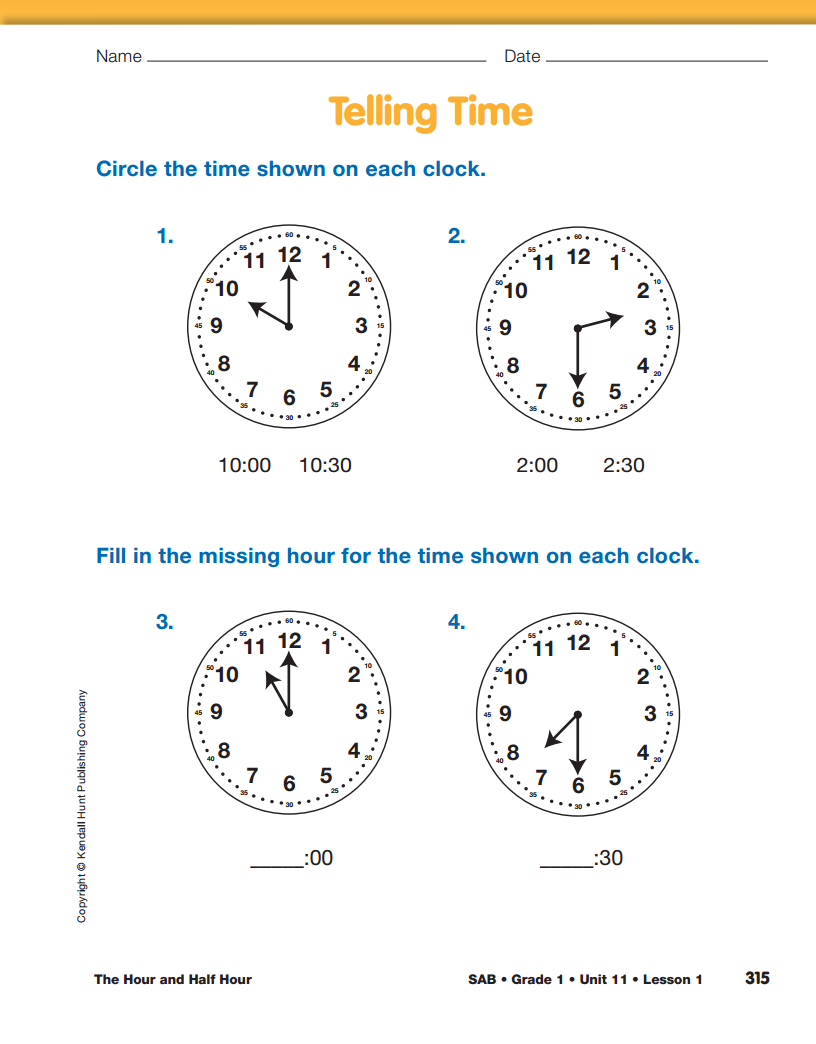
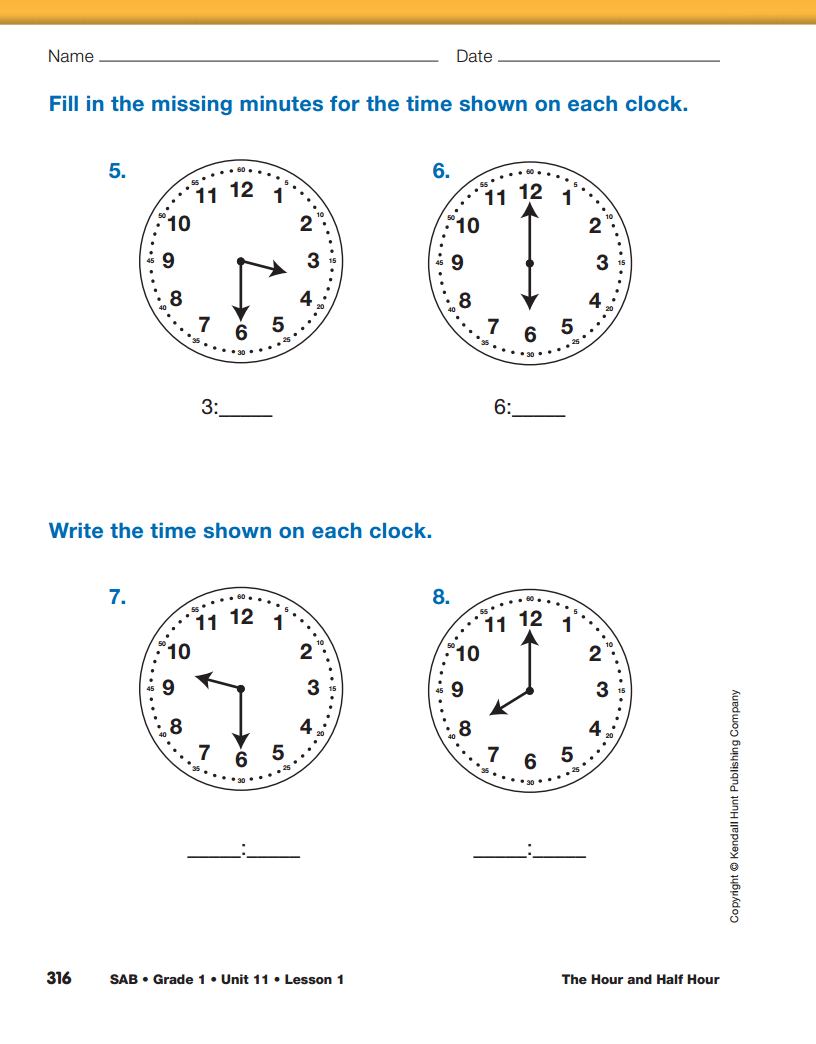
Direct students to the Telling Time pages in the Student Activity Book. Ask students to work with a partner to complete Questions 1–8. In Questions 1–2, students circle the correct time shown on each clock. For Questions 3–6, students fill in the missing information to complete each time. In Questions 7–8, students write the time shown on each clock.