Multiplication and Rectangles
Est. Class Sessions: 3Developing the Lesson
Part 1. Exploring Factors Using Tiles

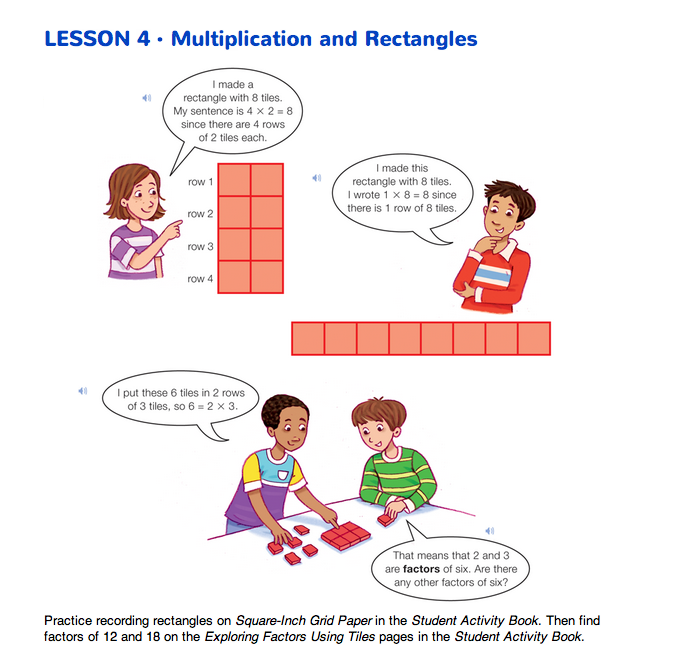
Find Factors of 6. Distribute 25 square-inch tiles to each student. See TIMS Tip. Direct students' attention to the Multiplication and Rectangles page in the Student Guide. Use this page as an introduction to the lesson as you read the vignettes together. Remind students that rows are horizontal and refer to the tiles going across. Use a display set of square-inch tiles to recreate the 4 × 2 and 1 × 8 rectangles made on the Student Guide page. Have students recreate the same rectangles at their desks.
Make a configuration that is not a rectangle with the 6 tiles and ask:
Then ask:
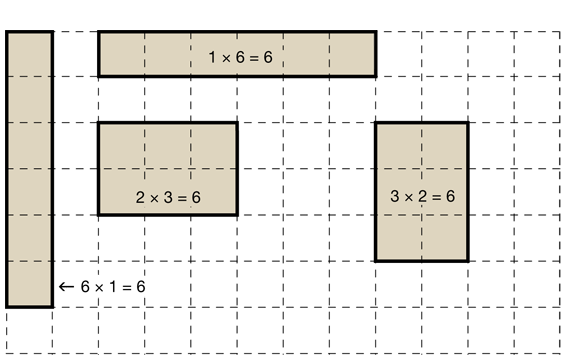
Students should work individually and then compare their rectangles with those of a partner. Students should find four ways to arrange the six tiles, counting the arrangement of two rows and three columns, for example, as different from the arrangement of three rows and two columns. See Figure 2.
Show students a display of the rectangle with 2 rows and 3 tiles in each row.
Ask:
If students suggest number sentences using repeated addition (e.g., 2 + 2 + 2), link this with multiplication by showing how both number sentences match the rectangle. Emphasize that in this activity, students will write multiplication sentences.
Review the term factor with students. Two and three are factors of six because when they are multiplied together the answer (product) is 6.
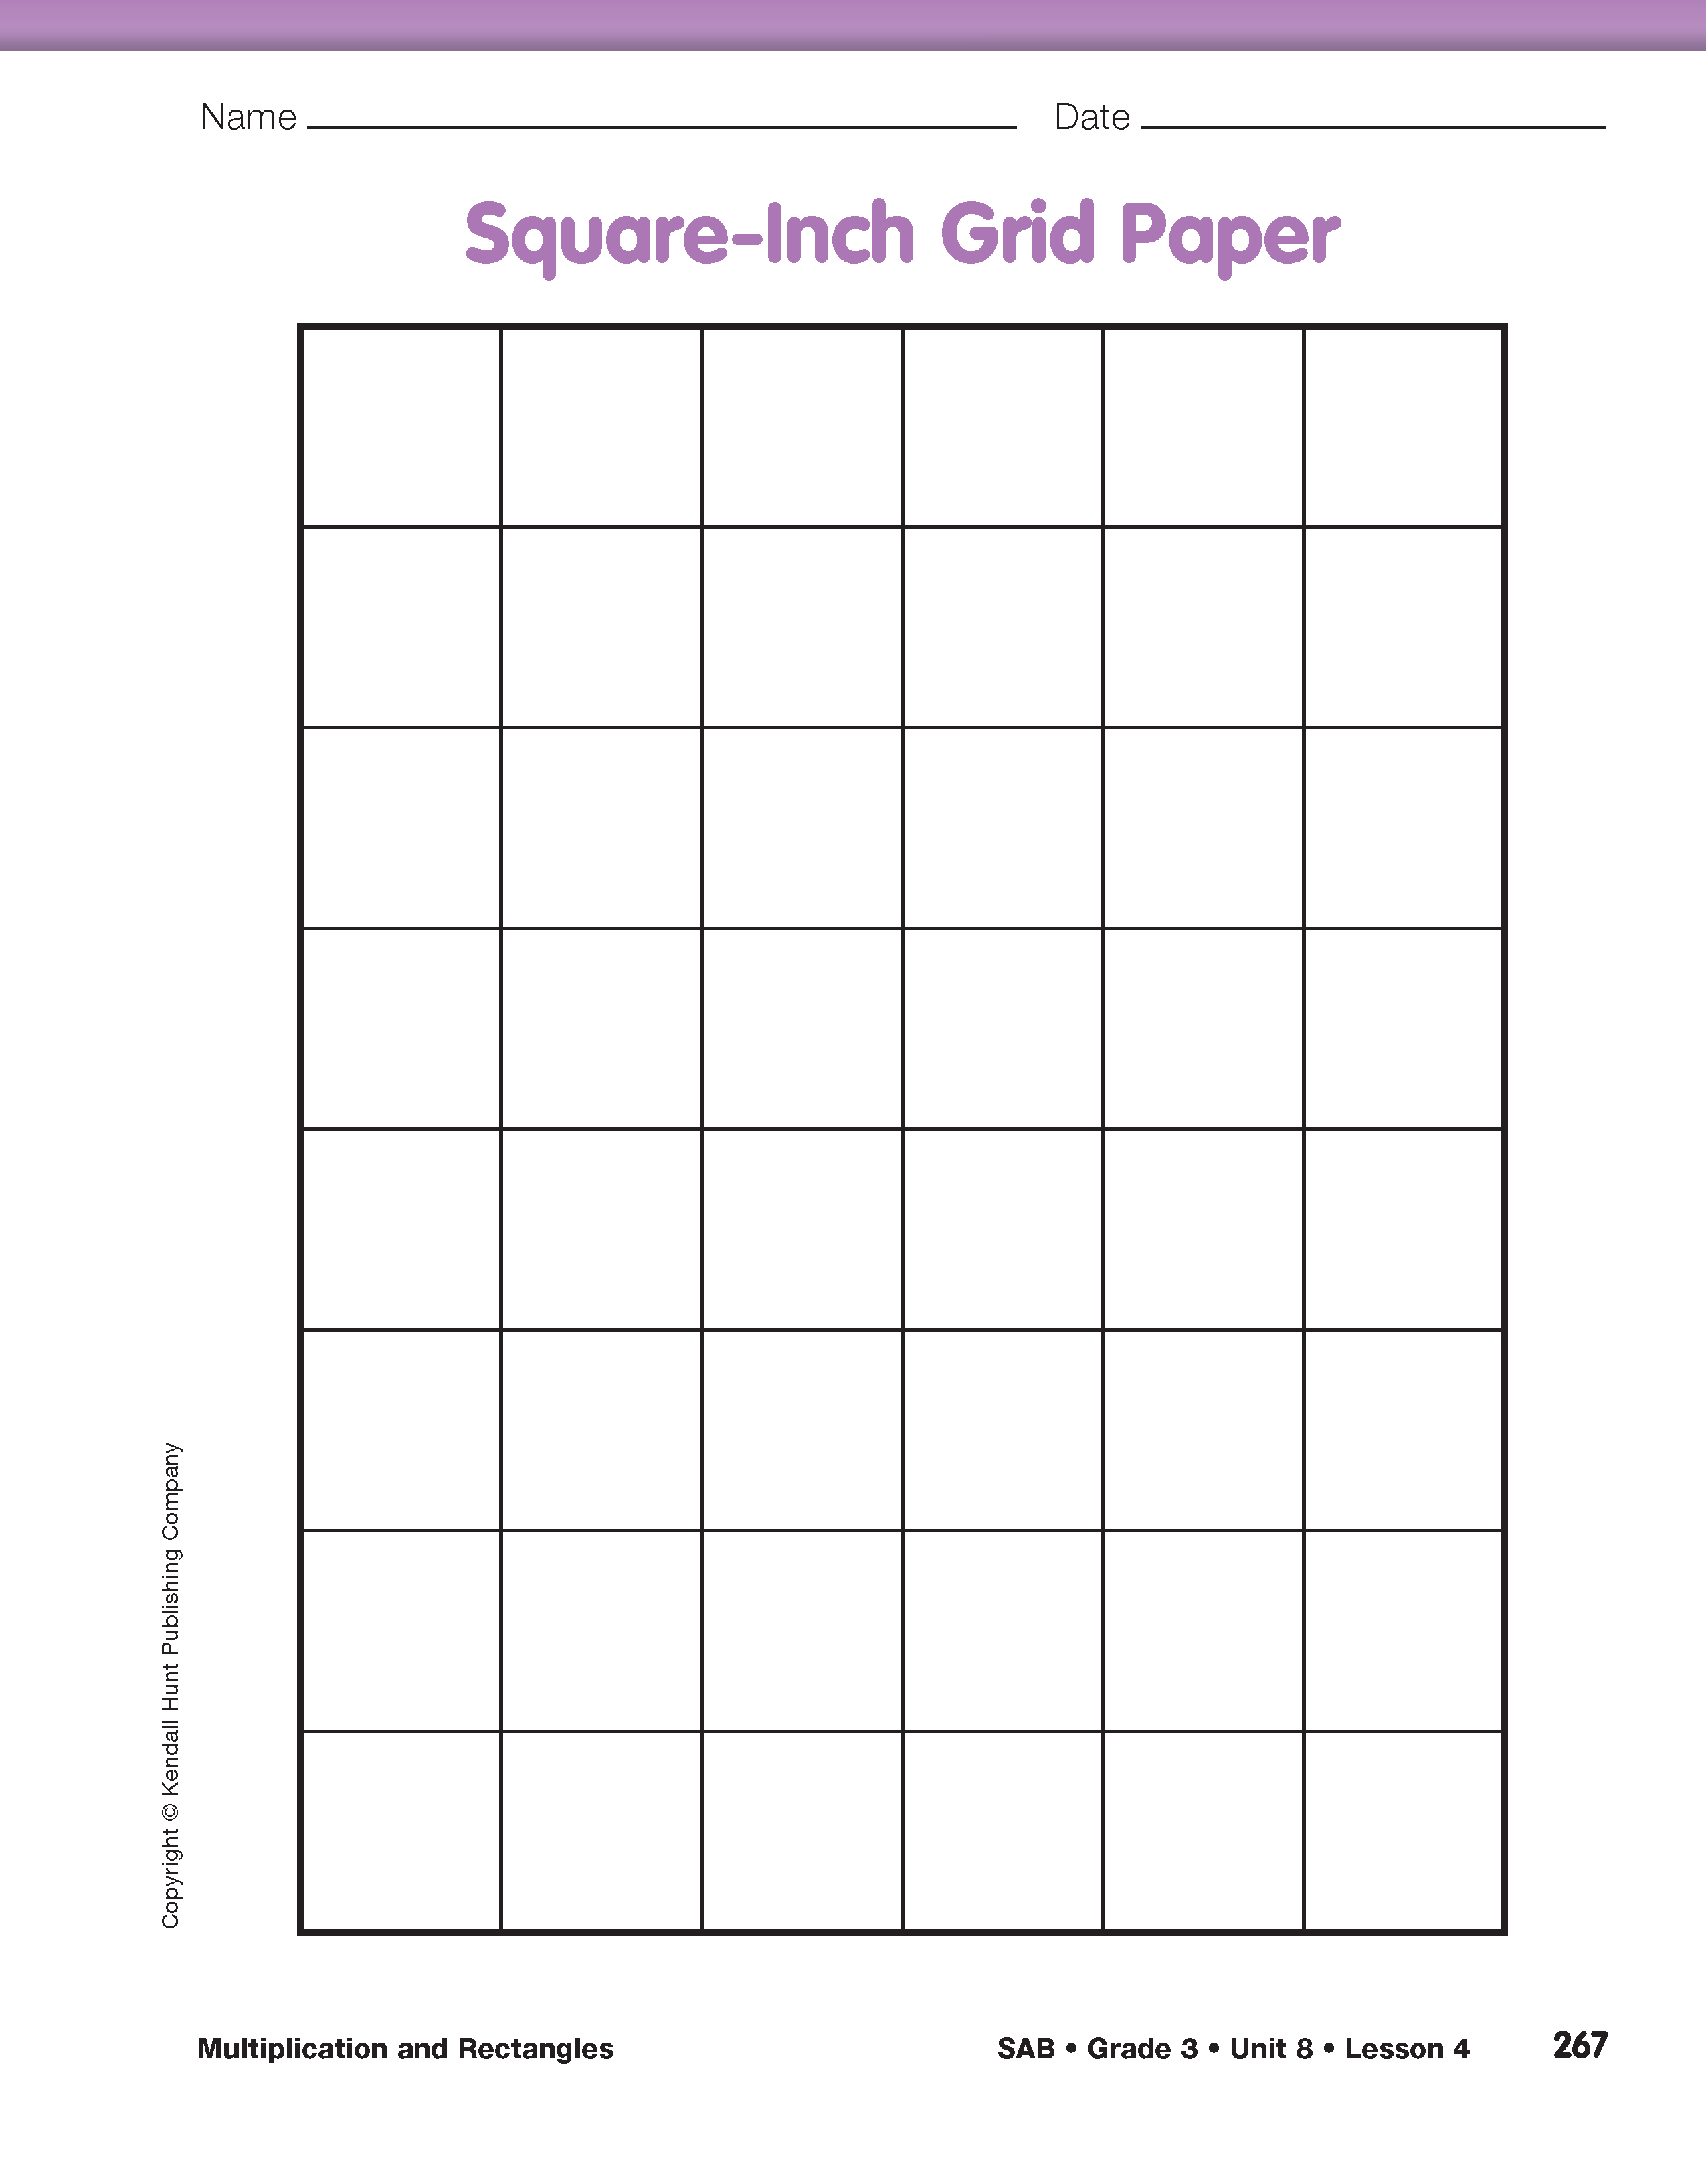
Ask students to remove the Square-Inch Grid Paper pages from the Student Activity Book. As you display the page, tell students you are going to show them how to make a record of the rectangles they build with tiles.
Ask:
Show students how to shade in 2 rows of 3 squares to record the rectangle. Discourage students from drawing the outline of the rectangle. Focus instead on shading in 6 squares to represent the area of the rectangle. Have students shade a 2 × 3 rectangle on the Square-Inch Grid Paper page and write the multiplication number sentence 2 × 3 near it.
Ask student volunteers to use the display set of square-inch tiles to share the 3 other rectangles they made with 6 tiles: a 3 × 2, a 1 × 6, and a 6 × 1. As each one is shared, demonstrate how to draw the rectangle on grid paper by shading in squares. Then have students draw the rectangle on grid paper and write a multiplication sentence near it. Display both a 3 × 2 and a 1 × 6 rectangle.
Ask:
Tell students they are going to be using more tiles to build larger rectangles. The rectangles will be too large to fit on to the Square-Inch Grid Paper, so new grid paper is needed. Display the Centimeter Grid Paper Master.
Ask:

Explain that you will still use one square on the grid to show each tile in your rectangle. Demonstrate how to shade in the 2 × 3 rectangle on Centimeter Grid Paper. Ask volunteers to demonstrate how to shade in other rectangles.
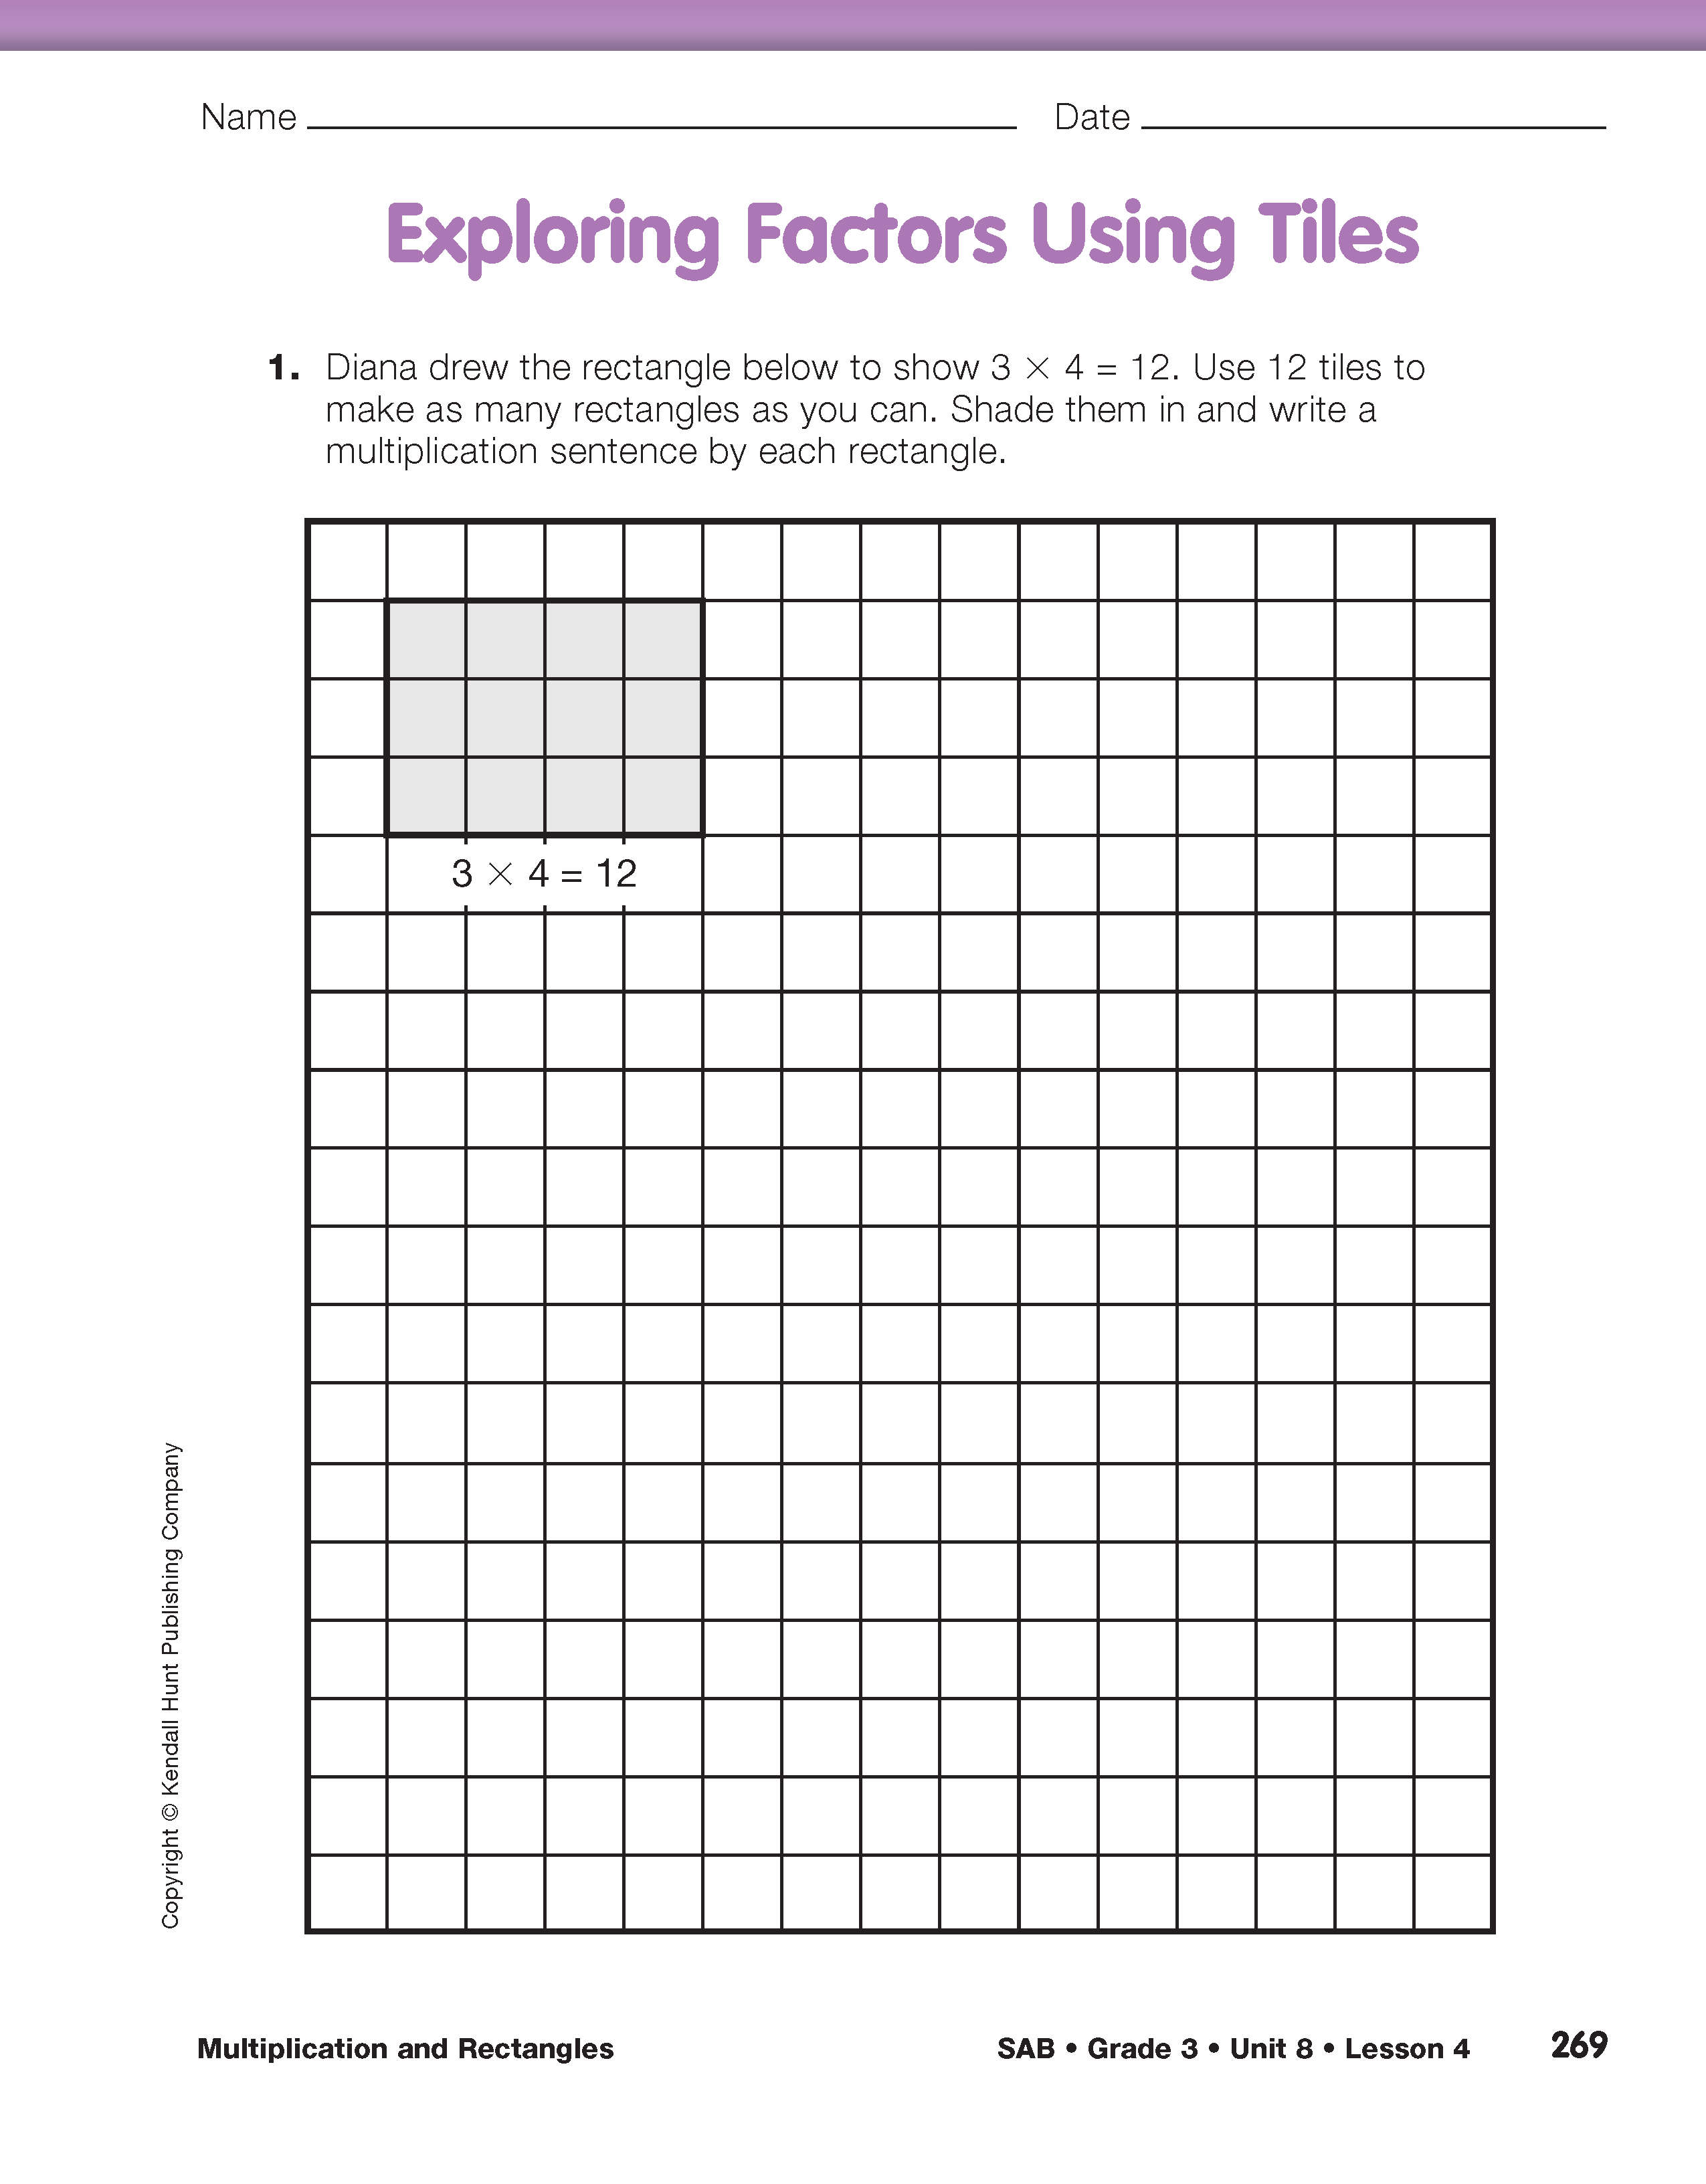
Find Factors of 12 and 18. Direct students' attention to the Exploring Factors Using Tiles pages of the Student Activity Book. Point out the centimeter grids on which students will draw their rectangles. Assign Questions 1–2 to student pairs. Students will arrange 12 and 18 square-inch tiles into rectangles in as many ways as they can, shade them on grid paper, and write a multiplication sentences near each one. Figure 3 shows the six rectangles that can be made with 12 tiles.
After they have finished, ask a pair of students to share their work with the class. Use discussion prompts similar to those in the Sample Dialog. Repeat a similar discussion for the six rectangles that can be made with 18 tiles.