Lesson 4

Building with Triangles

Est. Class Sessions: 2

Developing the Lesson

Part 1. Geometry Concepts

Review Terms. In this lesson, students will build shapes by putting together two or three small triangles. They will record the number of sides, vertices, right angles, and lines of symmetry. They will need to agree on which shapes are the same, or congruent, by moving one (flipping, turning, or sliding) so it exactly covers the other.

Display the large triangle from a set of tangram pieces. Review or introduce vocabulary and concepts students will be working with (triangle, sides, vertices, angles, right angles).

You can informally assess the students' knowledge of certain geometry terms by asking them to describe their triangles. They should be comfortable using these terms to describe their triangle. See Sample Dialog for guiding this discussion.

Use the Sample Dialog to review vocabulary and concepts related to triangles.

Teacher: How would you describe a triangle?

Michael: It is a shape that has three sides.

Teacher: Show us the sides of your triangle. [Teacher traces sides on a large triangle in front of the class.] Why do you think these shapes are called “triangles”?

Maria: “Tri” means three. A triangle has three sides; a triangle has three angles.

Teacher: What is an angle?

John: An angle is made when two sides come together.

Teacher: Where are the angles?

Michael: They are right here at the corners.

Teacher: Right, here is an angle. [Teacher traces the angles on the large triangle in front of the class to visually reinforce the concept of an angle as two sides that come together at one point.]

Teacher: There is a special name for the point where two sides come together. It is called a vertex. [Teacher points to the vertices on all three sides of the large triangle in front of the class.] Can you show a vertex on your triangle? How many vertices does your triangle have? We say 2 or more are vertices, 1 is a vertex. What is a good way to remember the word vertex?

Michael: Vertex starts with a “V” and a “V” has a vertex.

Teacher: When you have two sides that meet at a vertex you have an angle. Are all the angles of your triangle the same size?

Maria: No. One is bigger than the other two.

Teacher: [Teacher shows the bigger angle on the large triangle in front of the class.] What do you notice about the size of the angles on this triangle?

Maria: Two angles are equal, the other is the big angle, the third side is longer than the other two sides.

Teacher: Are there other shapes that have big angles like your triangle?

John: Yes, the bigger angle is like the angles on a square.

Teacher: Yes. In fact, we sometimes call angles this size square angles because they are the same size as angles on squares. Does anyone know another name for square angles?

John: I've heard them called right angles.

Teacher: Yes. Do you see any other right angles in the room?

Maria: There are right angles at the corners of the door.

John: At the corner of the paper also.

Review Symmetry. Display the Lines of Symmetry Master to review line symmetry for this lesson. Second-grade students using Math Trailblazers learned to identify shapes with line symmetry, so this will be a review.

Direct students to cut out the shapes on the Lines of Symmetry Master and to fold and draw the lines of symmetry on each shape. After students have completed drawing the lines, discuss where the lines of symmetry were found. Figure 2 shows the lines of symmetry for Shapes A and C. Shape B does not have line symmetry.

  • How do you know if a shape has line symmetry? (Possible response: You can fold the shape in half and both parts are exactly the same.)
  • Do all shapes have line symmetry? (Possible response: Some shapes have one line of symmetry, some shapes have more than one line of symmetry, and some shapes have no symmetry at all.)

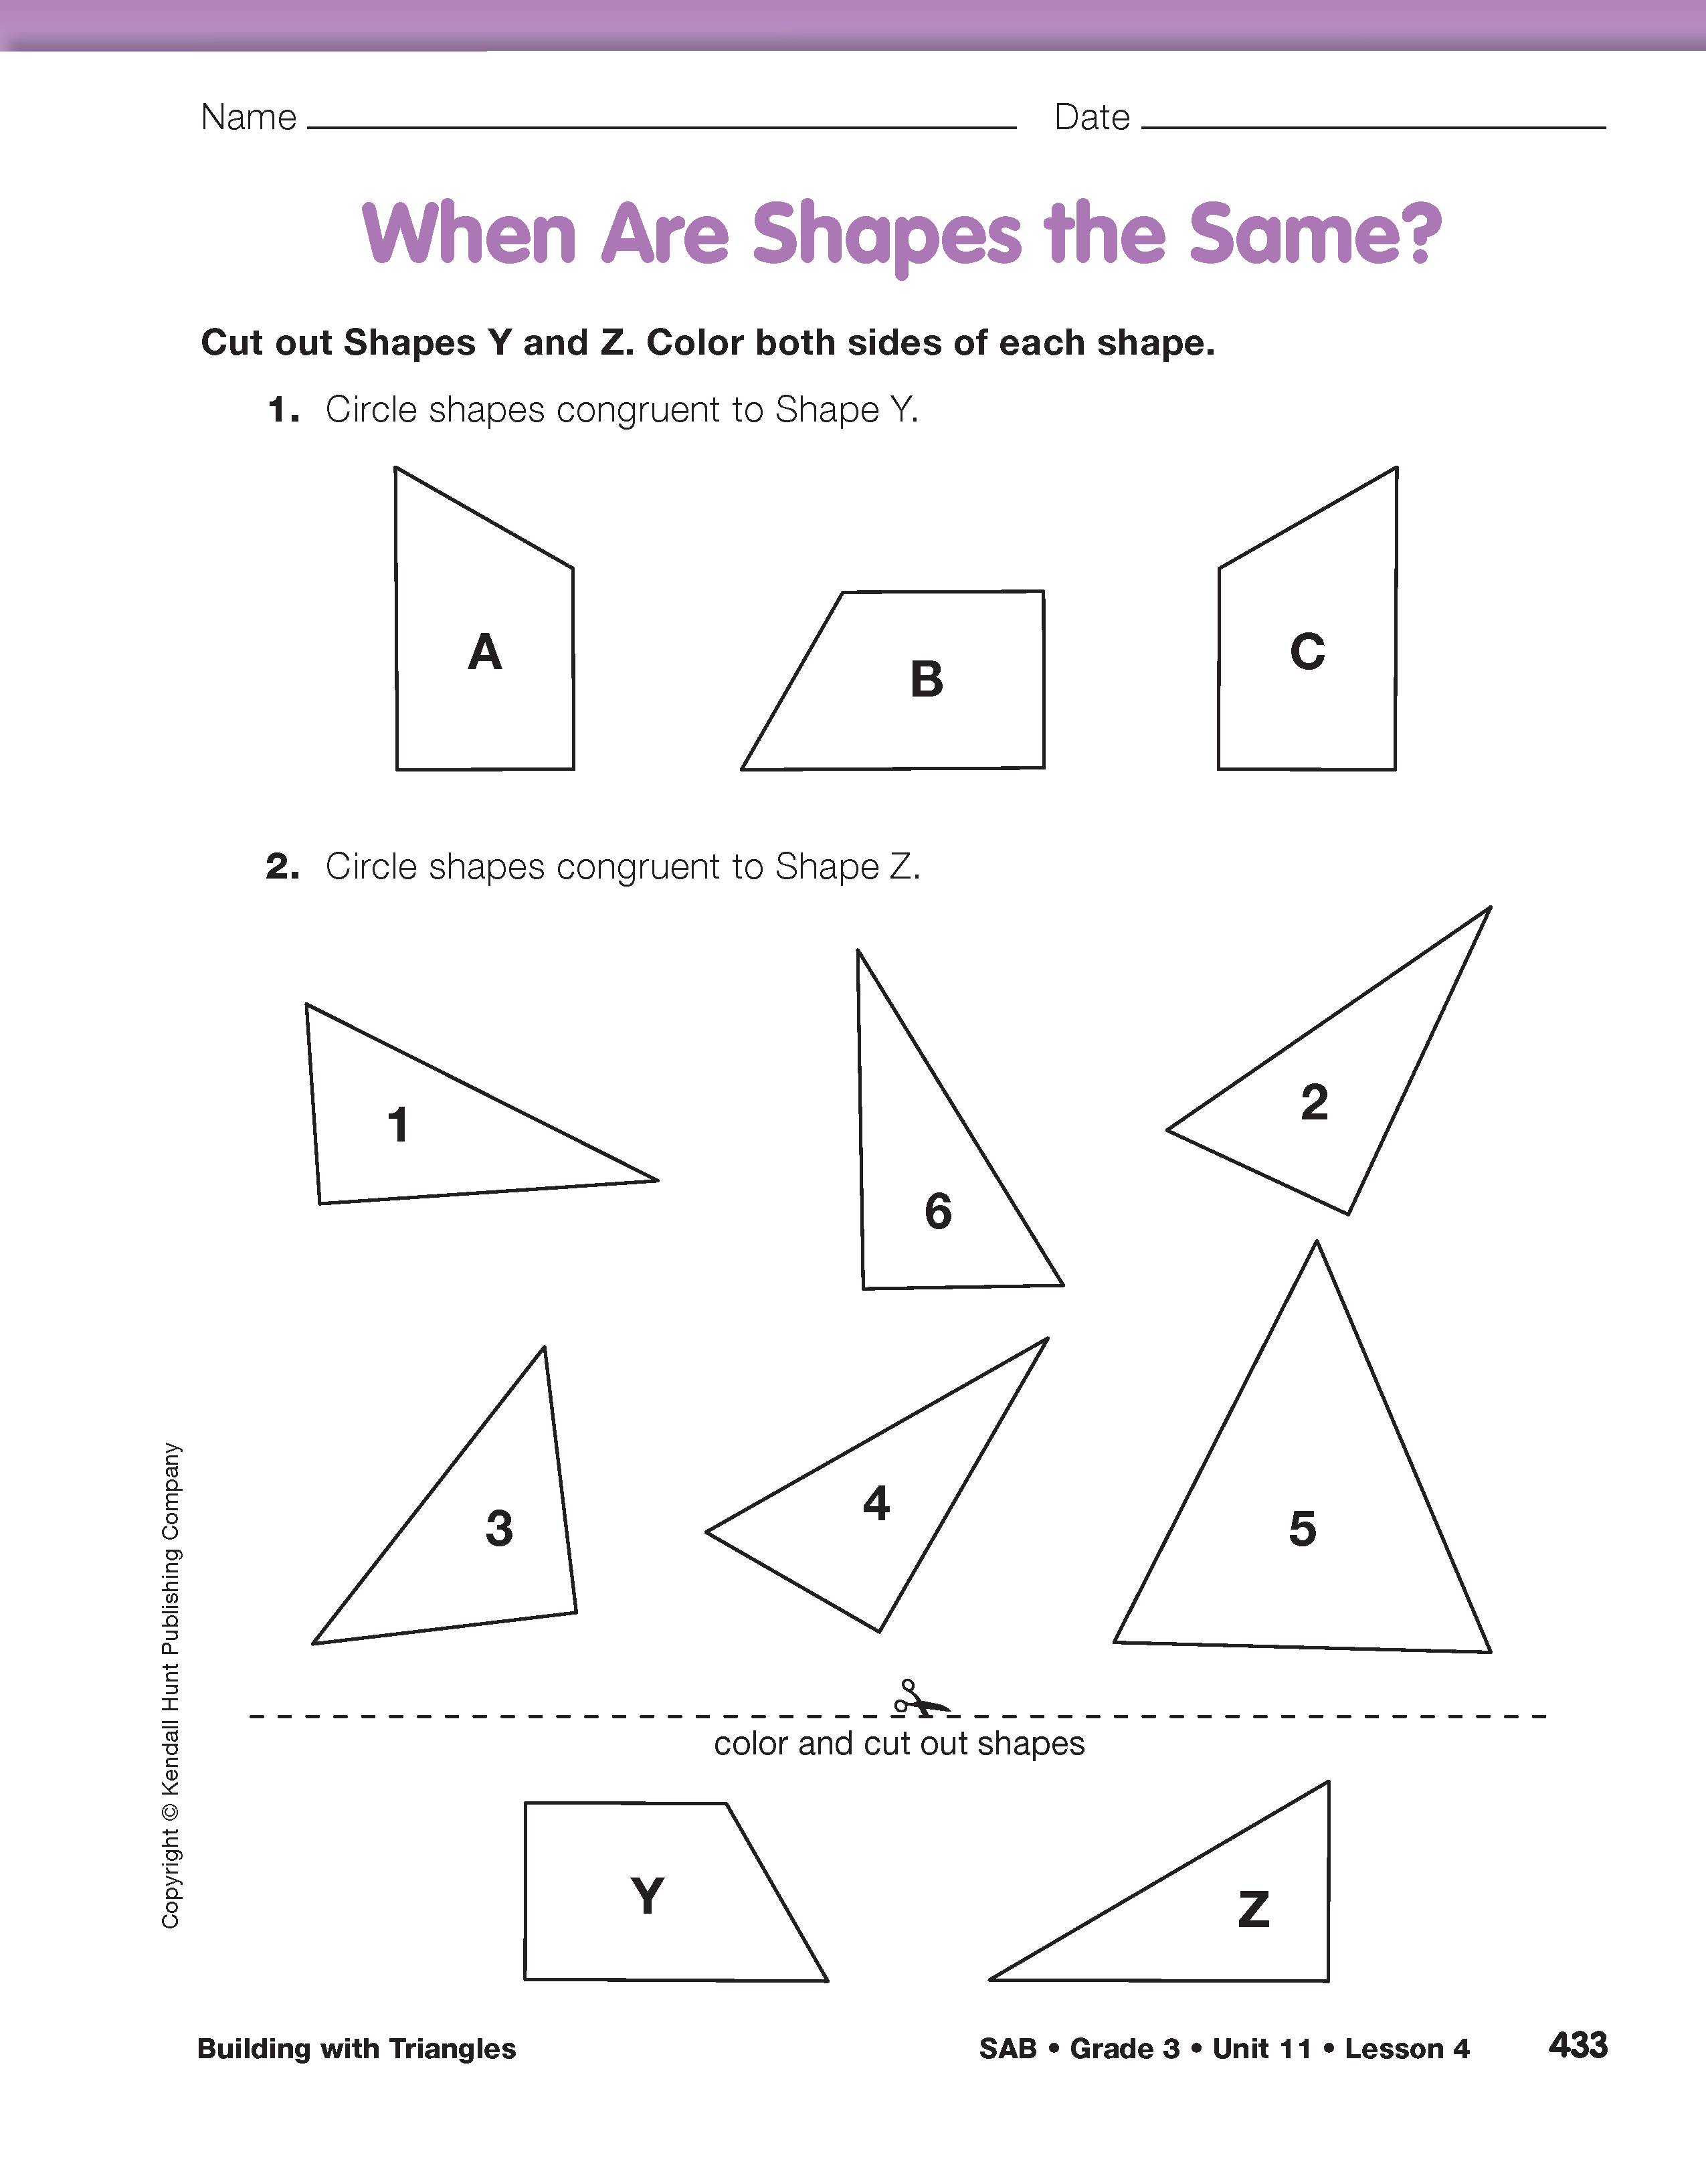
Introduce Congruency. As students build shapes by putting triangles together, they will need to know which shapes are the same, or congruent. Two shapes are congruent if Shape A can be turned, slid, or flipped onto Shape B so that it exactly covers Shape A. See the Content Note about Testing Congruence. To further explore the concept of congruency, display the When Are Shapes the Same? page you prepared from the Student Activity Book. Refer students to that page in their book. Direct them to cut out Triangle Z and Shape Y at the bottom of the page and to color both sides of each shape.

  • Look at the three shapes in Question 1. Do you think all three shapes are congruent to Shape Y? How do you know? (Possible response: I know Shapes A, B, and C are congruent to Shape Y because they all are the same size and shape. I can lay my cutout on top of each shape.)
  • Use the cutout of Triangle Z to answer Question 2. Which triangles are congruent to Triangle Z?
  • Is Triangle 1 congruent to Triangle Z? (yes) How do you know? (Possible response: Triangle Z can be flipped and turned to fit exactly on top of Triangle 1.)

Use the cutout for Triangle Z to continue testing all six triangles. Ask students to explain why they think the triangles are congruent or not congruent to Triangle Z. Triangles 1, 4, and 6 are congruent to Triangle Z.

Ask students to work in pairs to answer Questions 1–5 on the Building with Triangles pages in the Student Guide. These questions formalize the definitions discussed.

X
SG_Mini
+
Lines of symmetry
X
+