


Skeletons of 3-D Shapes
Est. Class Sessions: 2Developing the Lesson
Part 1. Making Shapes
Make 3-D Shapes with Full-Length Straws. Hold up 3-D examples of a cube, square pyramid, triangular pyramid, triangular prism, and rectangular prism from your classroom collection one at a time. Remind students of the properties of each shape as discussed in Lesson 6. Focus on geometric ideas such as the shape and number of the faces, and the number of vertices and edges of each shape. Explain to students that they will make skeletons of three-dimensional shapes using full-length straws and chenille stems. Allow time for students to examine the skeletal models you made earlier.
To help prepare your students for constructing their own models, pose the following questions:
Show students how to use chenille stems and straws to connect the corners. See Figure 2 and TIMS Tip.

Have students work in pairs. Distribute the chenille stems and full-length straws. Tell partners they will help each other construct the following shapes: cube, square pyramid, triangular pyramid, and triangular prism using only full-length straws.
Point out that the cube is the only rectangular prism they will be able to make. Hold up an object, such as a box, that is a rectangular prism, but not a cube.
Ask:
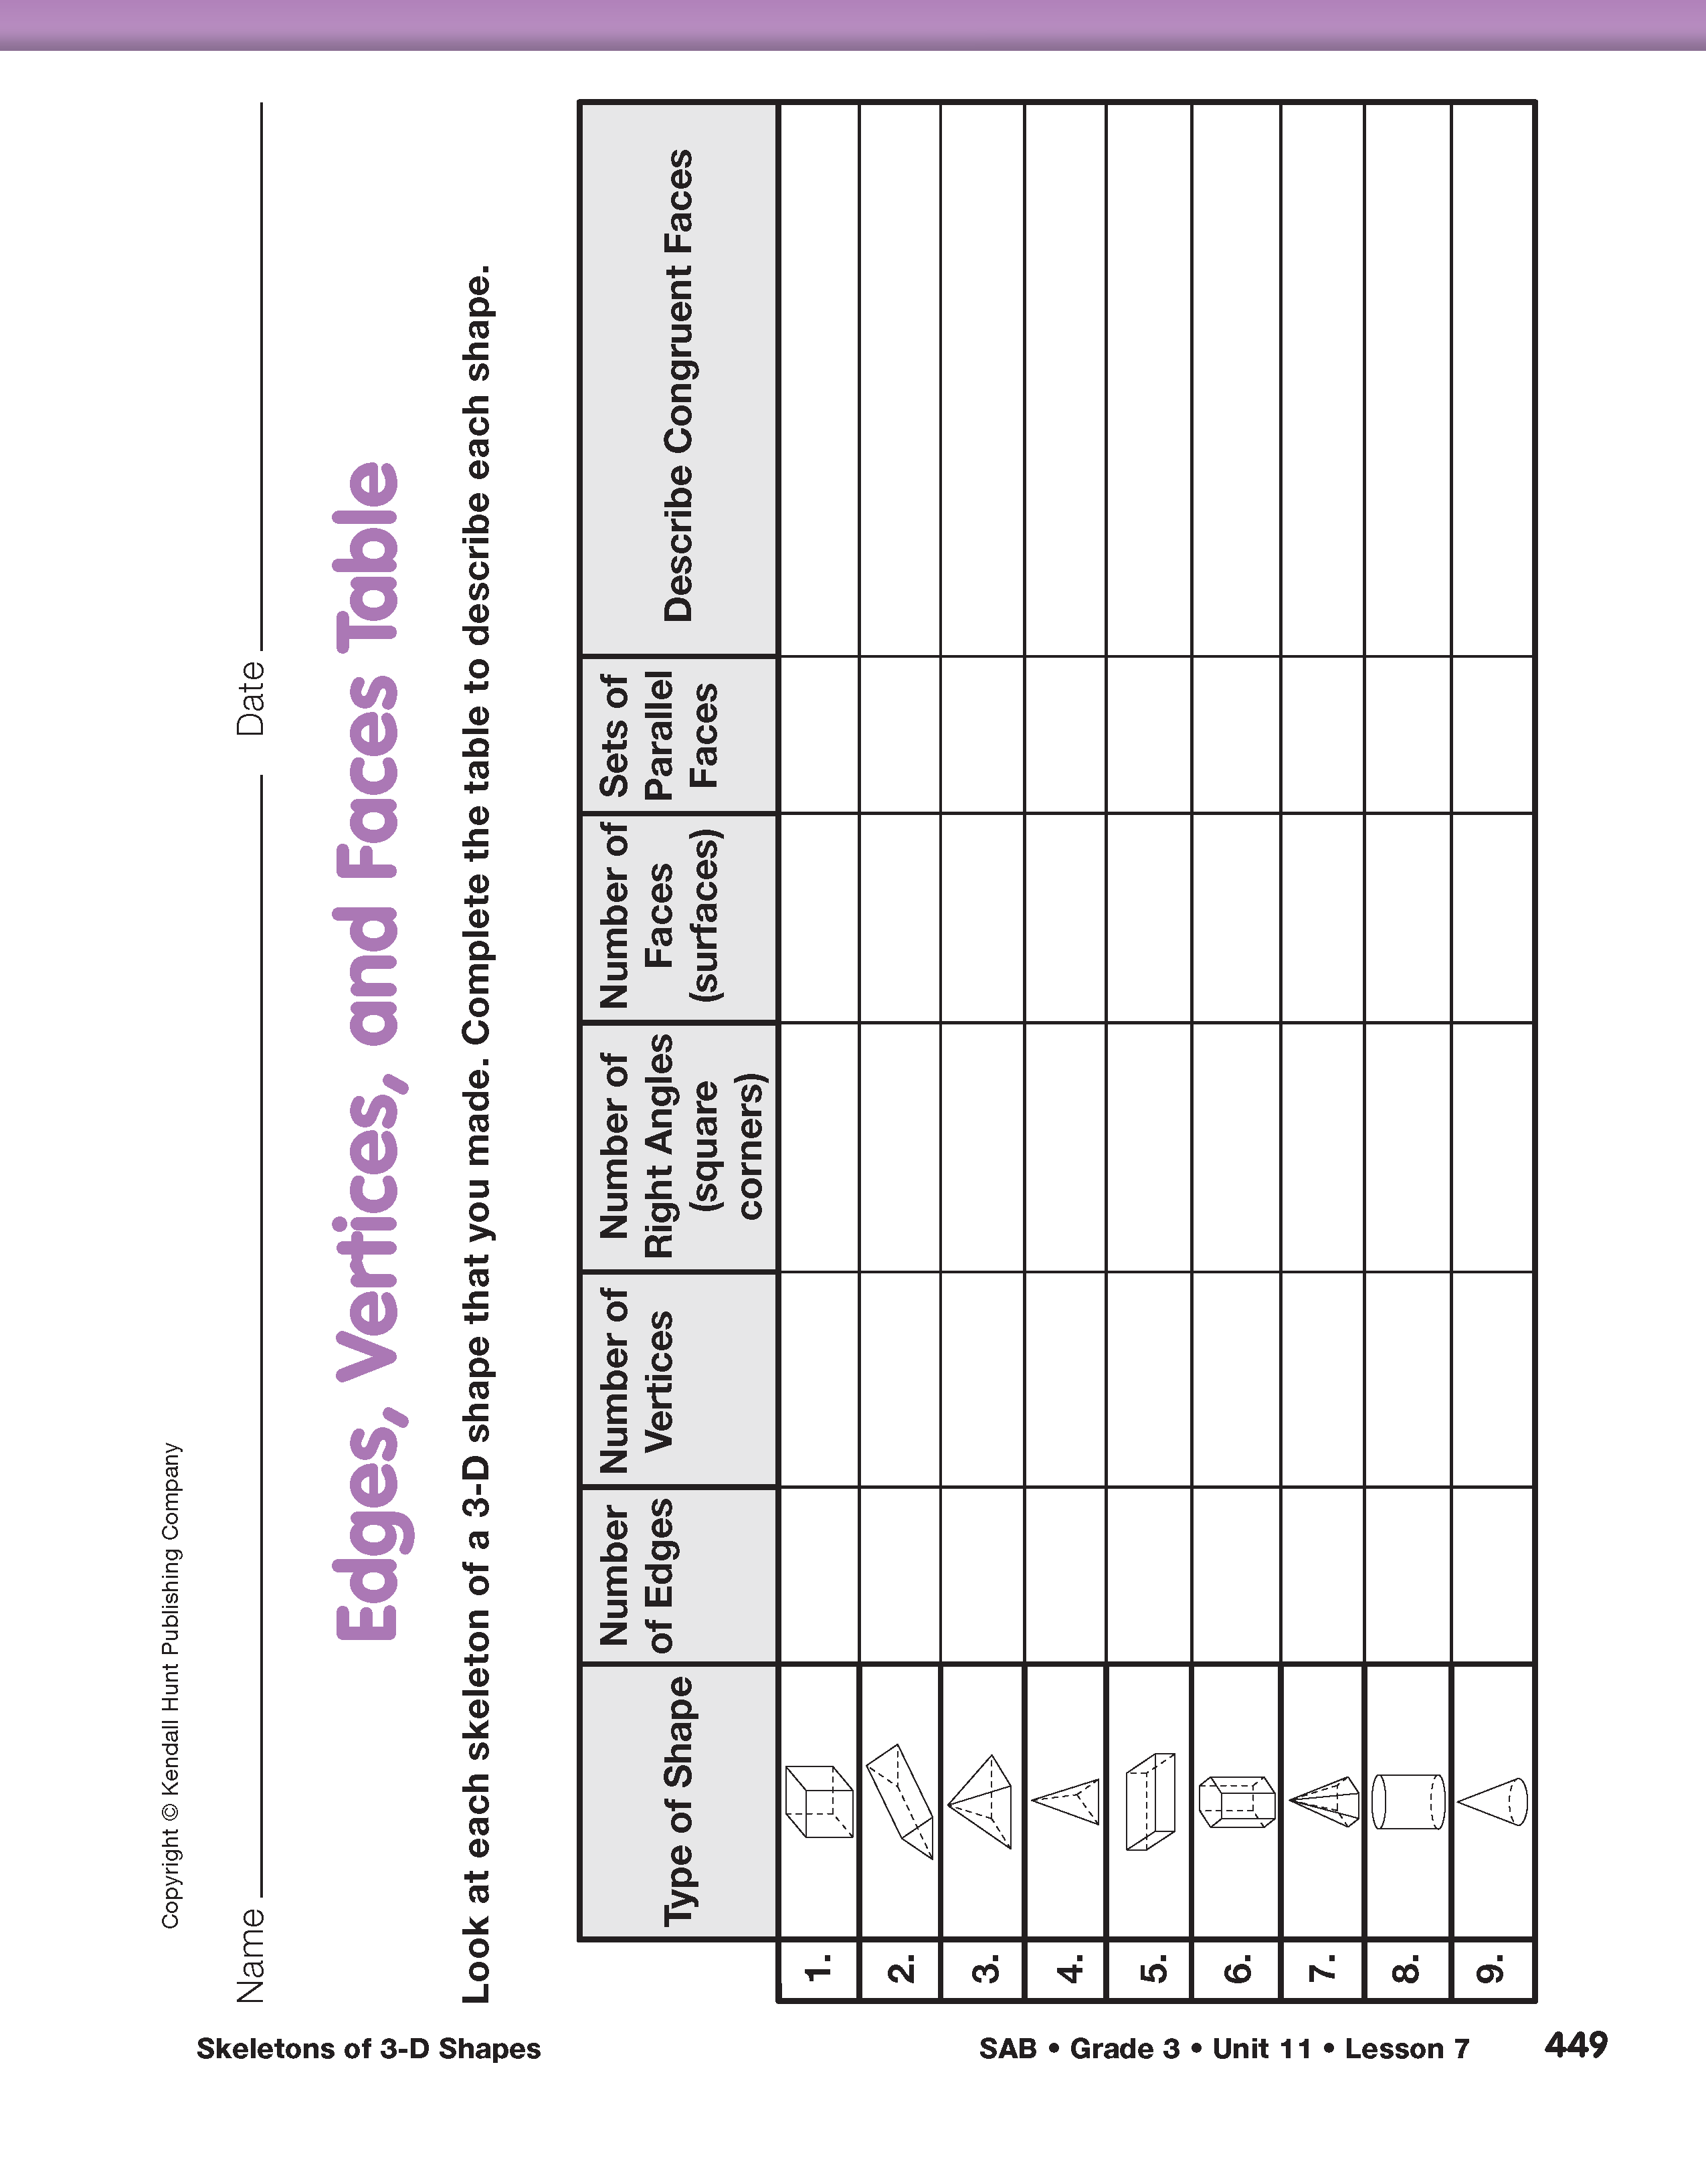
After student pairs have constructed all the skeletal models, have them complete the first three columns and the first four rows of the data table on the Edges, Vertices, and Faces Table page in the Student Activity Book. Allow them to refer to examples of three-dimensional shapes on display. Have students verify their responses as you conduct a class discussion to complete the first three columns and first four rows on the display of the Edges, Vertices, and Faces Table page. Students will complete the last three columns of the table in Lesson 8.