Investigating Angles
Est. Class Sessions: 2Developing the Lesson
Part 1. Where Are the Angles?
Introduce the unit by asking students about their prior experiences with angles.
Ask:
Have students make quick drawings of two or three other angles they see in the room. Ask students to show their drawings to a partner and explain where the angle is in the picture. Have one or two students share their drawings with the whole class.
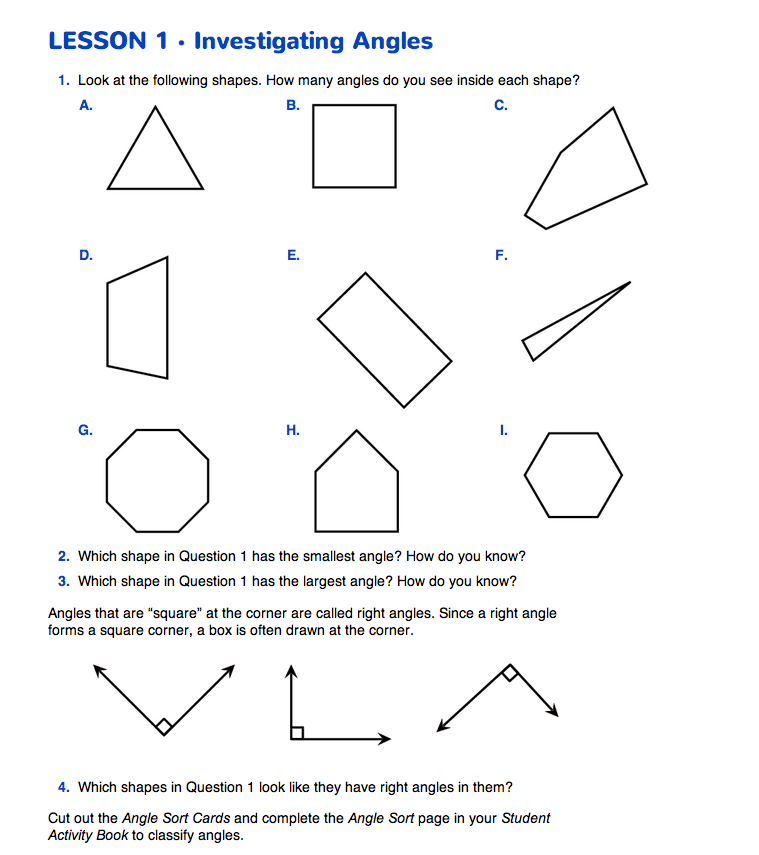
Students work in pairs to answer Questions 1–4 in the Investigating Angles pages in the Student Guide. In Question 1, students find the number of interior angles in each of the polygons.
Ask:
Questions 2 and 3 ask students to compare the relative size of angles in each of the shapes. The triangle in Question 1F has the smallest angle. Students may explain that the angle is the smallest because it is very sharp, or the “sides are closer together.” Similarly, the pentagon in Question 1C has the largest angle. Students may justify this choice by saying that the angle in this shape is “nearly straight” or “very wide.” Help students describe angles in this way so that they begin to establish visual imagery for angle size.
Question 4 asks students to identify the shapes from the list with right angles in them. At this point, students visually inspect the shapes for angles that look like they are right angles (i.e., the shapes in Questions 1B, 1C, 1E, 1F, and 1H).
You may assign Questions 1–4 in the Homework section of the Student Guide.


