


Investigating Angles
Est. Class Sessions: 2Developing the Lesson
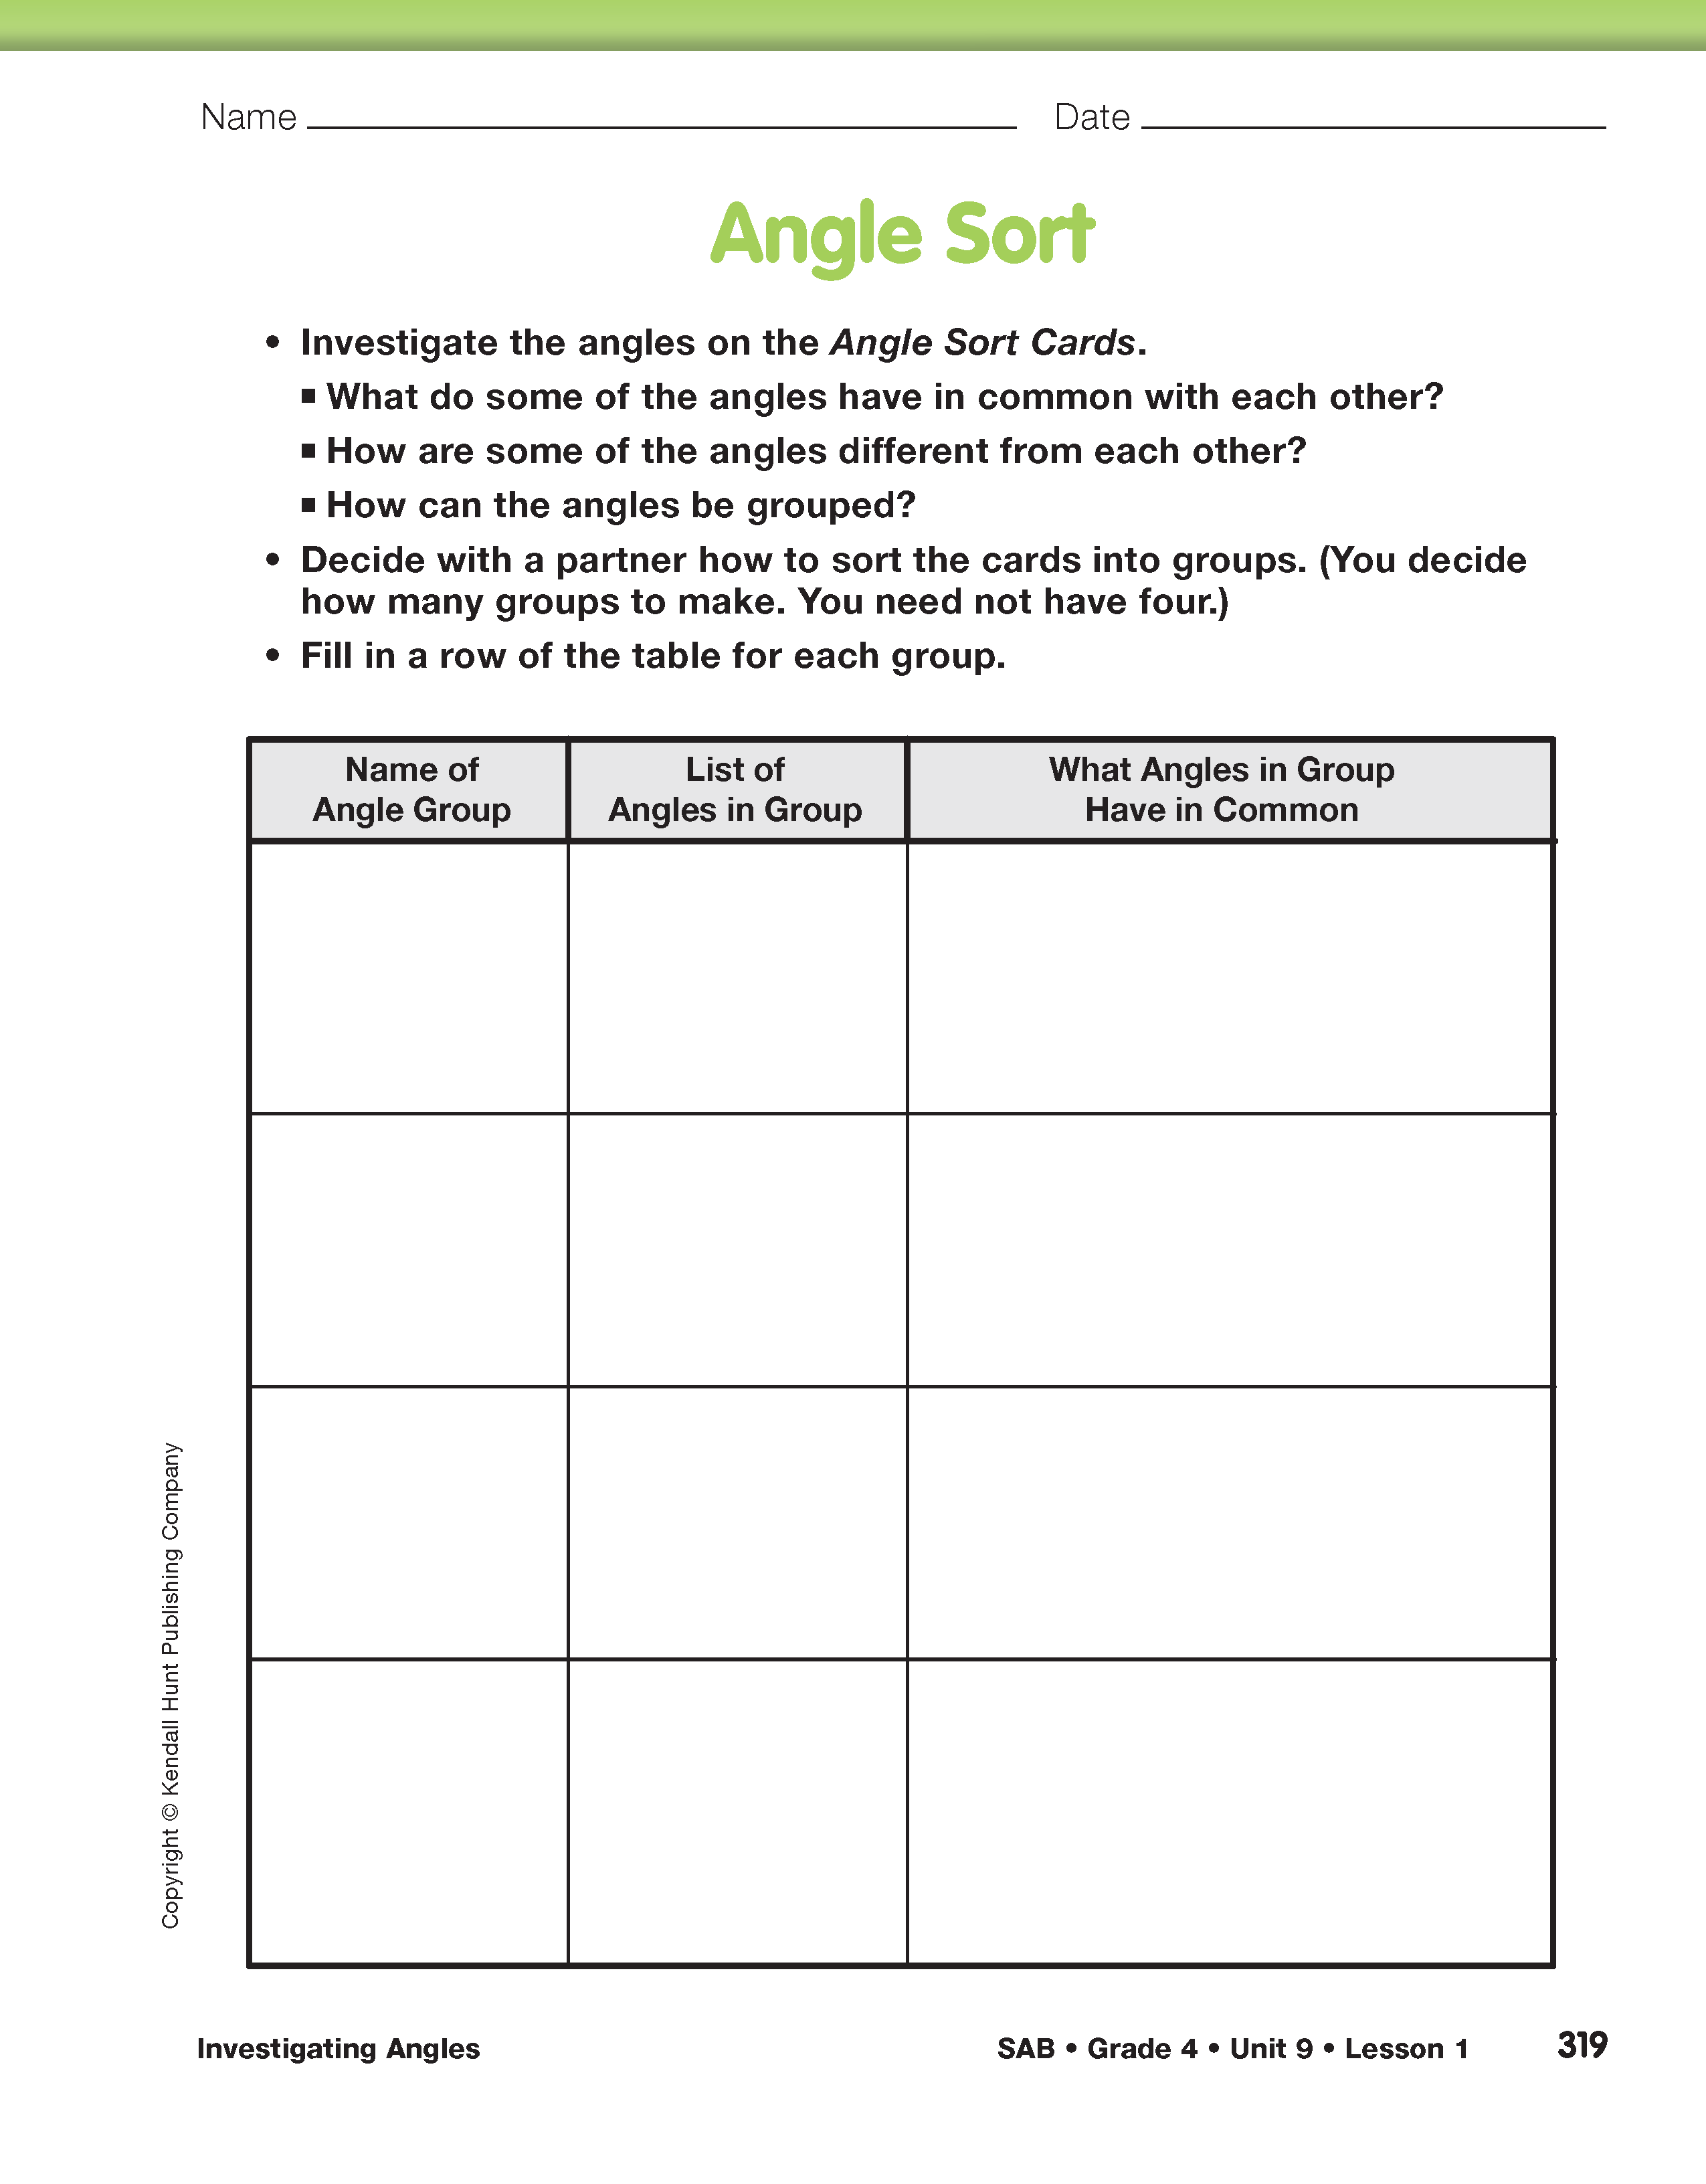
Part 3. Angle Sort

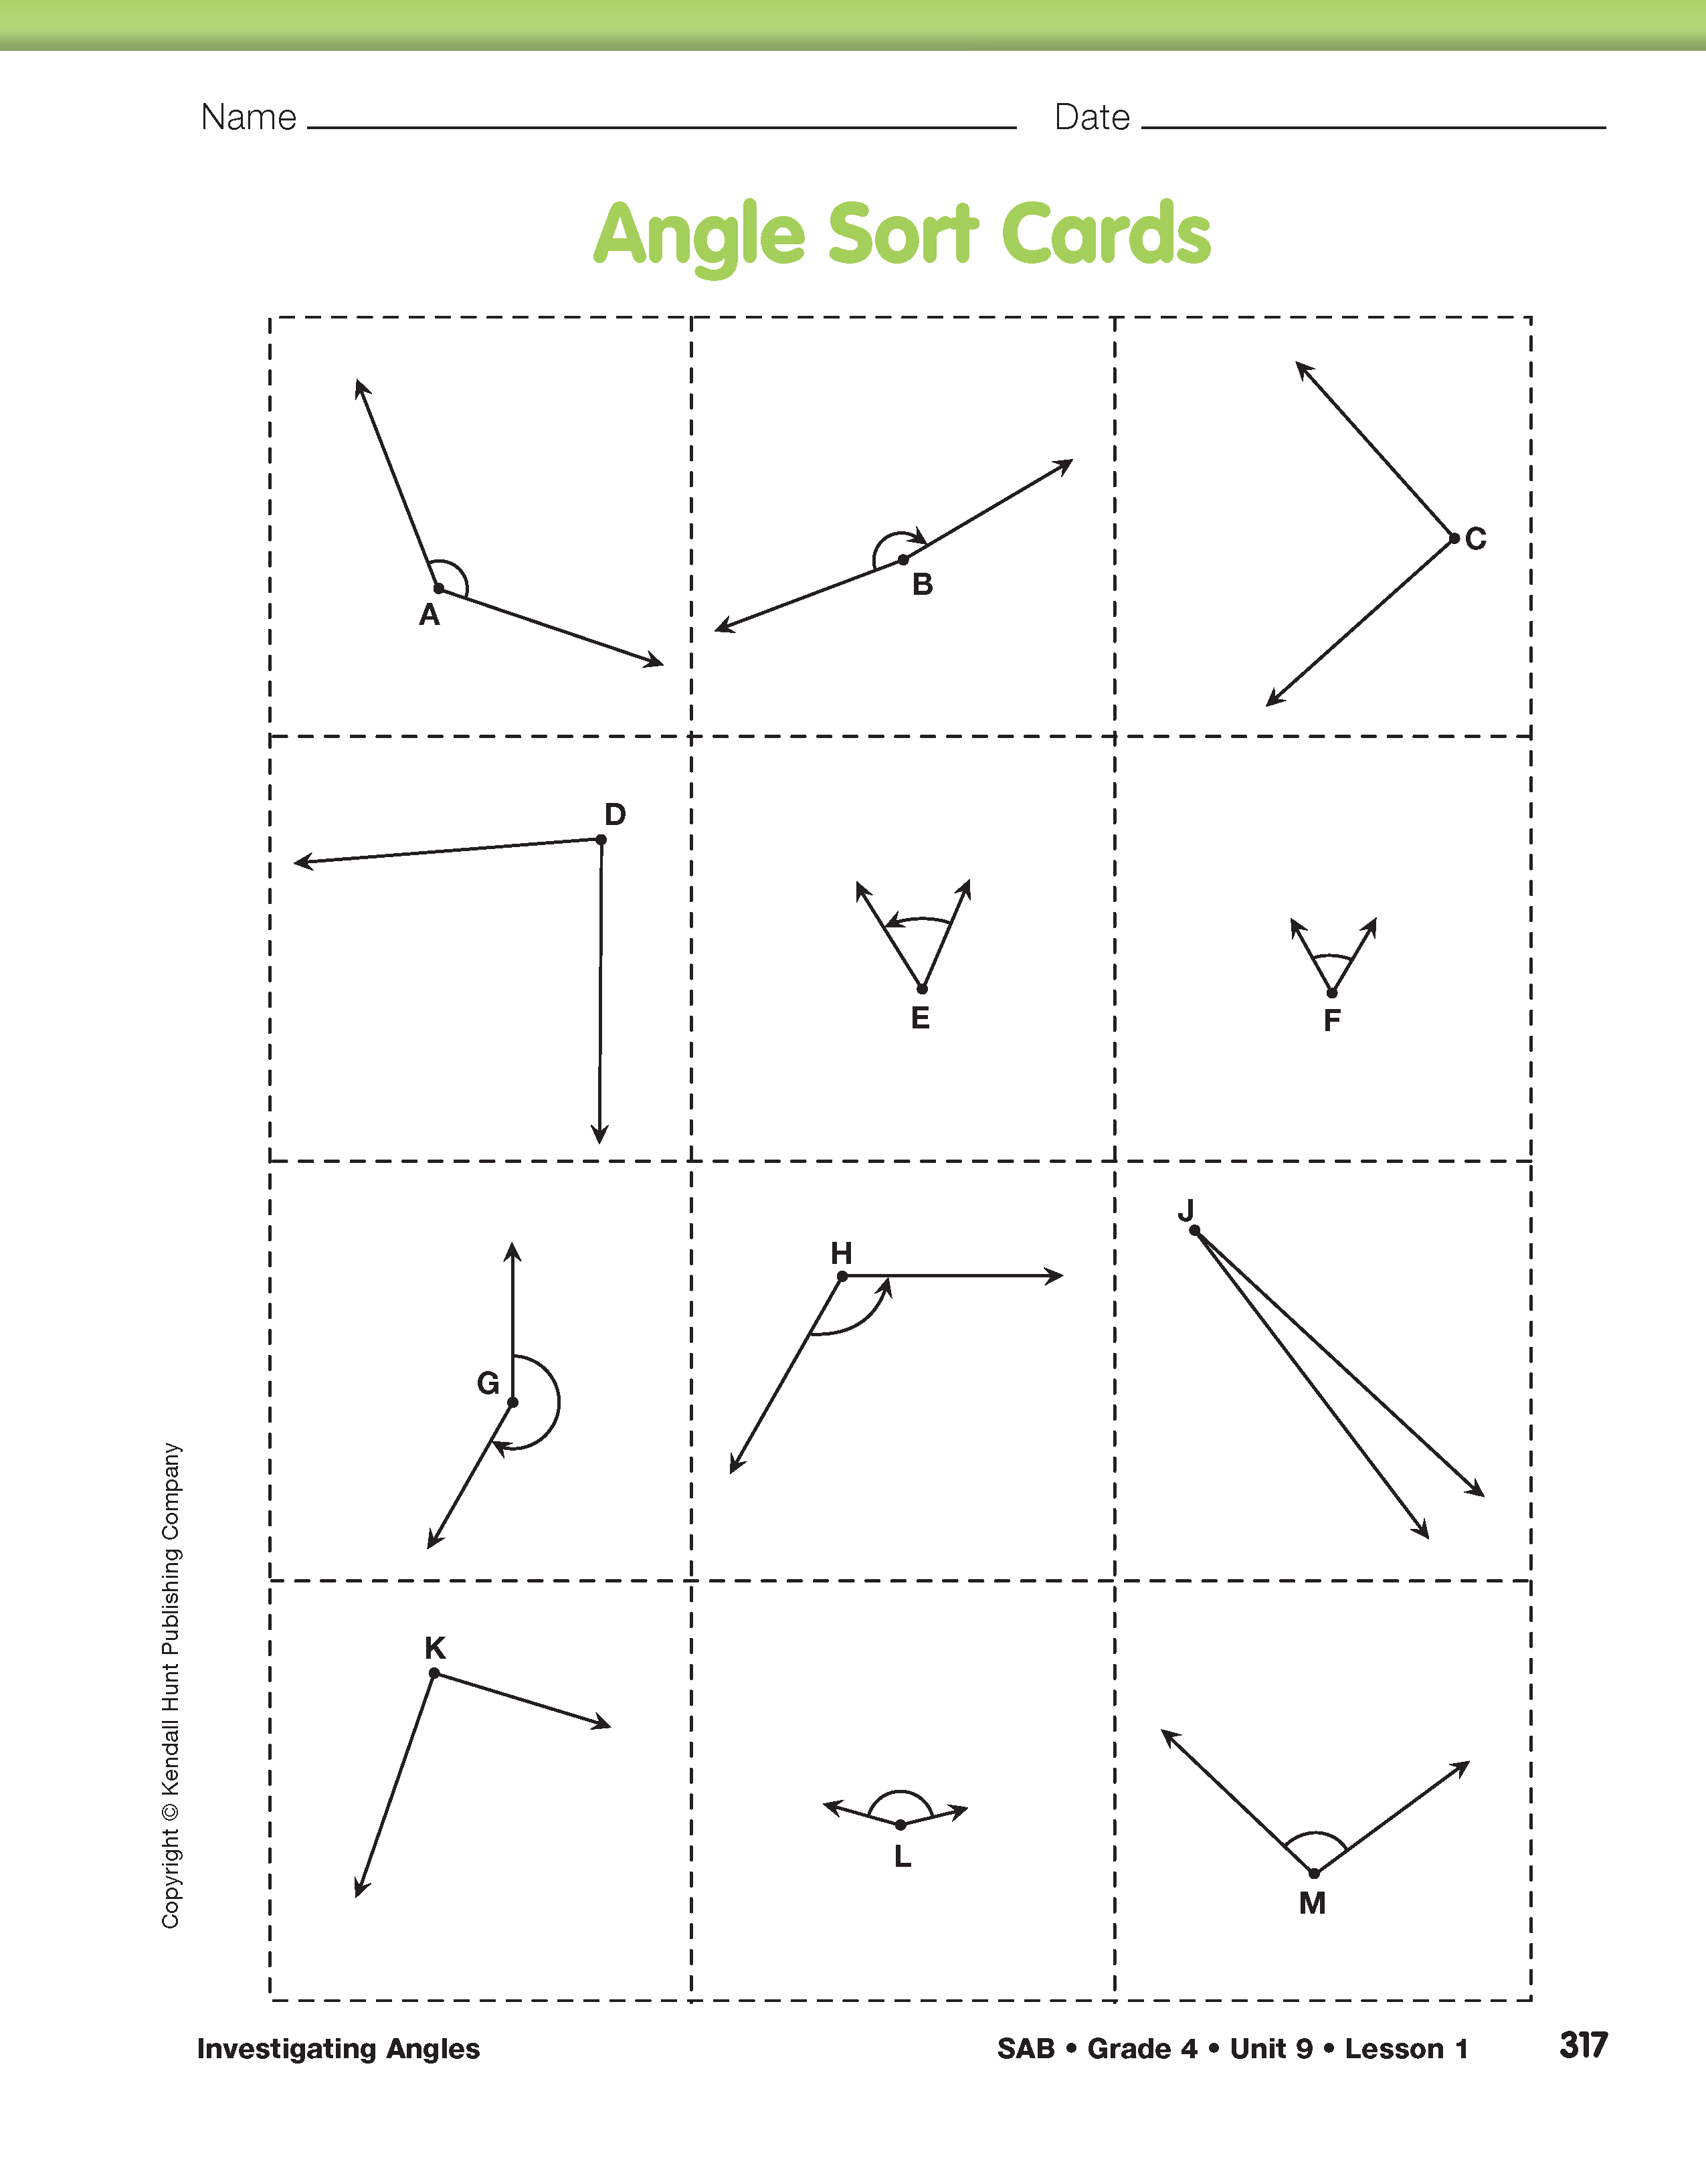
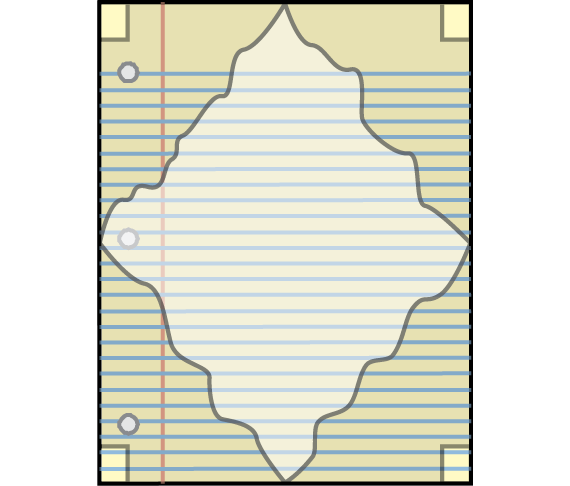
Compare and Categorize Angles. Students work in pairs for this activity. If you have not already done so, have students cut out the angle cards from the Angle Sort Cards page in the Student Activity Book. Next, ask students to tear off a corner of a piece of notebook paper. See the TIMS Tip and Figure 4.
Ask the whole class:
Explain that sometimes this type of angle is called a square angle, because it is the type of angle at each corner of a square. Most often it is called a right angle.
Ask students to lay out one set of cards so that they can look at all of the angles. Students work with partners to sort the angles into groups in whatever way makes sense to them. Have students record their angle groups in the table of the Angle Sort page in the Student Activity Book. Remind students that they do not need to come up with exactly four groups to fill in all the spaces in the table. They may decide to use fewer than (or more than) four categories.
Ask them to think about these questions as they work:
Some students may not immediately move toward comparisons to right angles as a way to organize the groups. Allow students to explore their own patterns and find shared traits before directing them to formalized angle categories and definitions.
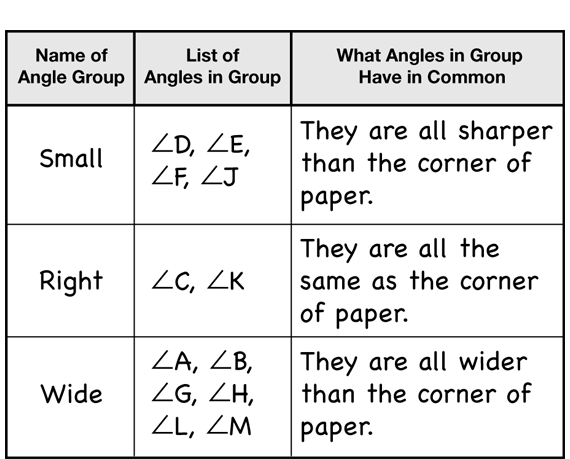
After student pairs have had time to record their work, ask three or four pairs to share their results with the class. Select at least one pair of students who sorted their angles based on comparison with a right angle (e.g., “Smaller Than Right Angles,” “Right Angles,” and “Bigger Than Right Angles”).
Without formally introducing the Geometry Word Chart (see Before the Lesson section), write one student's three descriptive category titles on the chart using the student's words. Also use a ruler to sketch one or two angles—or have students do so—as examples for each of the three descriptions. Later in the lesson, you will write the formal vocabulary words next to the descriptions and pictures, and discuss how the chart will be used over the course of the unit.
For students who may not have used this method to sort their angles, allow them an opportunity to try it now.
If no student explanations move in this direction, ask:
Using categories based on comparison to a right angle, students might sort as shown in Figure 5.
Class Discussion of Angle Sort. Several of the angle cards can also be used to prompt deeper discussion about angle size. Once again, angles are shown with different-sized rays to help students distinguish between angle size and size of the intersecting rays. Other angles present opportunities for discussing angle concepts. For example, ∠B is nearly a straight angle, but not quite.
Ask:
On a different card, ∠D is nearly a right angle, but close inspection shows it is actually a little less than 90°. Pay attention to whether or not students recognize the difference. If they do not, ask them to inspect the angle more closely using their paper-corner template as a guide.
Another special case is ∠G. The arrow of rotation on this angle shows that ∠G is actually greater than 180°. This type of angle is known as a reflex angle, or an angle between 180° and 360°. (Reflex angles will be presented in more detail in Lesson 3.)
Ask:
You may assign Questions 5–13 in the Homework section of the Student Guide.