


Describing and Analyzing Shapes
Est. Class Sessions: 1–2Summarizing the Lesson
After students have completed Check-In: Question 5 in the Student Activity Book, have the class complete a class shape chart for rhombuses.
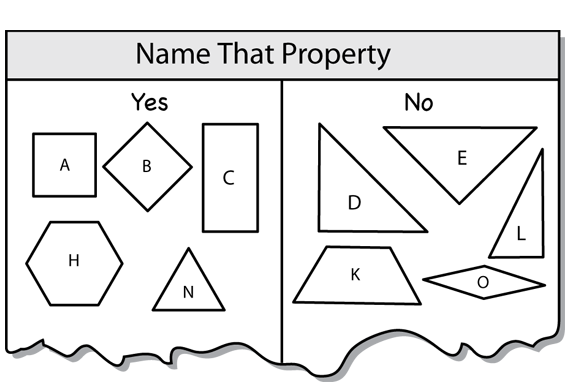
Play Name That Property using the Power Polygons™. Make a two-column table. Label the columns “Yes” and “No.”
Tell students:
Figure 10 shows a possible table for the property, “All angles are equal.” If there is not a single shape available that matches the rule, students can make a shape with two or more polygons. Have students challenge one another. Possible rules include:
- Has a right angle
- Has an obtuse angle
- Is a quadrilateral
- All sides are equal
- All sides and all angles are equal
- Has at least one pair of parallel sides
Student Guide:
Student Activity Book:
Master: