


Measuring and Estimating Angles
Est. Class Sessions: 1–2Developing the Lesson
Part 1. Estimating Angles
Sort Angles. Display ∠F and ∠B from the Angle Sort Cards pages of the Student Activity Book. Ask students to describe the size of each angle. After a few minutes, ask students to tell their neighbor how they chose their estimate. Ask a few students to share their estimation strategies with the class. Look for a student who is using the 90° square corner as a benchmark to estimate the size of each angle.
Ask:
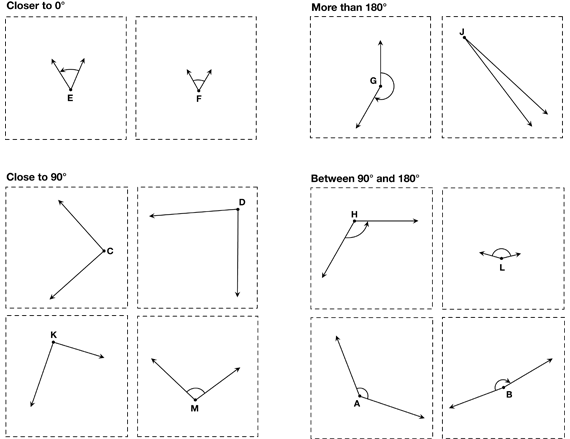
Ask students to take out the Angle Sort Cards they used in Lesson 1. Ask them to find groups of angles that will help them describe the approximate size of an angle. See Figure 1 for one possible sort. Note that ∠J belongs in the “More than 180°” category if we are considering reflex ∠J. Ask students to describe to their partners how they sorted the Angle Sort Cards and discuss a few different sorts with the whole class.
Order Angles by Size. Display and ask students to take out ∠D, ∠K, ∠C, and ∠M from the Angle Sort Cards. Ask students to put these angles in order from smallest to largest.
Ask:
Describe Angle Size. Ask student pairs to work together to describe the approximate size of each angle on the Angle Sort Cards. Students record their descriptions on the back of each card.
While they are working, circulate and ask students to explain their estimates; for example:
After students have written descriptions, ask them to sort the angles by type of angle: acute, obtuse, right, and reflex.
Ask:
Add to the Geometry Word Chart. Lead the class to refine their definitions of angle types by adding this angle measure information to the angle type descriptions on the Geometry Word Chart you created in Lessons 1 and 3.
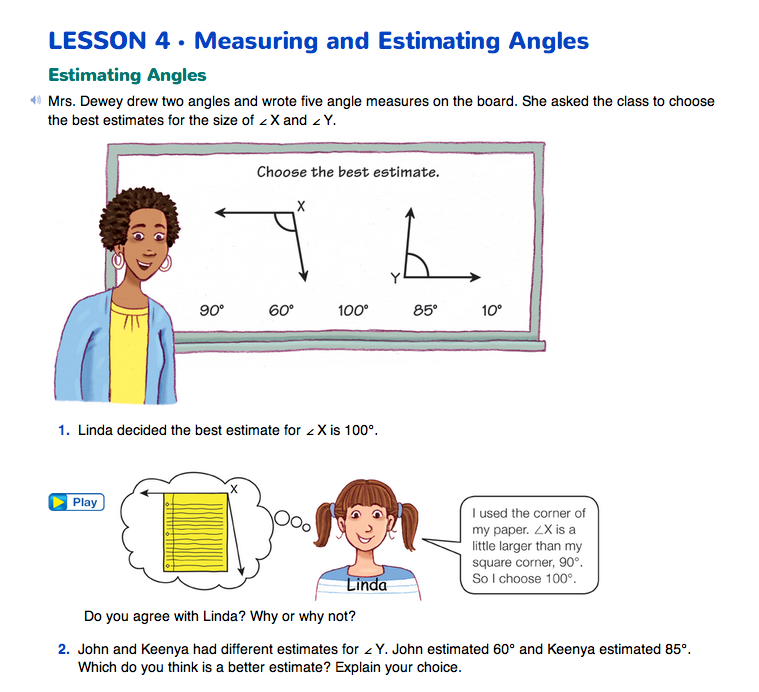
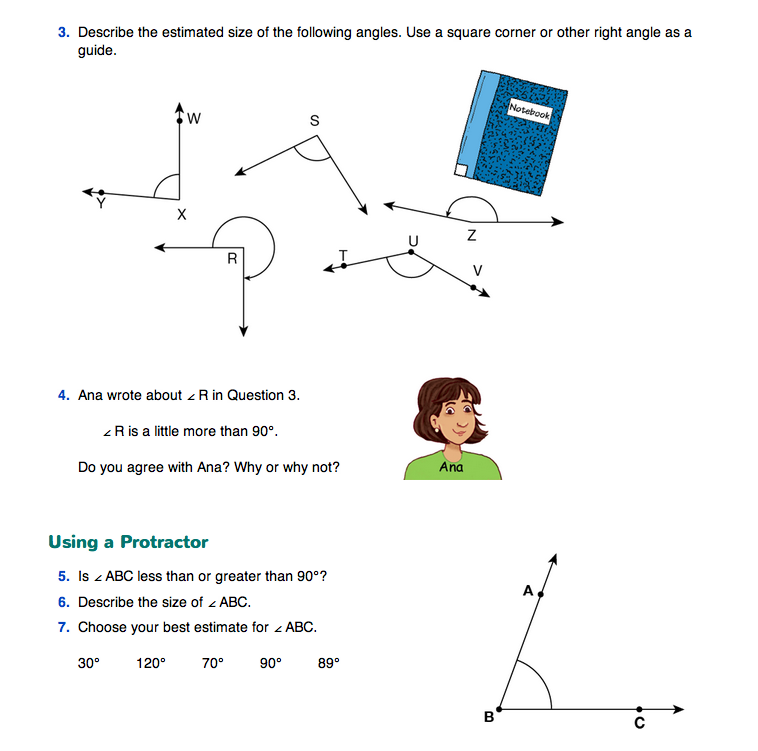
Introduce Mrs. Dewey's problem in the vignette on the Measuring and Estimating Angles pages in the Student Guide. Ask student pairs to answer and discuss Questions 1–4. Circulate and listen to students describe the size of an angle and ask students to justify those descriptions using the benchmarks. Students can put their Angle Sort Cards in an envelope for now. They will use them again in the next part of the lesson.
Assign the Homework section in the Student Guide after Part 1.