


Investigating Angles
Est. Class Sessions: 2Summarizing the Lesson
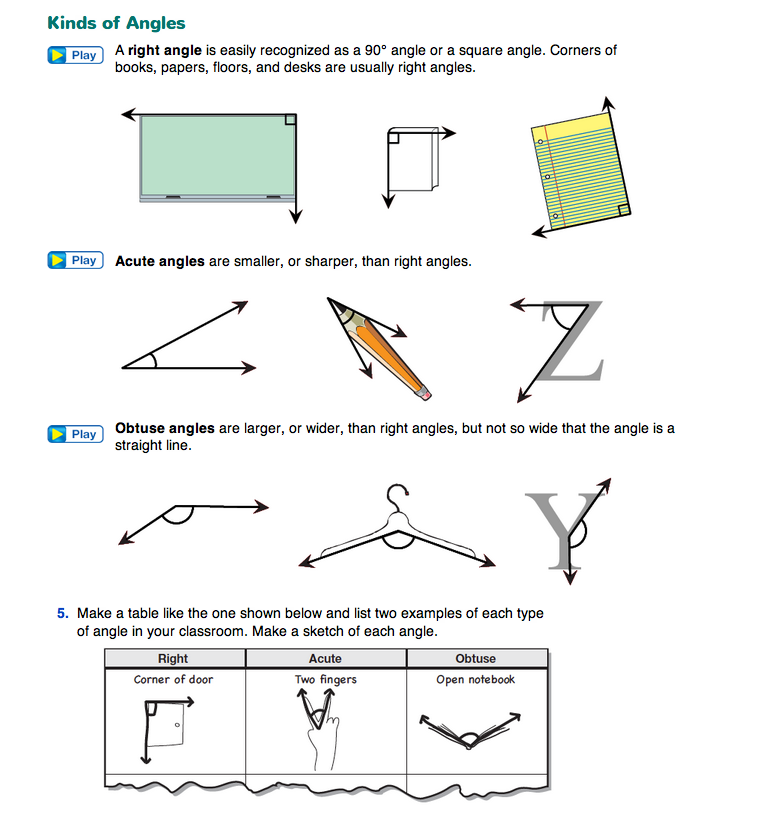
Read the Kinds of Angles section of the Investigating Angles pages in the Student Guide with the class. In this section, the terms right angle, acute angle, and obtuse angle are formally introduced to match the categories discussed in Part 3 of the lesson.
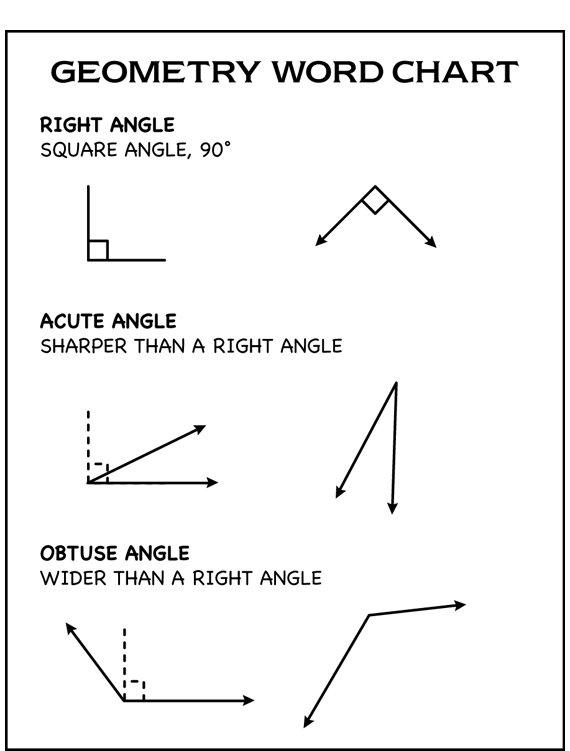
Use this opportunity to formally introduce the Geometry Word Chart by writing these formal terms on the chart next to the matching descriptions and pictures. Tell students that the class will be exploring new concepts and showing new words on this chart over the course of the unit. Charting the words and examples will help students learn the concepts and remember the mathematical vocabulary. Point to the words that are already on the chart consistently whenever they come up in classroom discussions. The repeated connections among written words, spoken words, formal and informal terms, pictures, and classroom context will help students develop fluency with the new geometric vocabulary presented in the unit. An example of how the word chart might look at this point is in Figure 6.
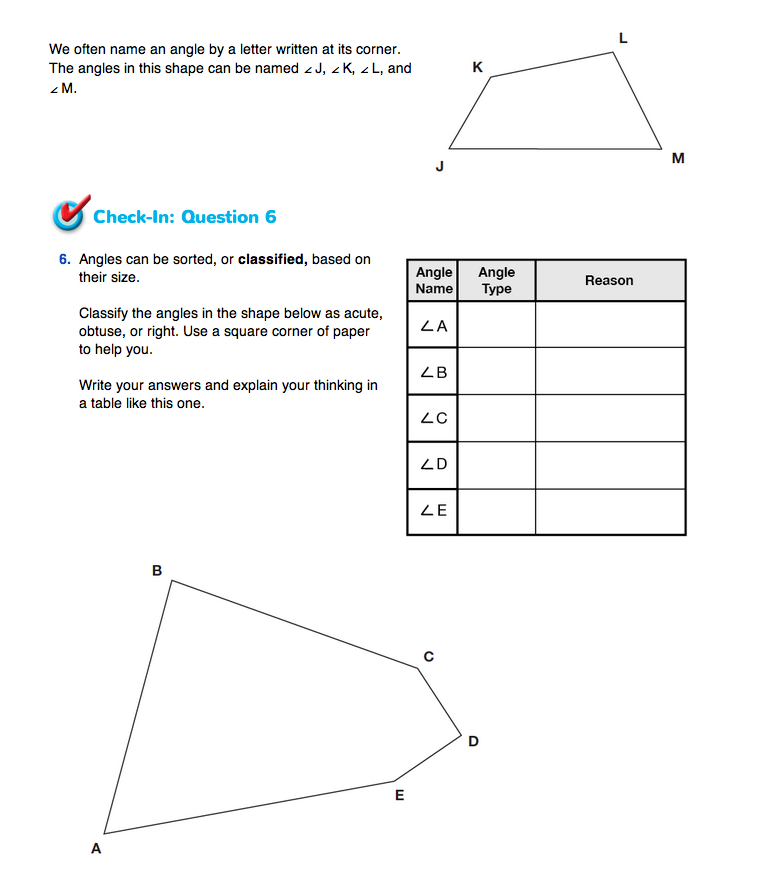
In Question 5, students work individually to make a table showing examples of each of these three types of angles. In Question 6, students again use the corner of a piece of paper to formally classify the angles inside of a shape as right, acute, or obtuse. Explain that classifying angles means sorting them into formal categories. Students should explain their reasoning as a comparison to the square corner of paper. Close the lesson by having several students share their examples from Question 5 with the whole class.