Describing and Analyzing Shapes
Est. Class Sessions: 1–2Developing the Lesson
Part 1. Use Properties to Play Shape Finder
Introduce Shape Finder. Begin the lesson by playing Shape Finder with Power Polygons™. Give each pair of students 2 sets of Power Polygons™ and ask them to have scratch paper and a pencil ready.
Display the Shape Finder Chart you prepared and tell students the rules of the game:
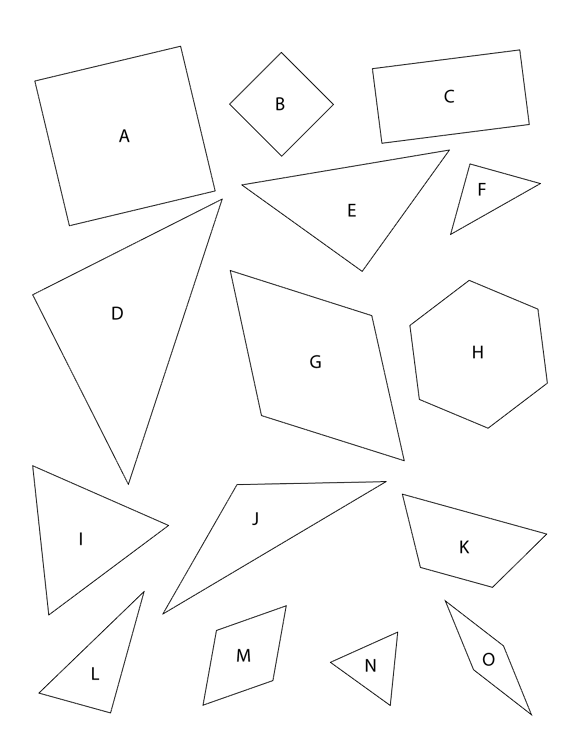
Figure 3 shows the Power Polygons™ labeled with letters. Use the figure to check students' responses.
Have students work in pairs to find at least one shape that has each property and to prepare explanations for their choices. Encourage students to use sides and angles of other shapes for comparison. They can also trace the shapes, so that they can rotate or fold them as part of their explanations.
For each property, have volunteers demonstrate for the class how they know their shapes have that property. The table in Figure 4 provides a list of properties, examples of shapes, and lists one possible explanation for identifying each property. Others are possible. It is not necessary for the class to find every shape that has a given property. However, continue the discussion long enough to find different shapes with the same property. For example, all of the following shapes in the Power Polygons™ set have the property all angles are equal: the rectangle (C), square (A, B), hexagon (H), and equilateral triangles (I, N).
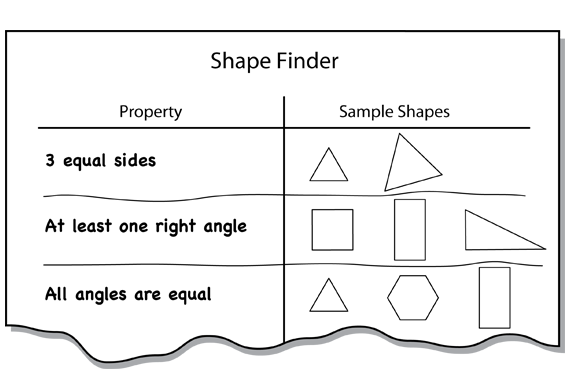
As the class discusses each property, build a Shape Finder chart of the properties with two or three examples of the shapes sketched or traced on the chart. This will compile a record of the properties and corresponding shapes that students can use in the remaining lessons of the unit. See Figure 5 for the beginning of a sample chart.
Describe Sides and Angles. After you have completed the Shape Finder game, introduce students to the terms “opposite sides” and “opposite angles.” This activity will help develop language for describing and analyzing shapes.
Have students touch the appropriate parts of the polygons as you ask:


