


Workshop: Shapes and Properties
Est. Class Sessions: 1–2Developing the Lesson
Part 2. Workshop
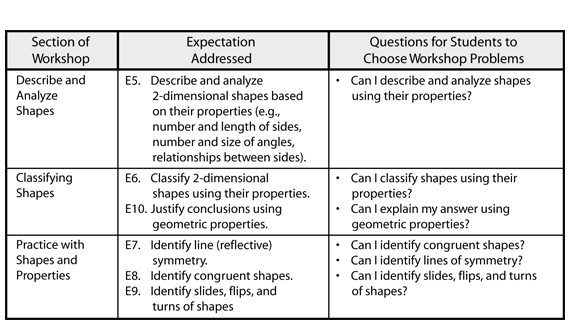
Set Up the Workshop. The problems and menus for this workshop are on the Workshop: Shapes and Properties pages in the Student Guide and the Classifying Shapes and Practice with Shapes and Properties pages in the Student Activity Book. The workshop is divided into three sections that address Expectations as shown in Figure 1. Minis of the Workshop pages not shown here are in the Answer Key.

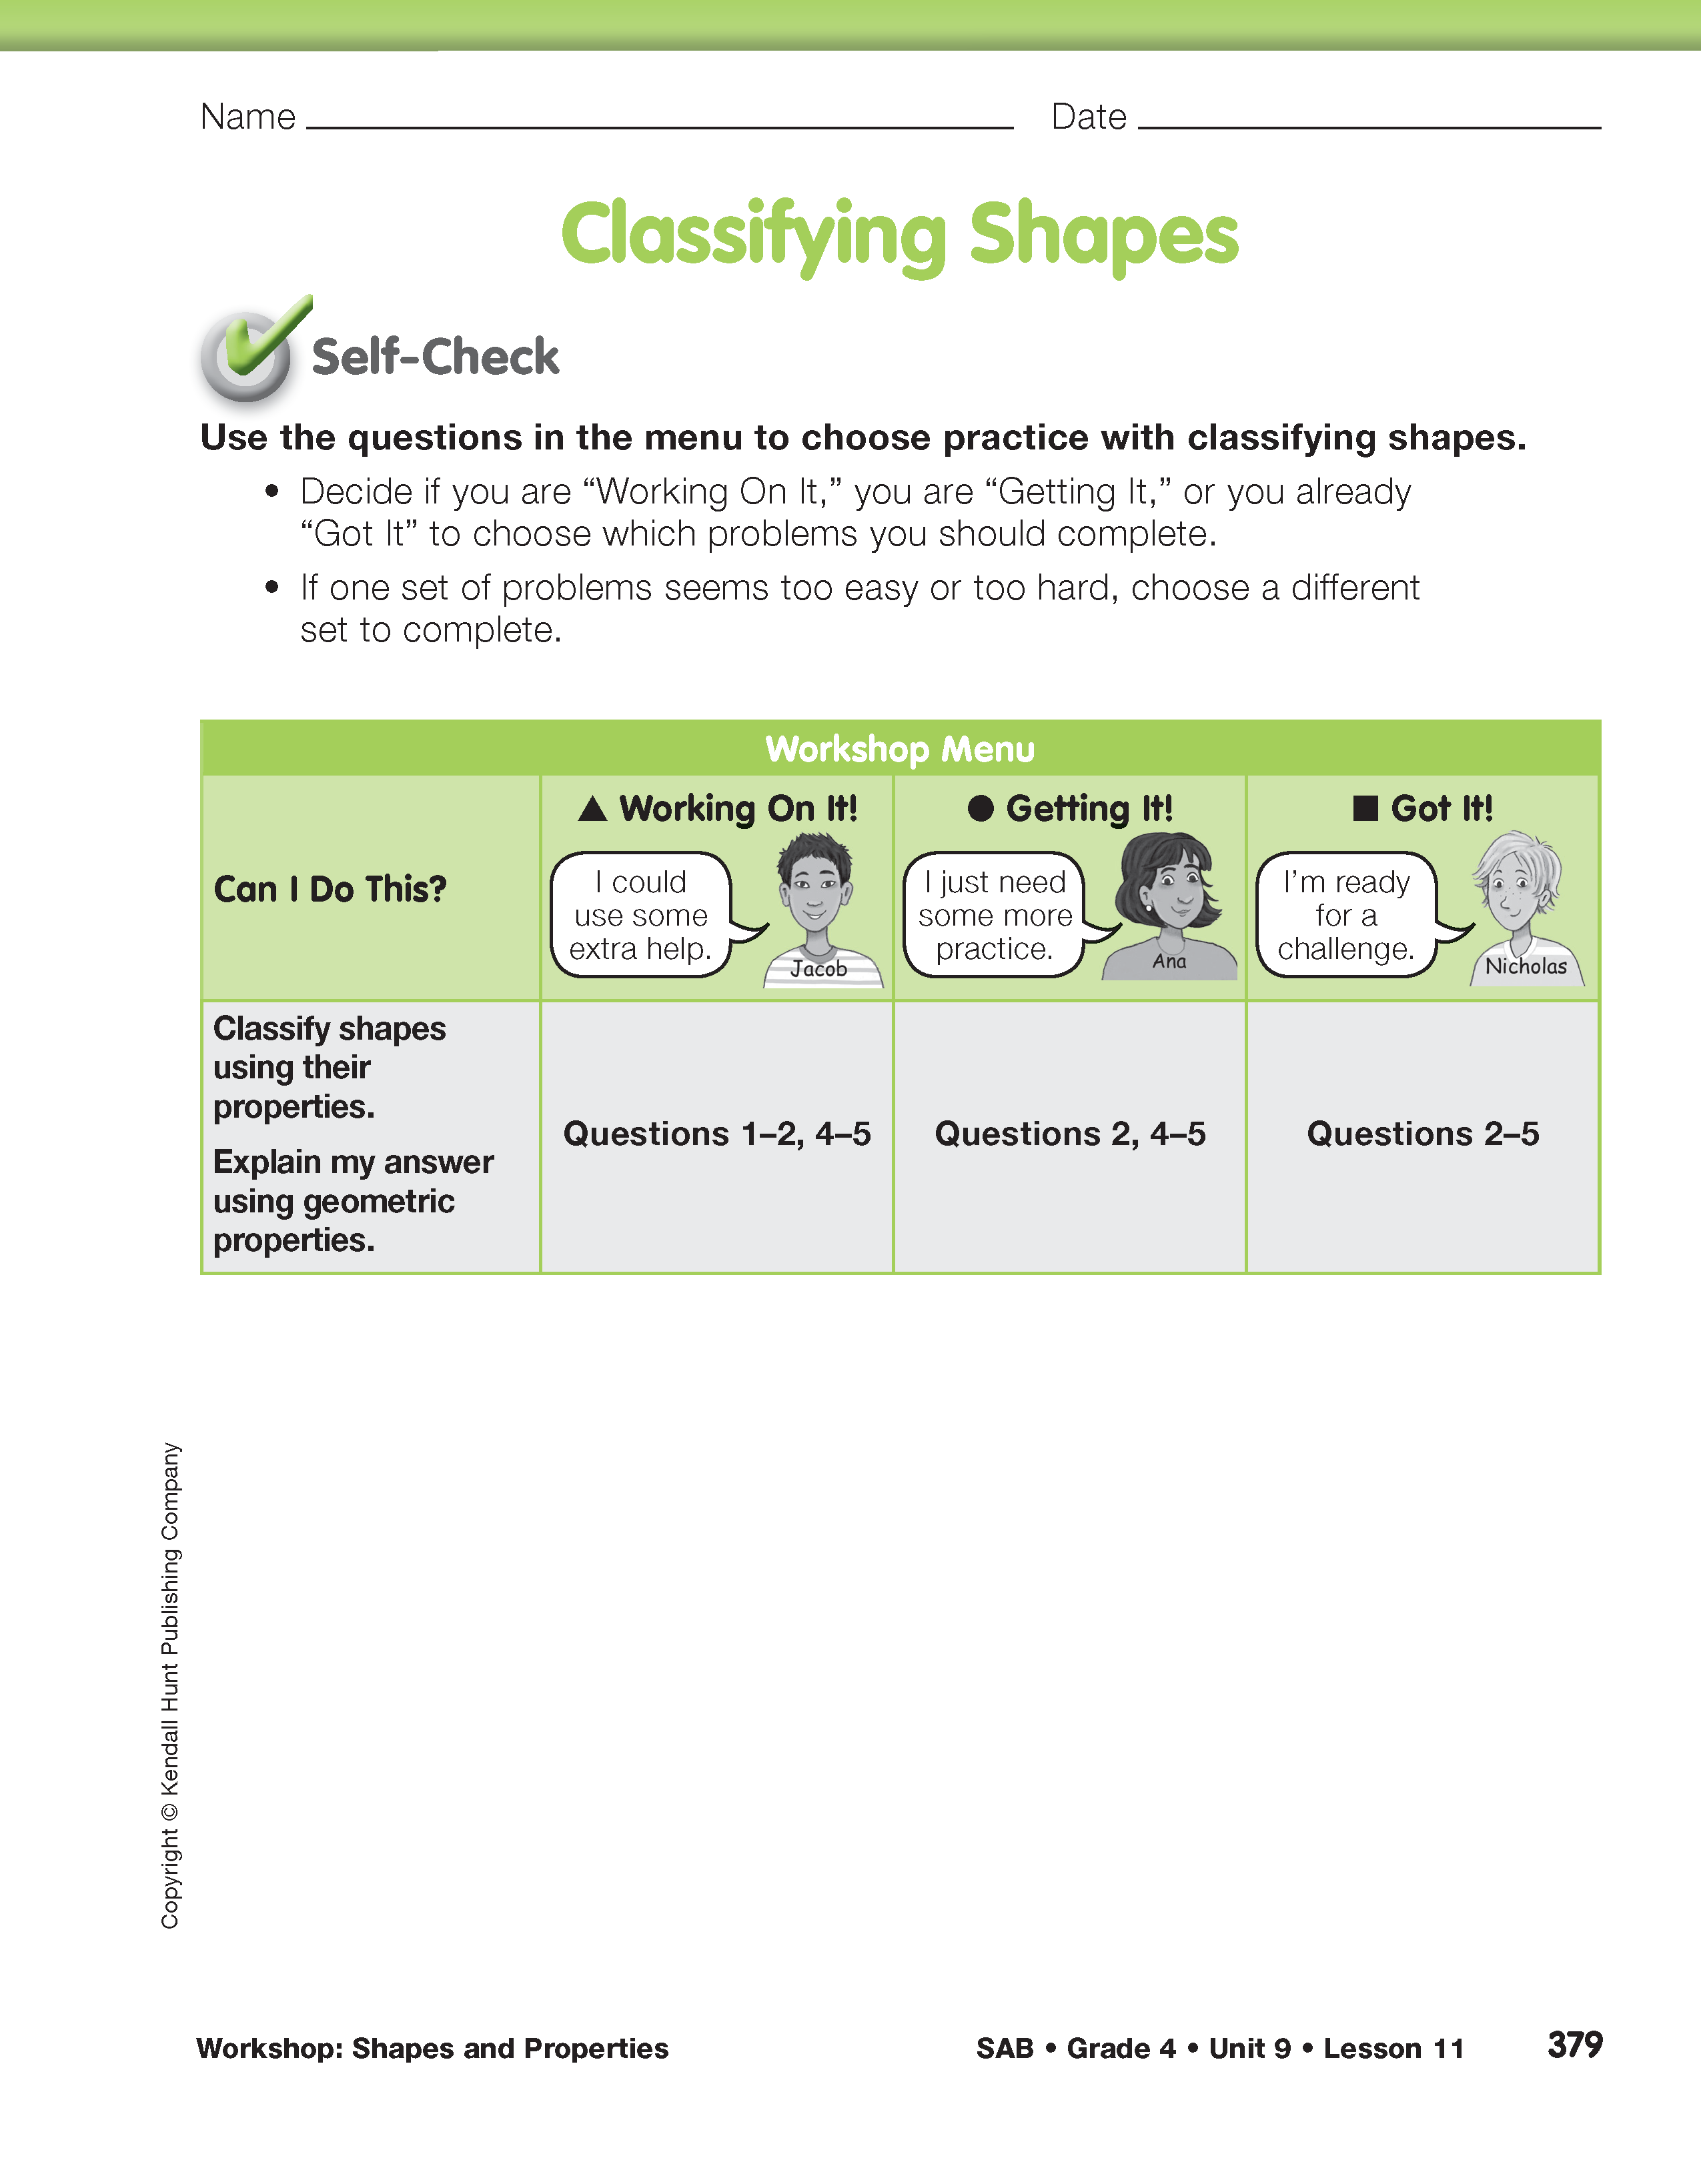
Choose Targeted Practice. Students begin each section by first answering the Self-Check Questions, either individually or with partners. These questions serve two purposes. First, they clearly communicate the content of the related targeted practice to students. Second, they help students quickly self-assess their progress with the Expectations to help them choose which problems to work on in the Workshop.

After students complete the Self-Check Questions in a section, discuss each of the questions with the whole class. Ask students to share their solutions and explain their reasoning. Facilitate a class discussion of students' solutions.
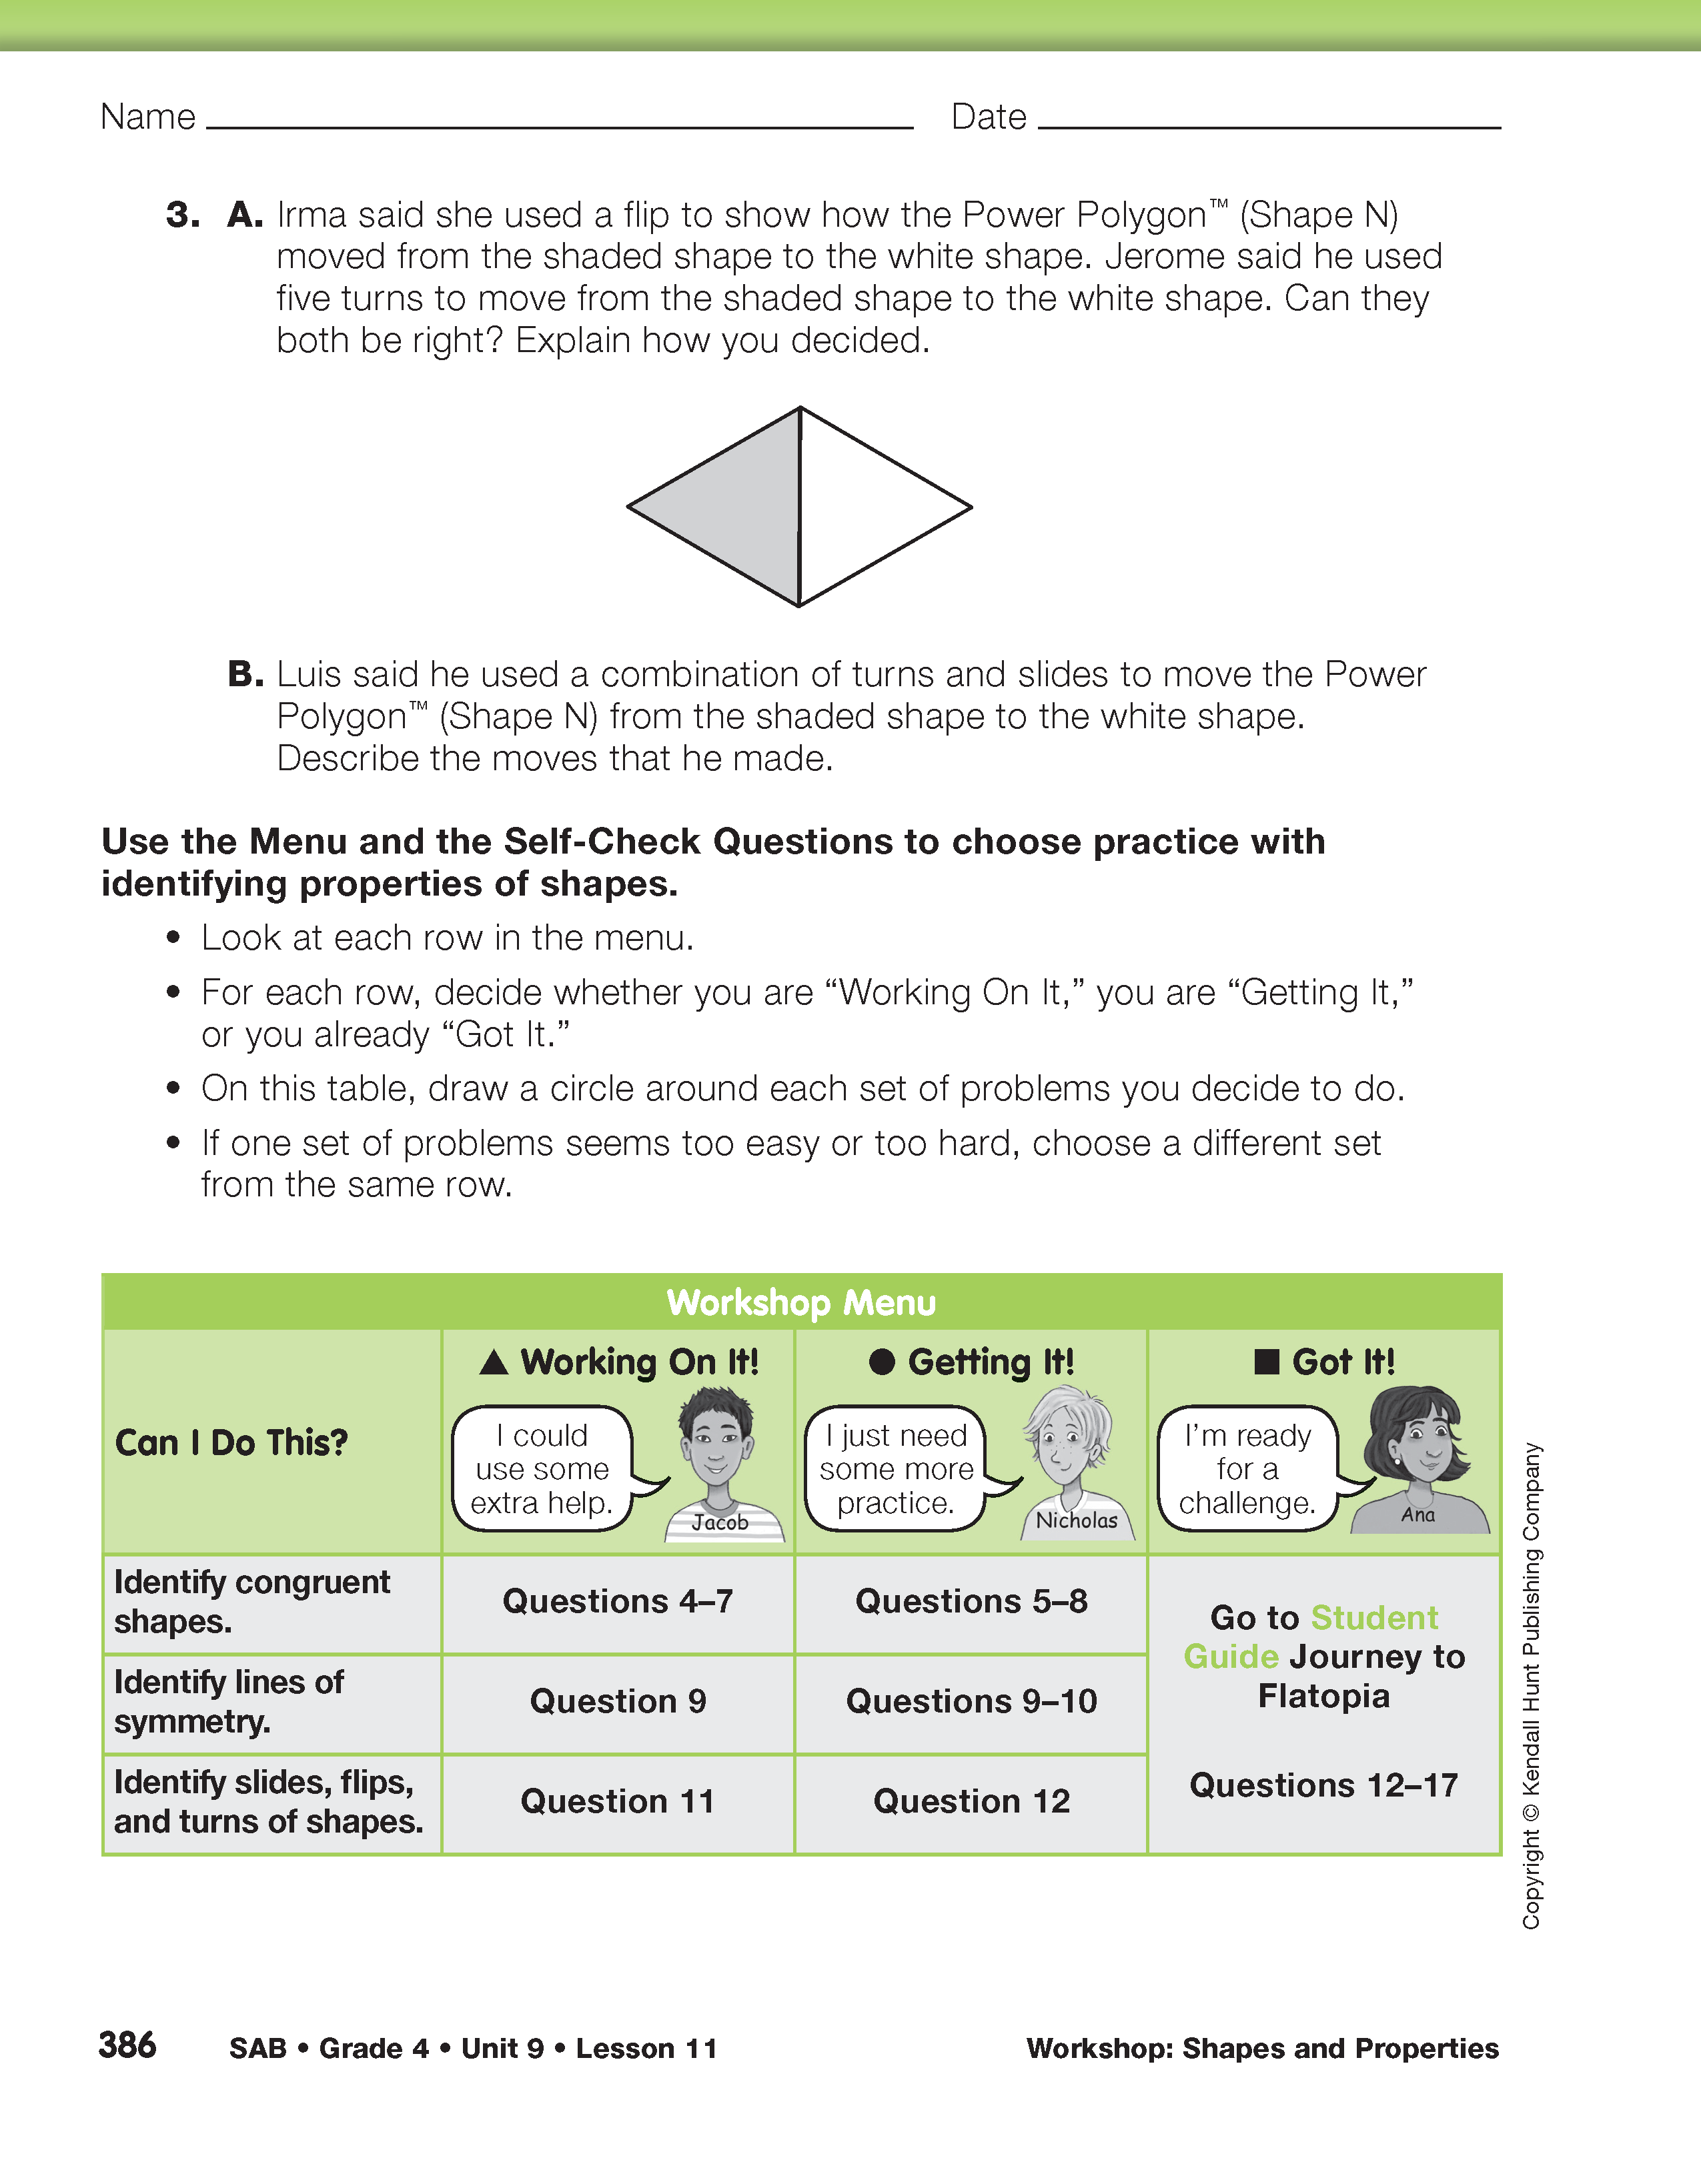
Next, have students think about each question in the left-hand column of the menu following the Self-Check Questions. Ask students to review their work on the Self-Check Questions to decide which problems to choose from the following groups.
- Students who are “working on it” and need some extra help should circle the problem set marked with a triangle (
 ). These problems provide scaffolded support for developing the essential underlying concepts as well as some opportunities for practice.
 - Students who are “getting it” and just need more practice should circle the problem set marked with a circle (
 ). These problems provide opportunities to practice with some concept reinforcement and some opportunities for extension.
 - Students who have “got it” and are ready for a challenge or extension should circle problems marked with a square (
 ). These problems provide some practice and then move into opportunities for extension.
Note that students' self-assessment of their own abilities may vary between rows in a menu or between menus. For example, a student might circle the “![]() ” questions in one row and the “
” questions in one row and the “![]() ” or “
” or “![]() ” questions in another row or in a subsequent menu. A student's comfort and ability may vary by Expectation, and the workshop allows each student to choose problems flexibly based on what type of practice he or she needs for each “Can I Do This?” question.
” questions in another row or in a subsequent menu. A student's comfort and ability may vary by Expectation, and the workshop allows each student to choose problems flexibly based on what type of practice he or she needs for each “Can I Do This?” question.
Check students' choices to see how well they match your own assessment of their progress on the related Expectations. Help students make selections that will provide the kind of practice they need.
Once students select the questions to complete in a section of the Workshop, match groups of students who have chosen similar sets of problems from the menu. Have students work together with a partner or in a small group to solve the problems they chose.
After the first few groups of students have completed their selected problems, but before all students have completed their problems, introduce the next section to the whole class. See the Meeting Individual Needs box. Again, have students try the Self-Check Questions, discuss solutions, and choose problems from the menu with your guidance. Follow this pattern through each section of the Workshop.

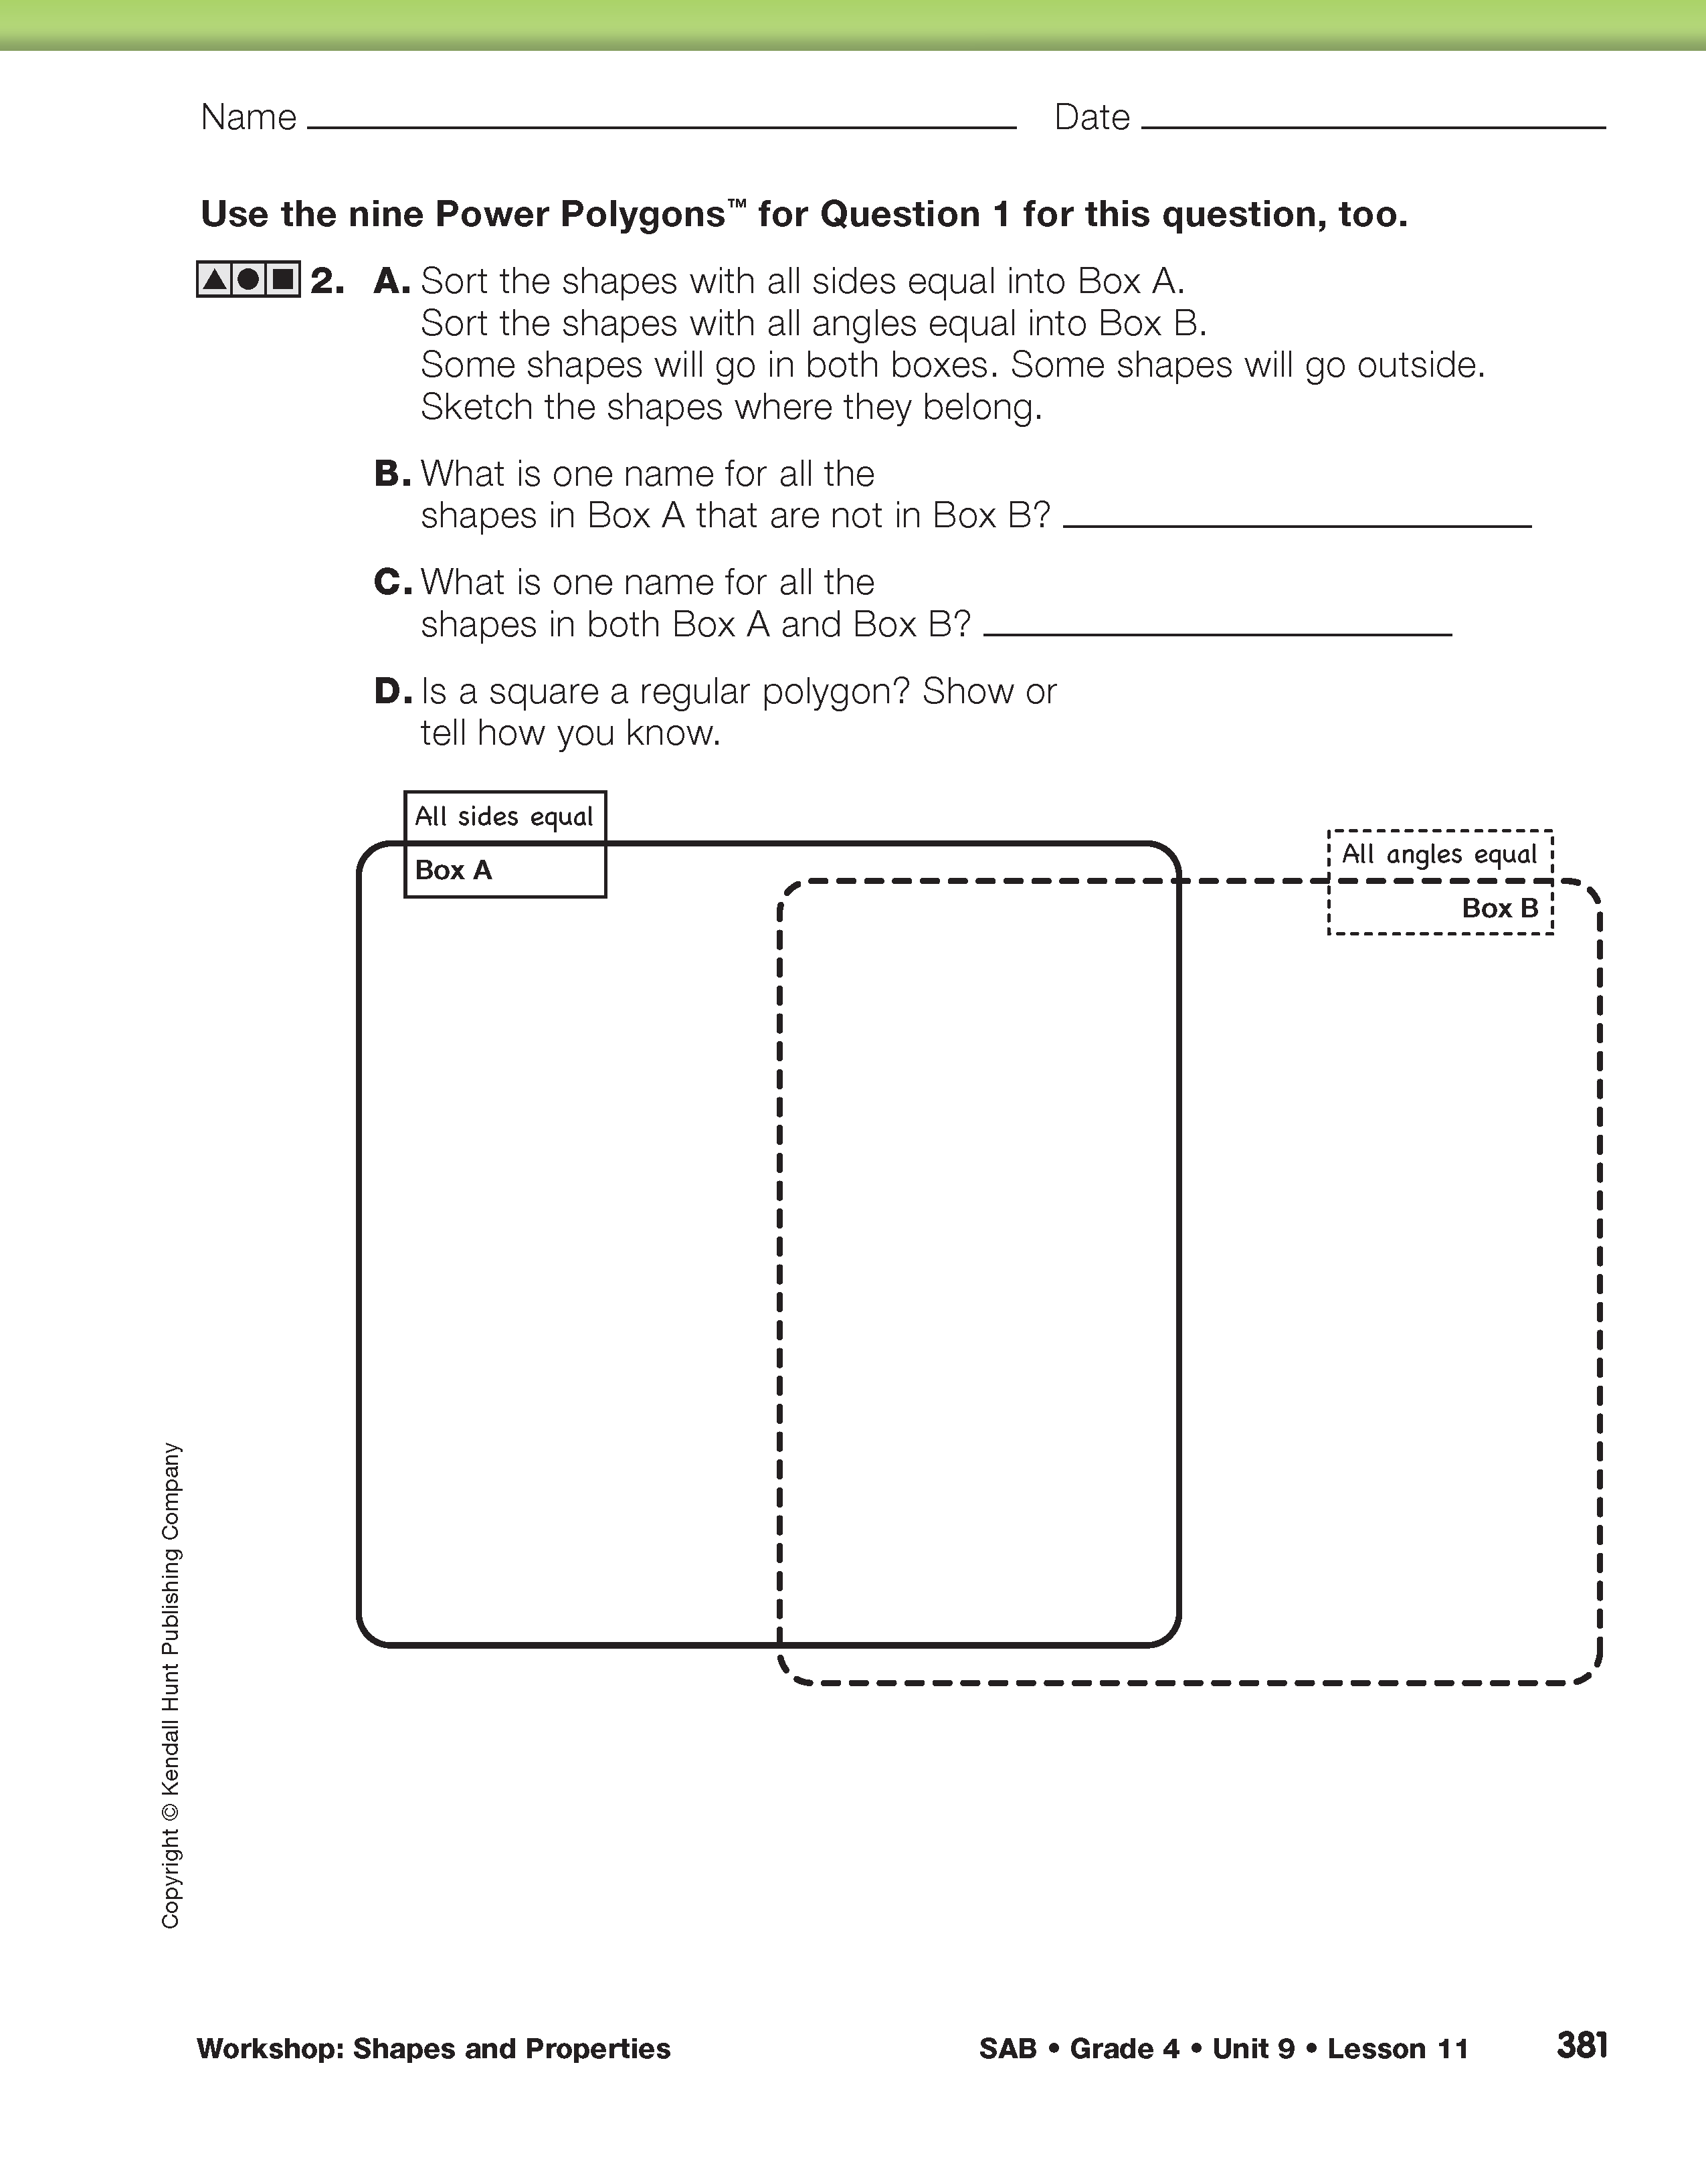
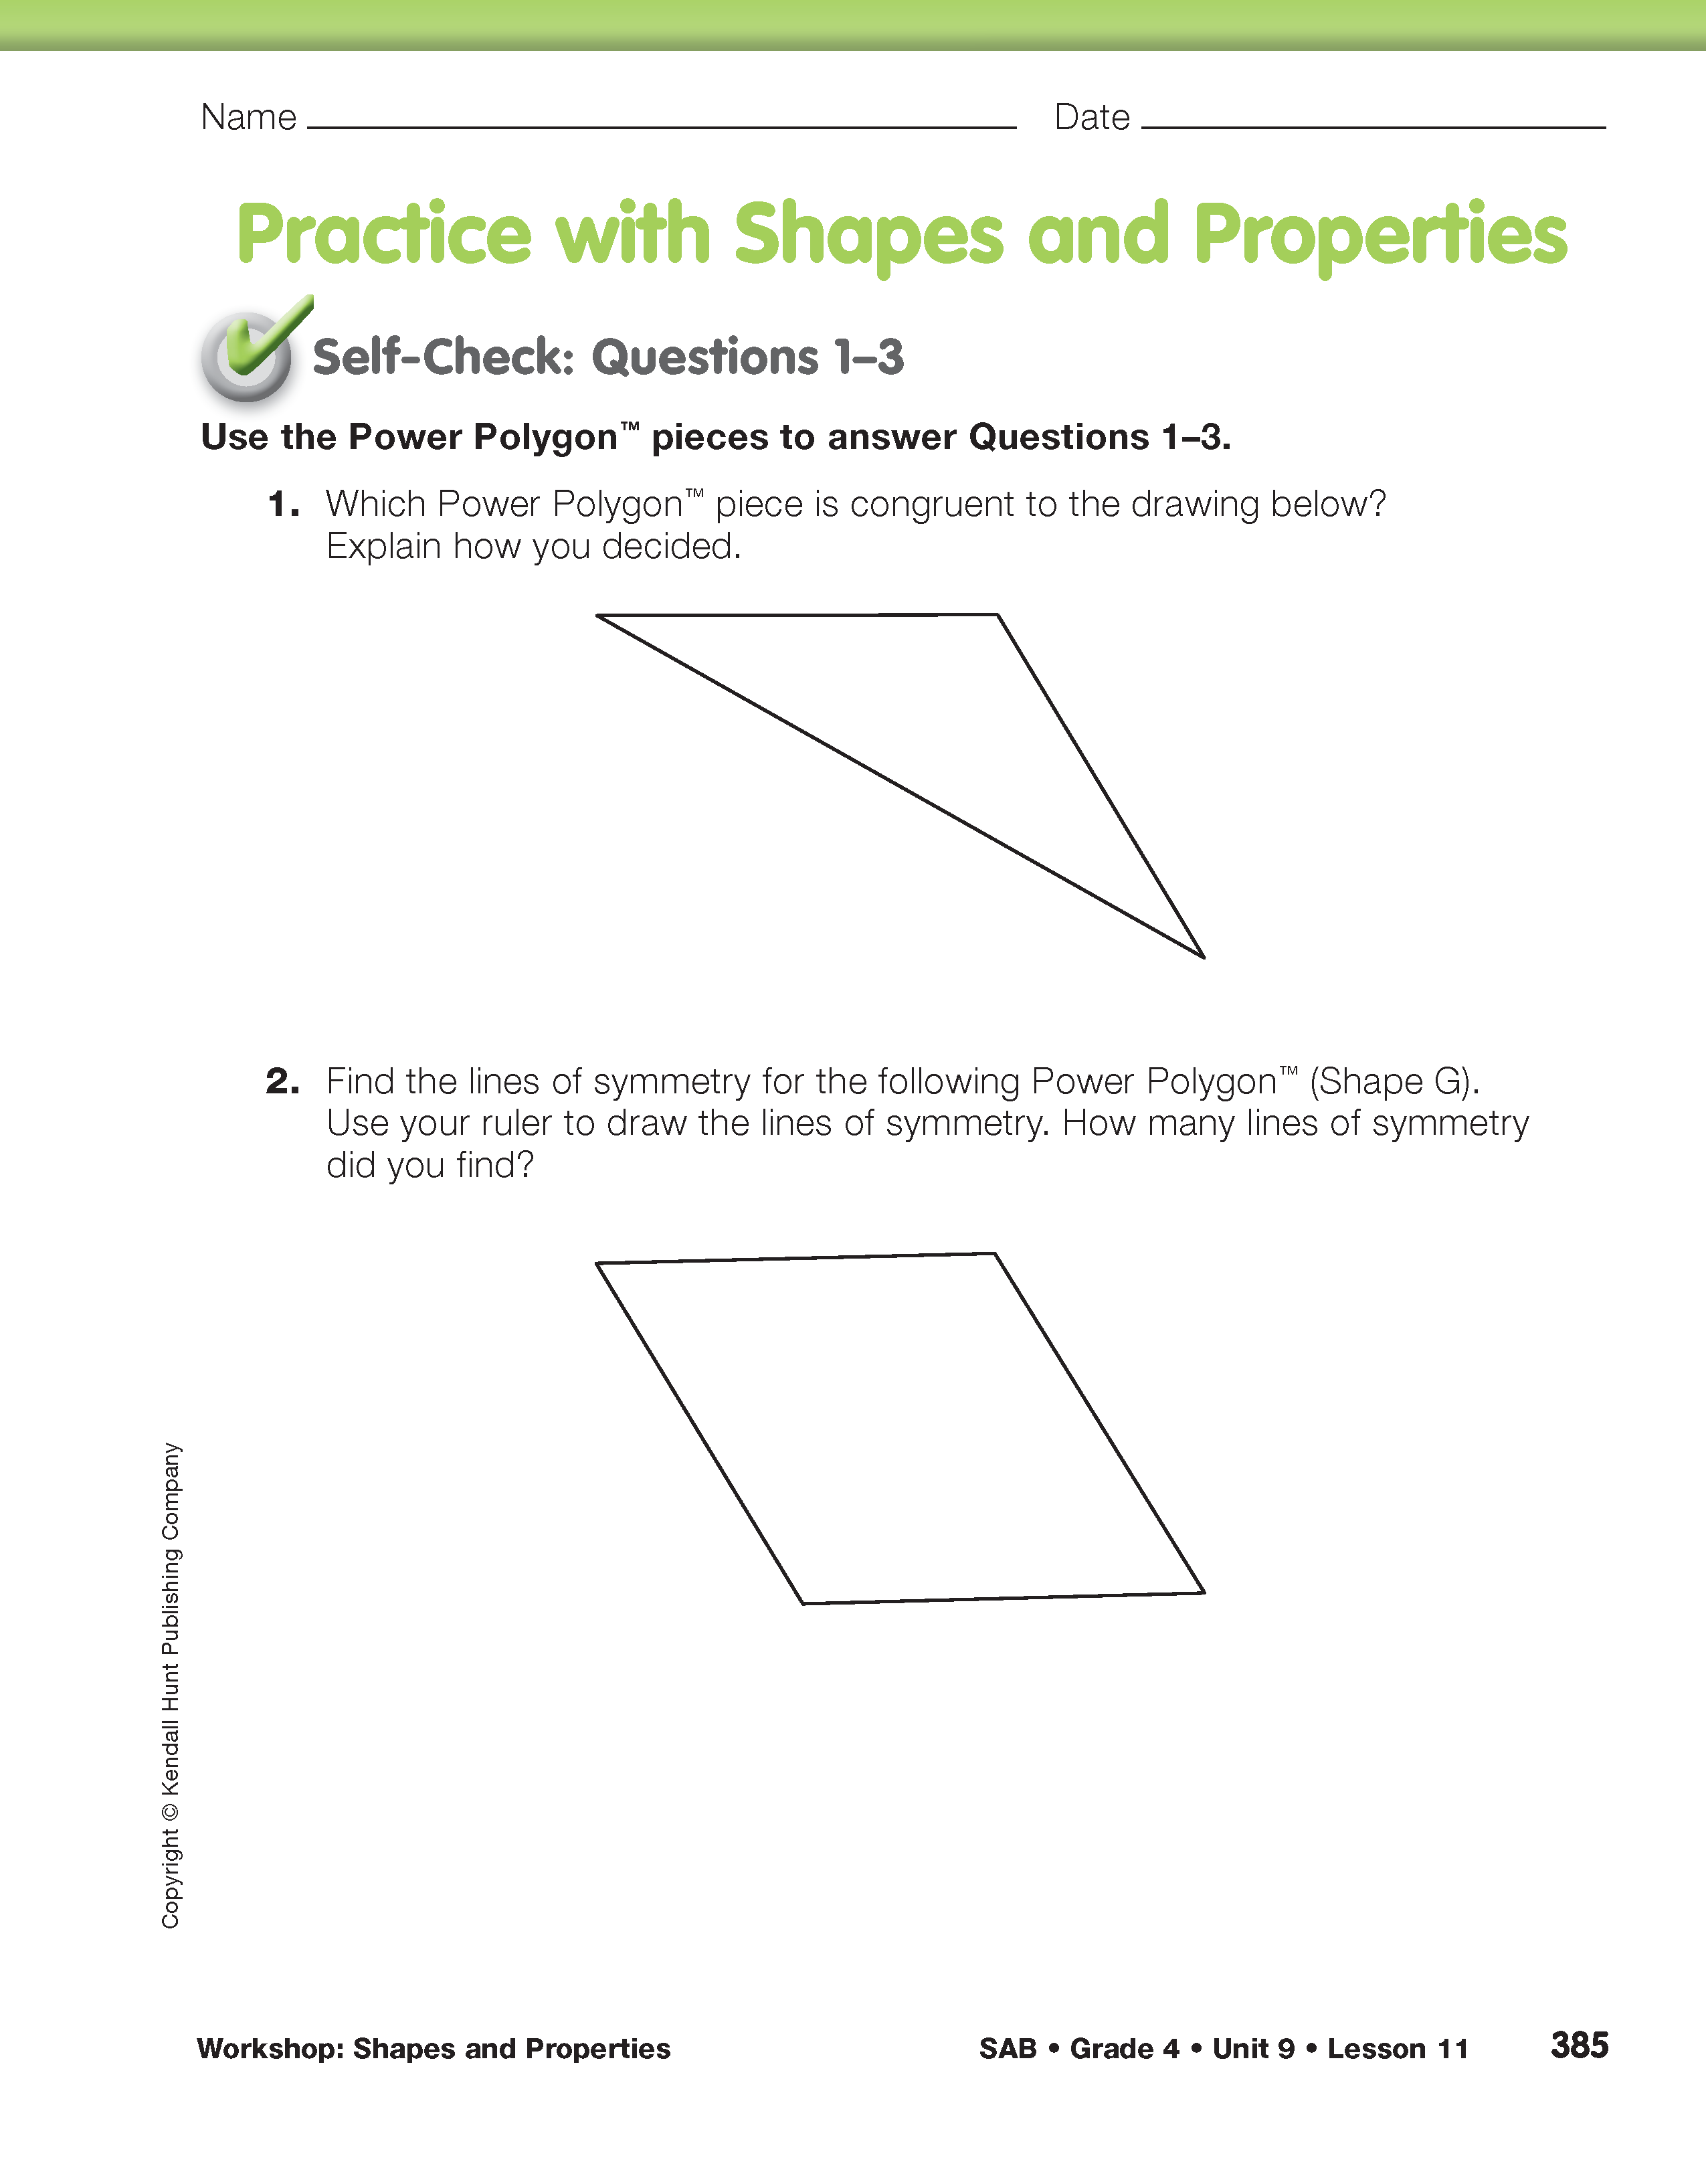
Share Workshop Experience. Select a few problems from the Workshop to discuss as a class. For example, a discussion of Question 2 on the Classifying Shapes pages in the Student Activity Book will help prepare students for completing Check-In: Questions 4–5.
Ask a pair of students who have completed the classifying shapes activity in Question 2 to display the results of their sort using Power Polygons™ and a display of the Sorting Polygons page from Lesson 10. Write “All sides equal” above Box A and “All angles equal” above Box B. A completed sort is shown in Figure 2.
Discuss Questions 2A–2C with the class. In particular, Question 2B asks students to recognize that shapes in both Boxes A and B are regular polygons because they have all equal sides and all equal angles. Students will use this information about regular polygons in the assessment in
Check-In: Questions 4–5.
Students must classify a square as a regular polygon and justify their reasoning to answer Question 2D. Ask students to review Math Practices Expectation 5 on the Math Practices page in the Reference section of the Student Guide and discuss their answers with a partner. Those students who have answered the question already should compare their answers with others and revise them based on the discussion. Those who have not answered the question will need to develop a justification and write up their answers.
When students have completed their responses, ask:
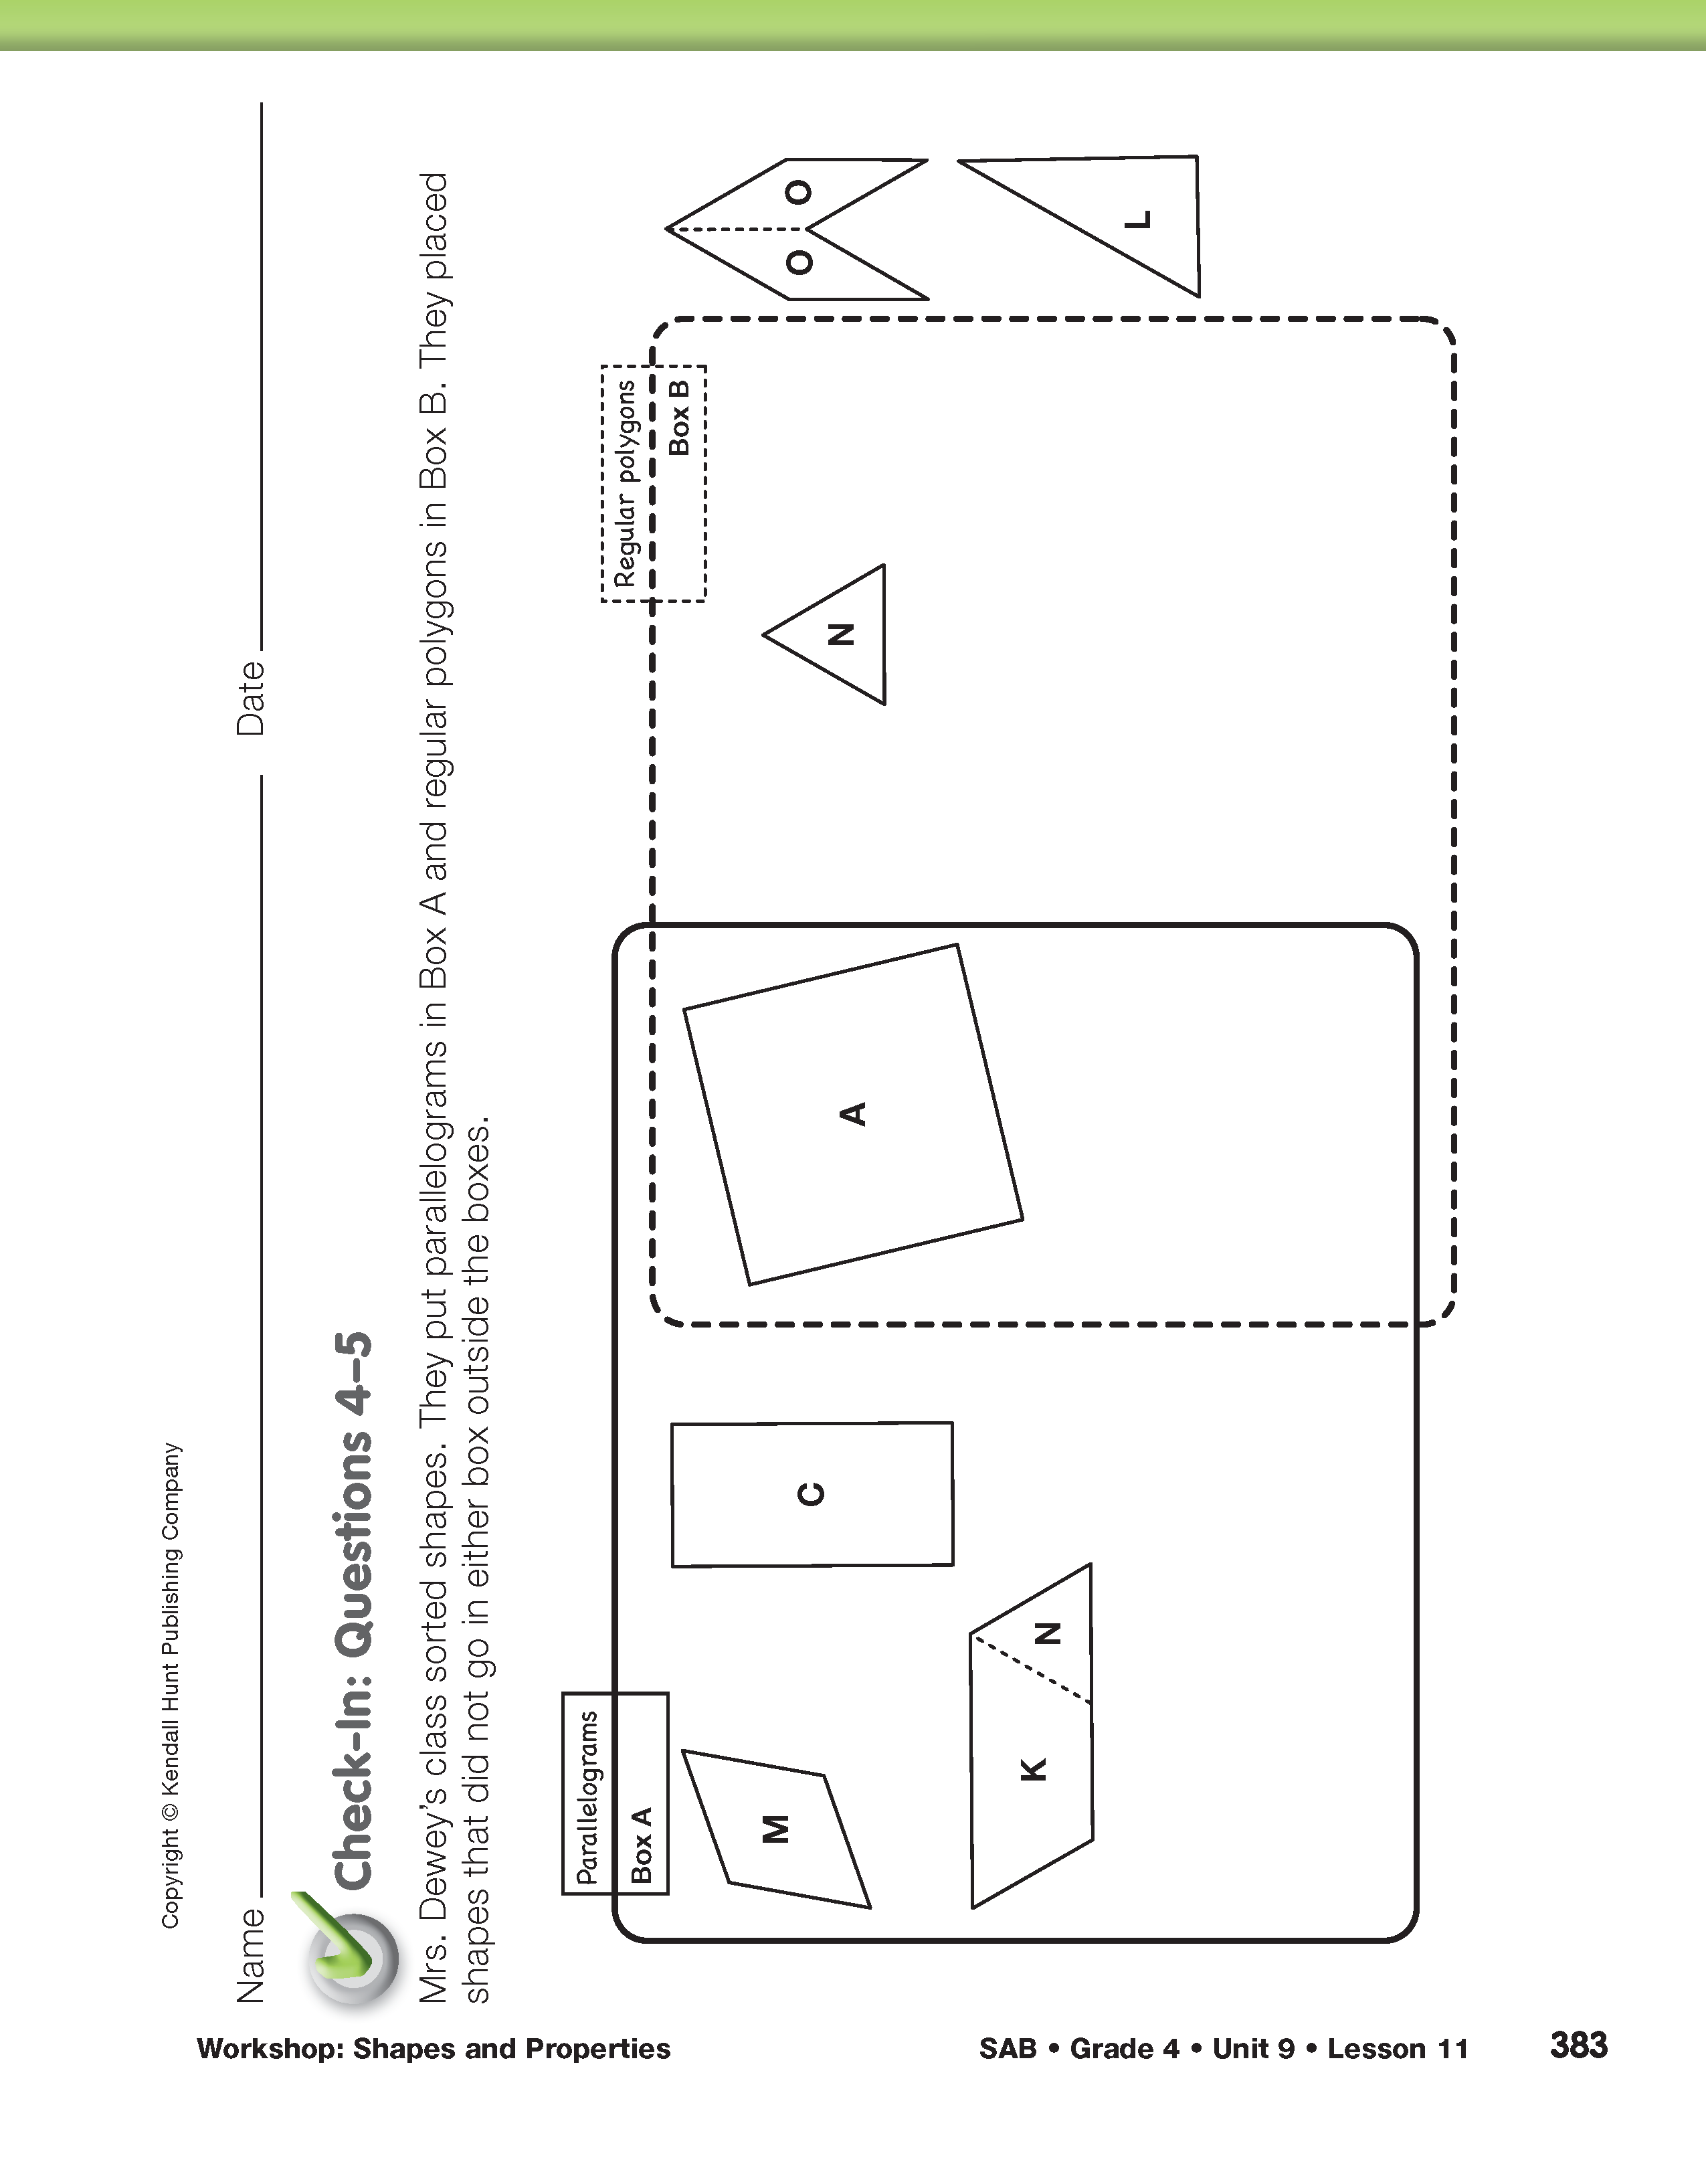
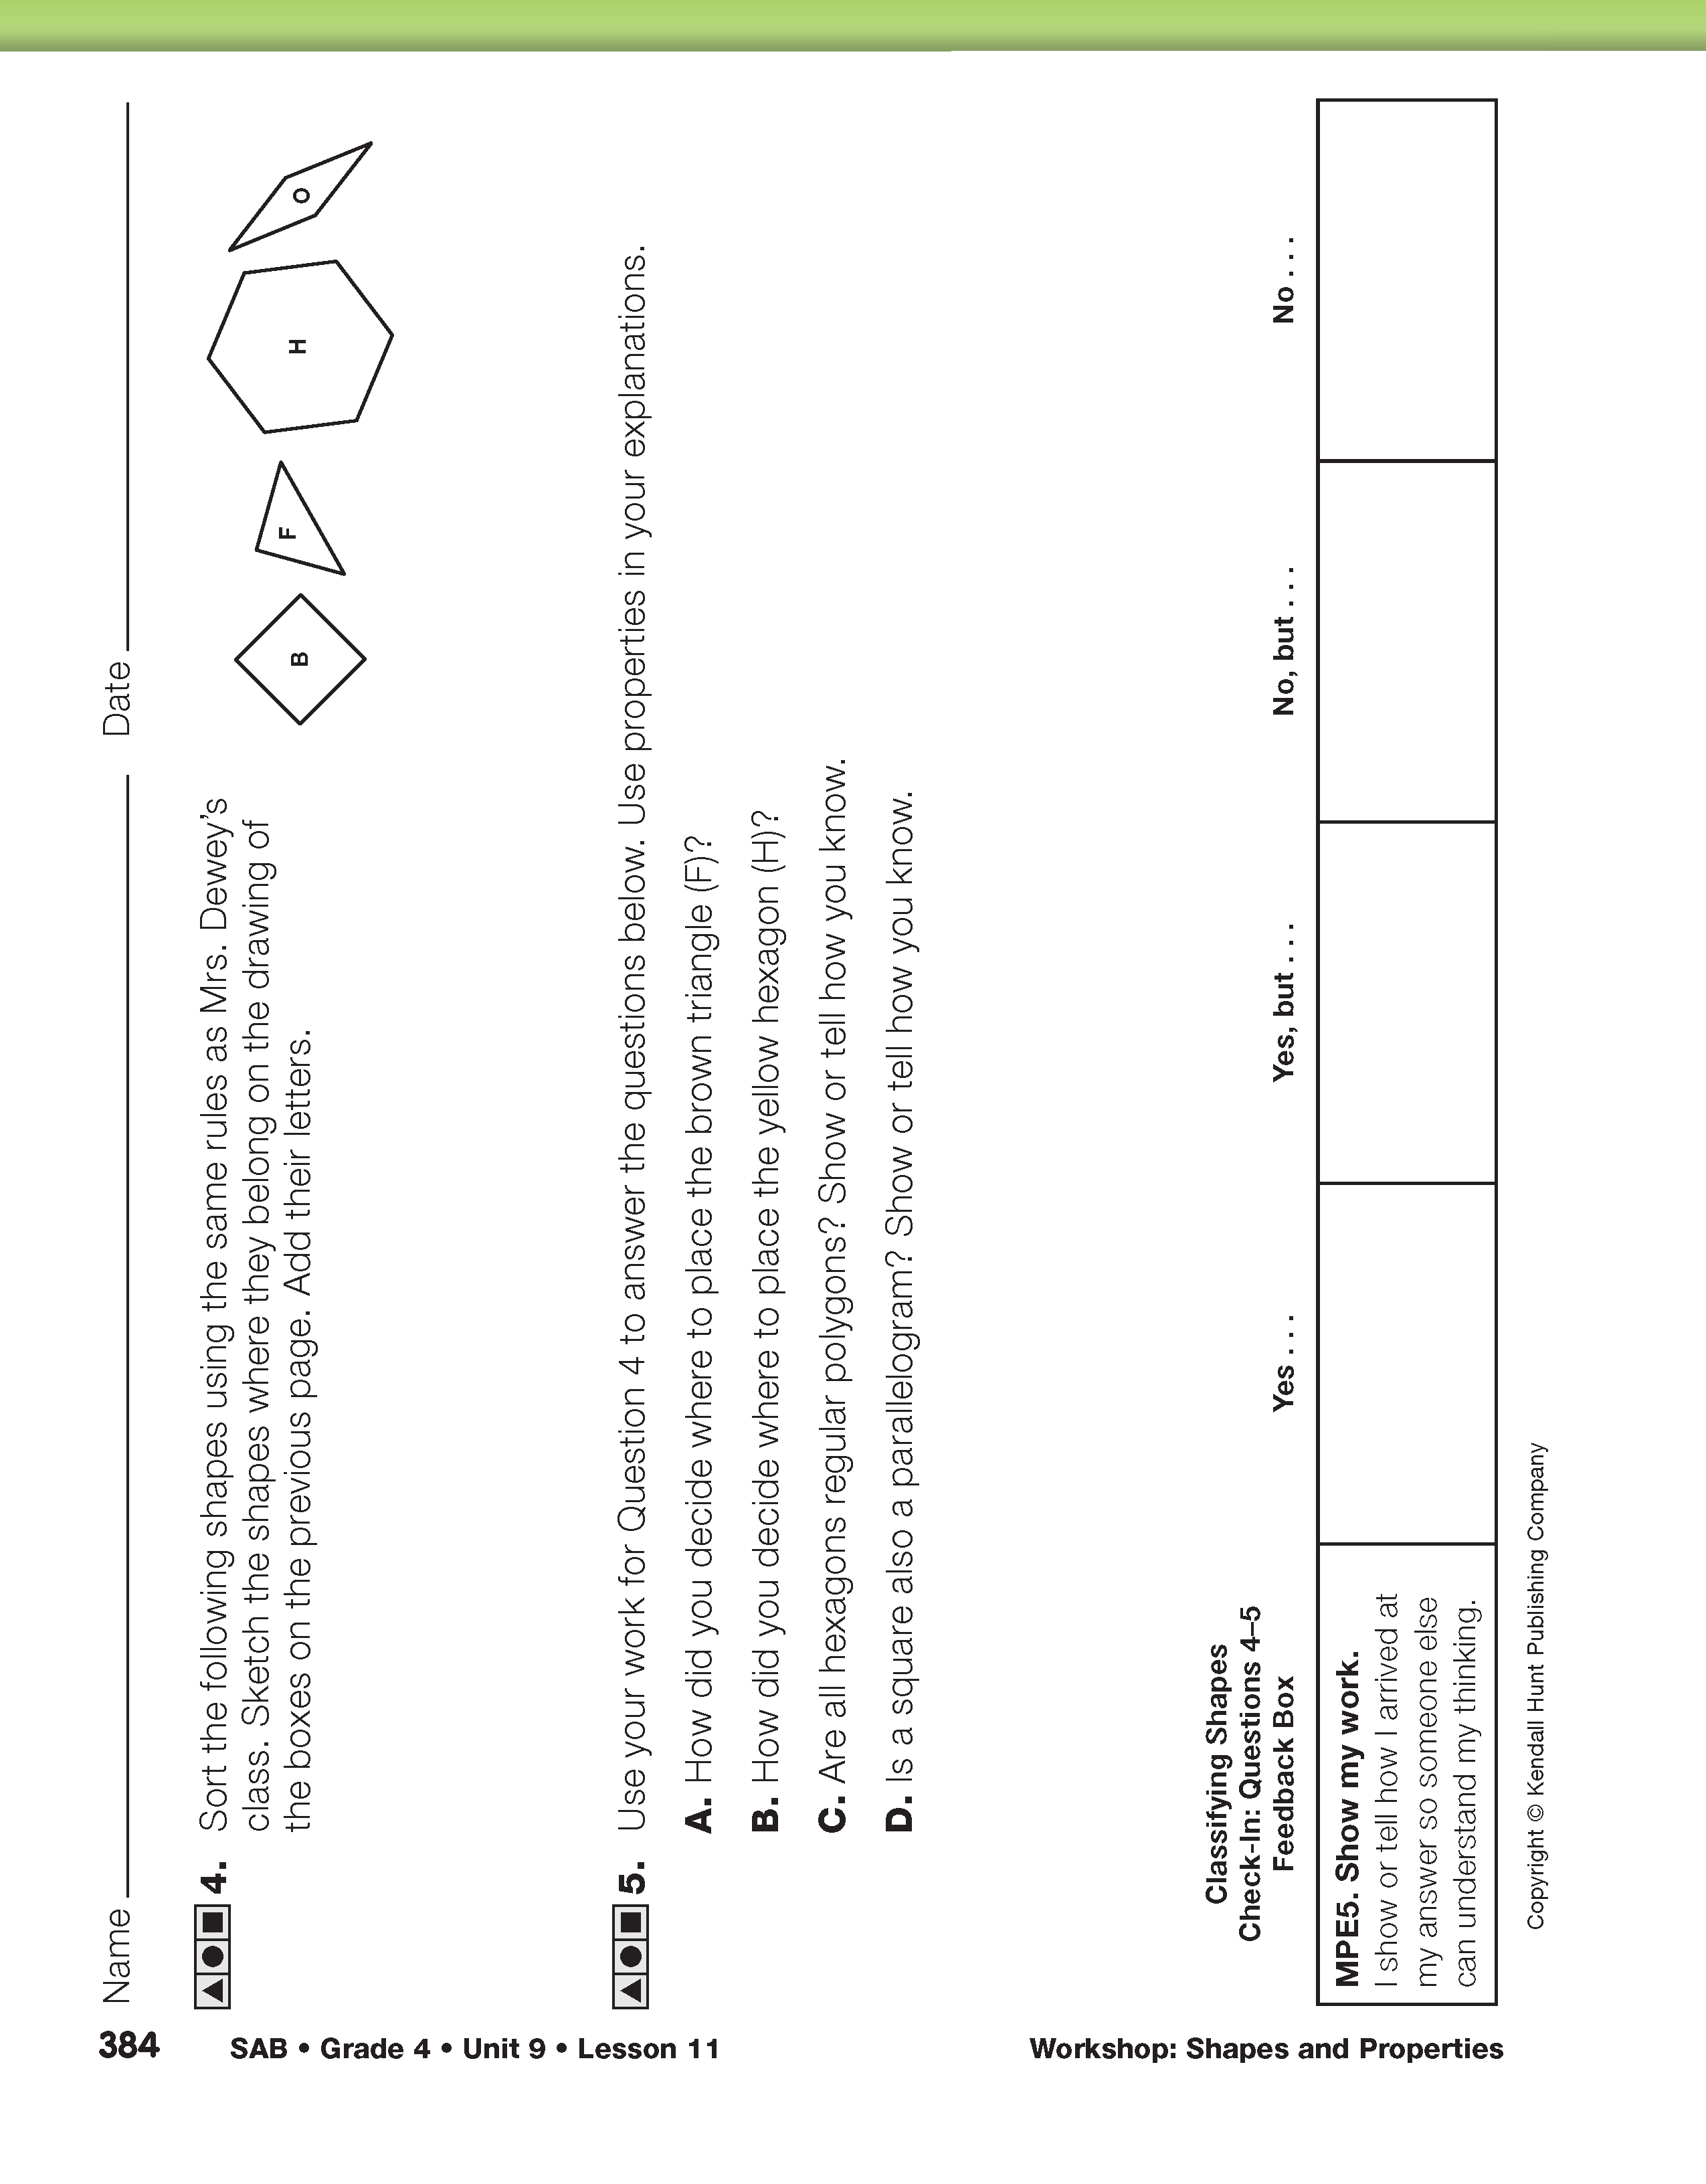
Have students complete Check-In: Questions 4–5 on the Classifying Shapes pages in the Student Activity Book. Remind them to use Math Practices Expectation 5 (Show my work) as they write their responses. When students have completed their individual responses, have them exchange papers with a partner. Students should decide if their partner's response is clear and complete and provide feedback using the Feedback Box. Then students can revise their responses based on their discussions.