


Measuring and Estimating Angles
Est. Class Sessions: 1–2Developing the Lesson
Part 2. Measuring Angles
Learn to Use A Protractor. In order to measure angles other than right angles, we use a protractor.
Ask:
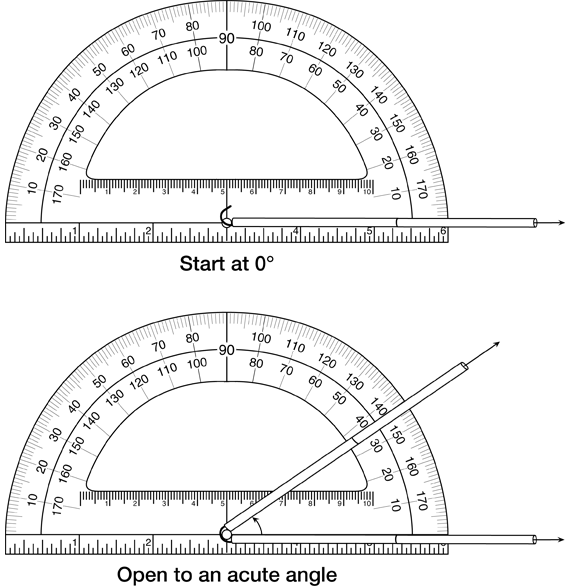
Use the straws-and-paper-clip model students used in Lesson 1. Place a clear protractor on the overhead projector. Place the straw model of the angle on the protractor with the vertex on the center and both rays at 0°. Show the angle starting at zero and opening to an acute angle measure. See Figure 2.
Say:
Record a few descriptions on the board. Then ask the class to help you use the protractor to measure the size of the acute angle you created with the straws.
Ask:
Starting at zero, have students skip count by 10 degrees as you point to the protractor until you reach the other ray. Describe the two sets of numbers you see on the protractor (e.g., 130° or 50°) and help students decide which measurement makes sense.
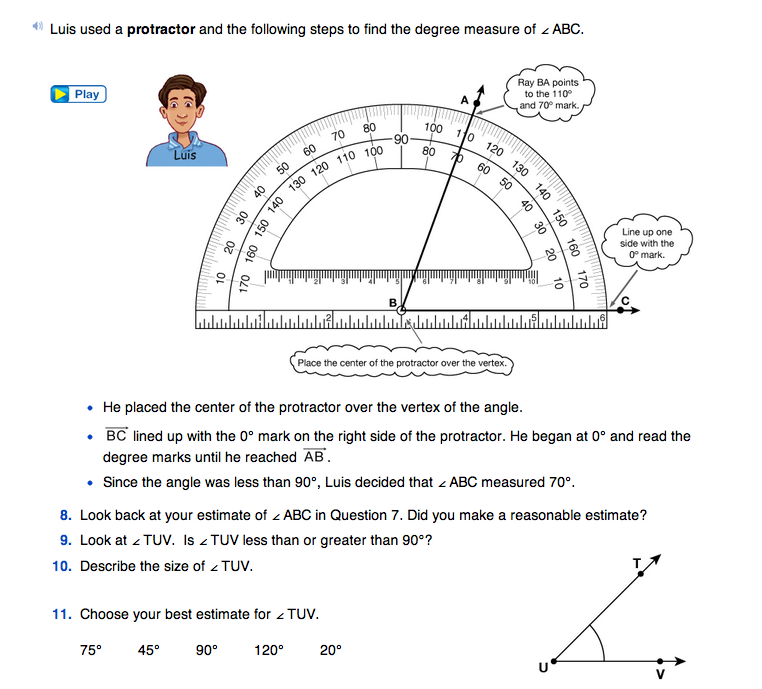
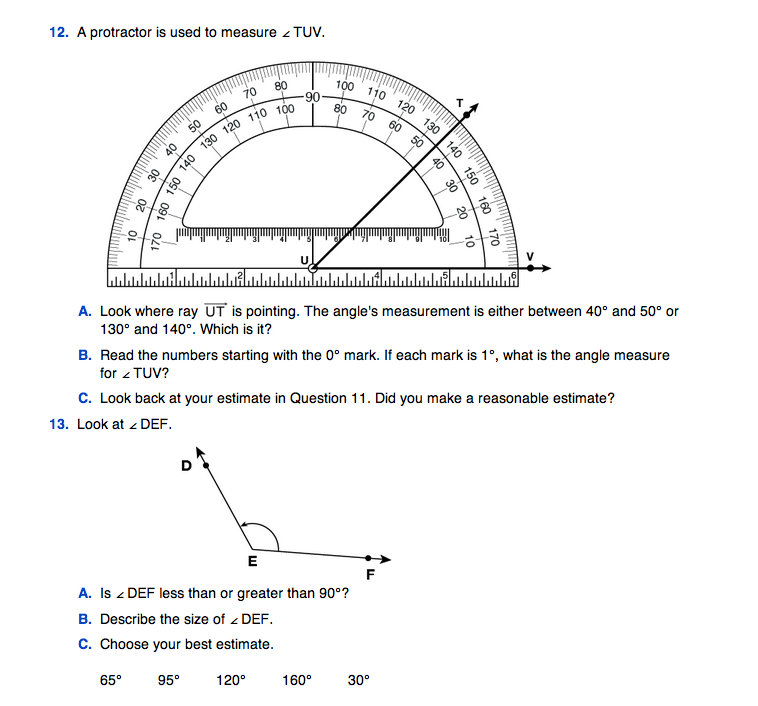
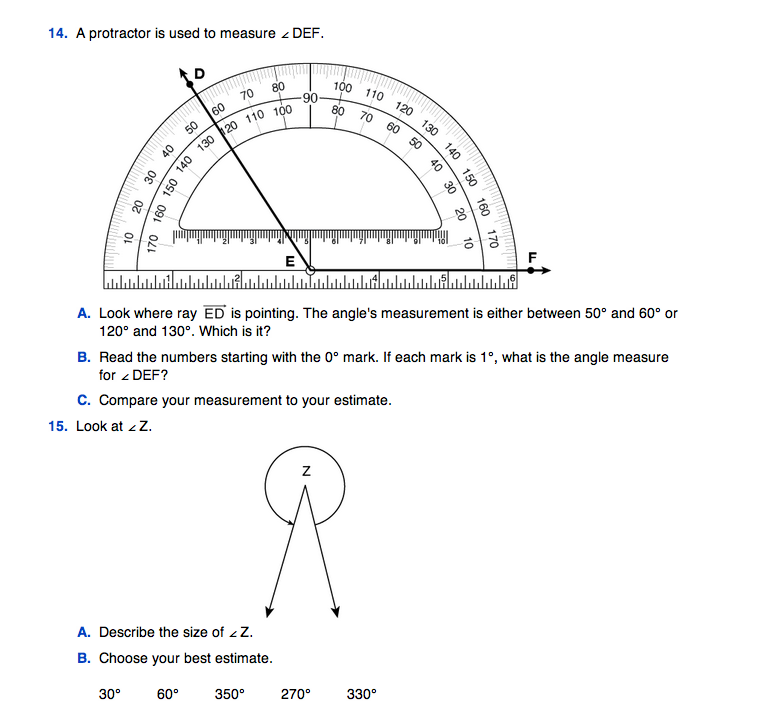
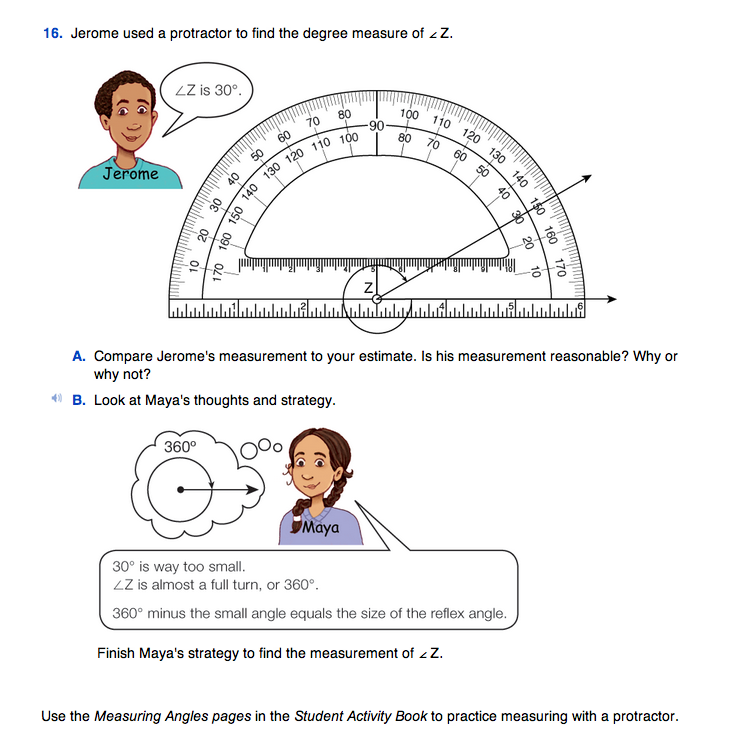
Assign pairs to work on Questions 5–16 in the Student Guide. Students are asked to describe the size of the angles or choose a best estimate and then measure using the protractor. Circulate as students are working.
Ask:
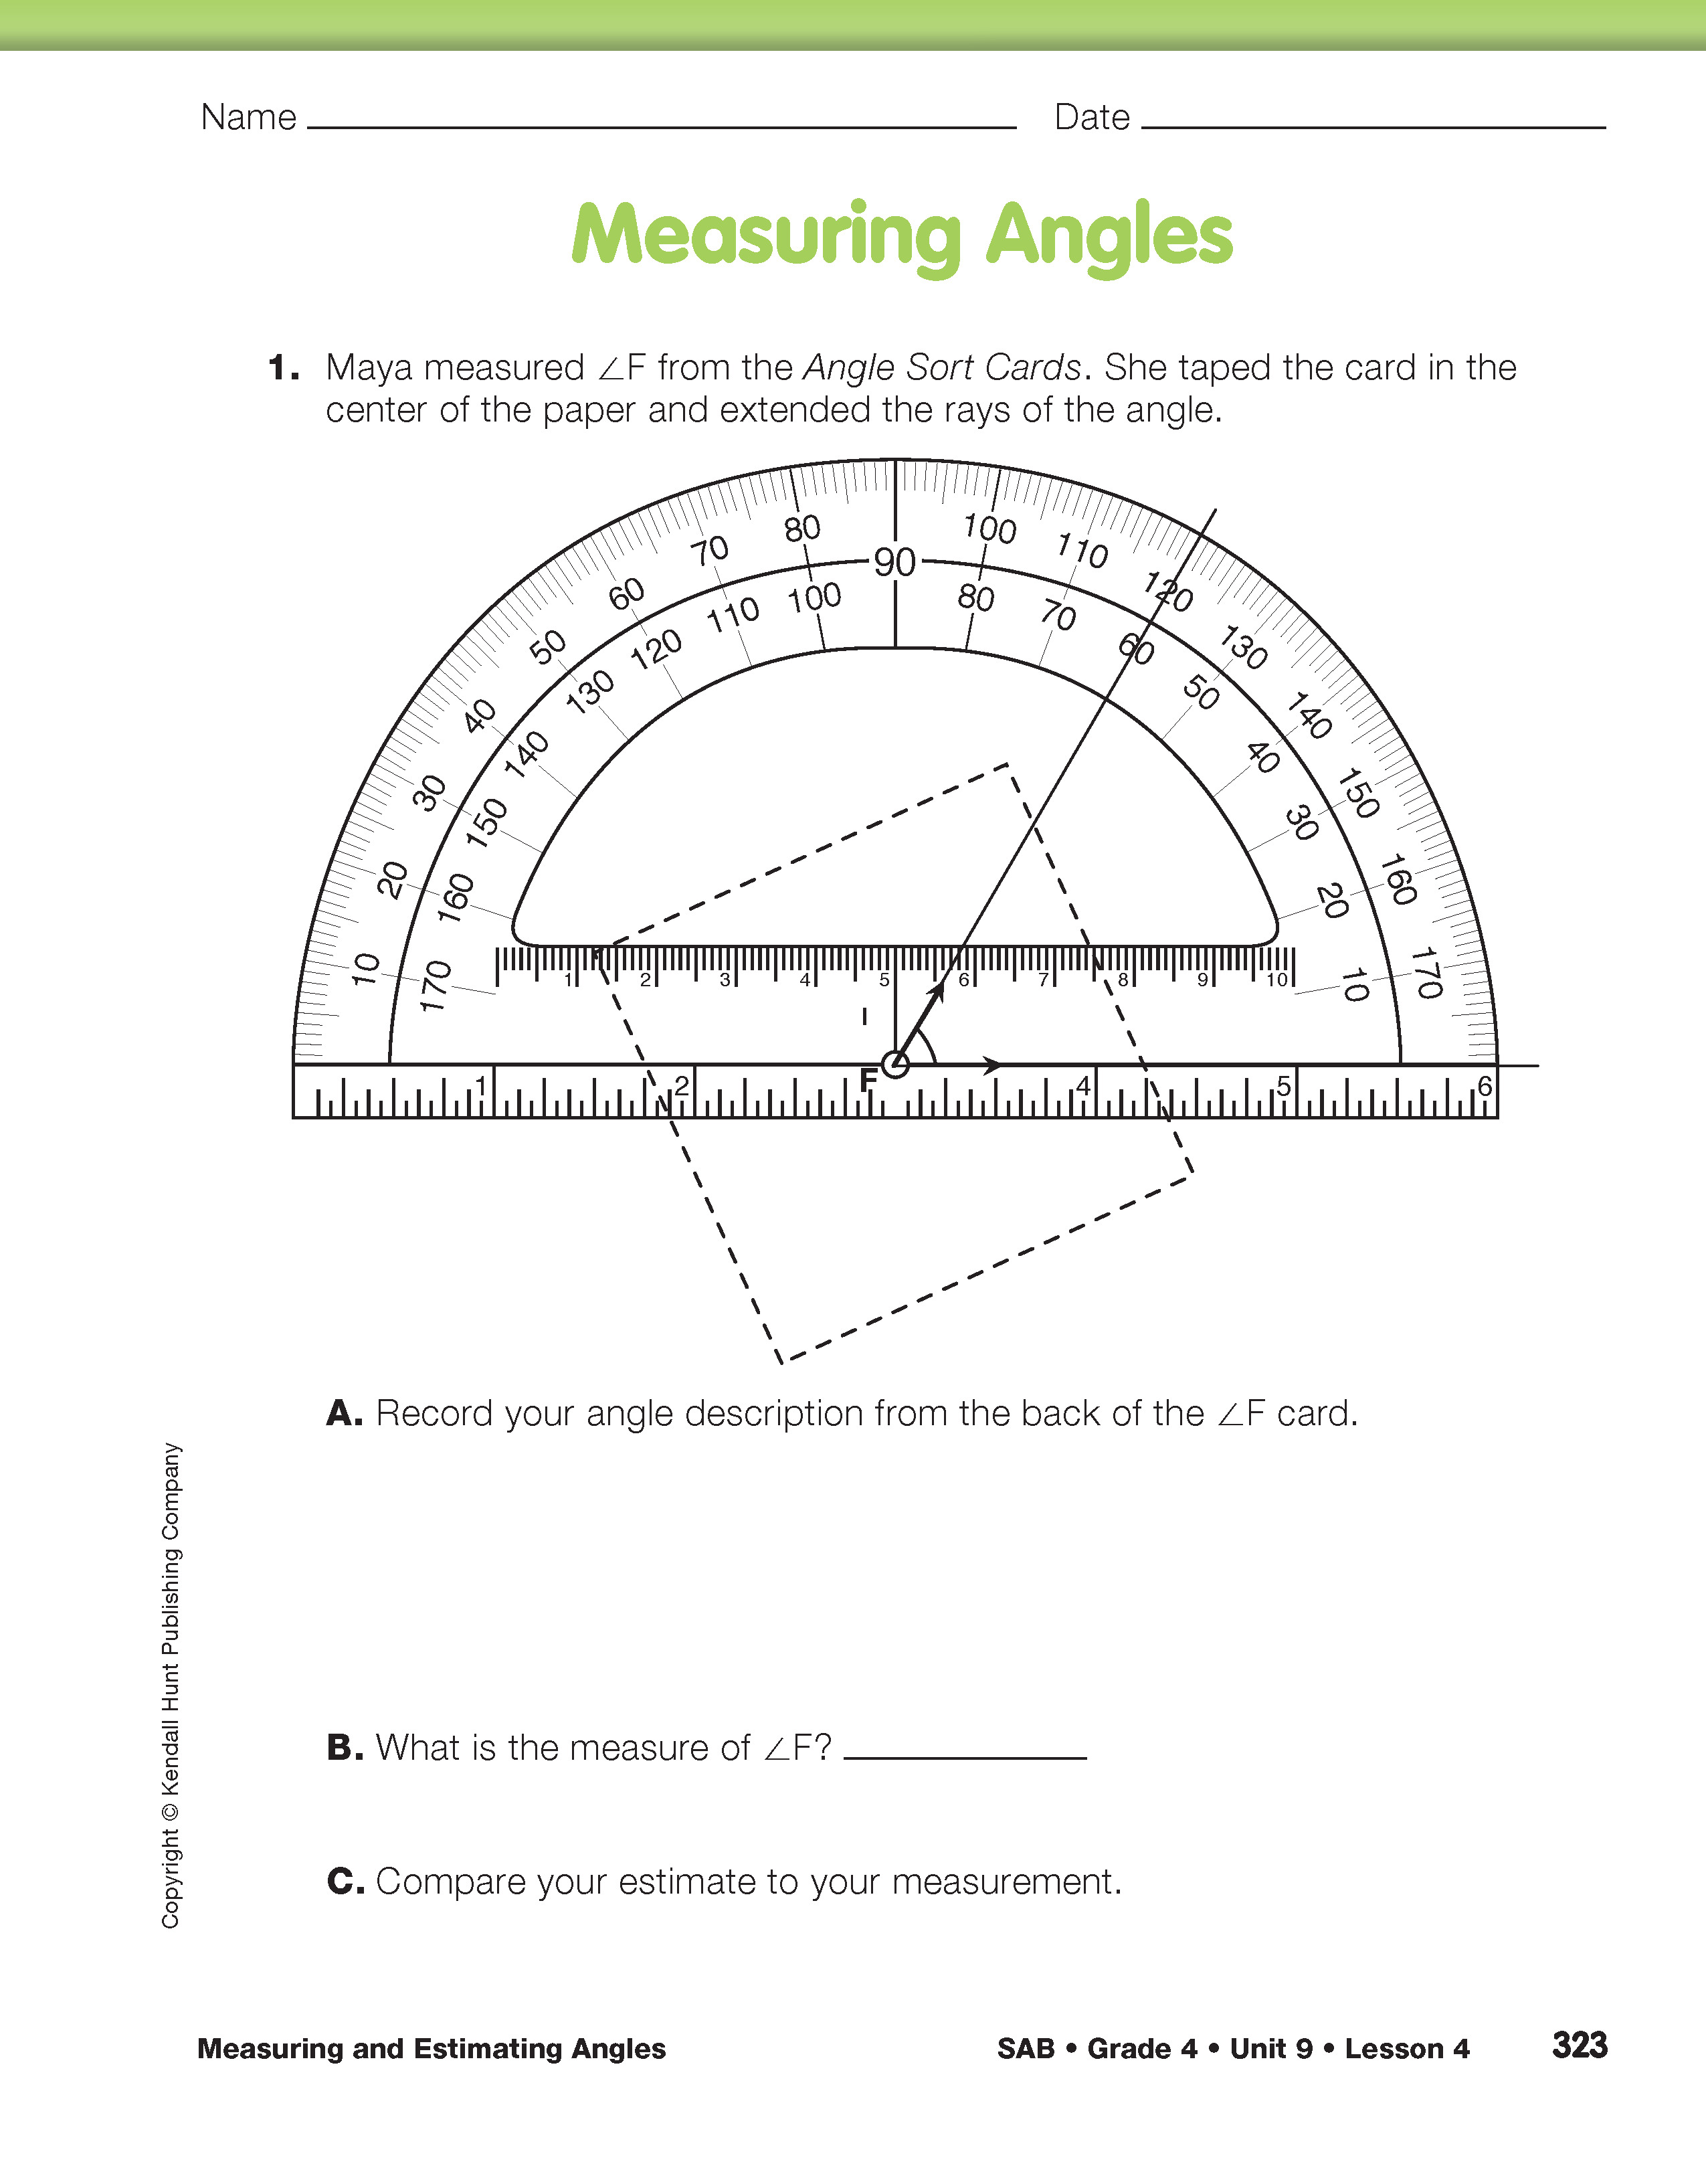
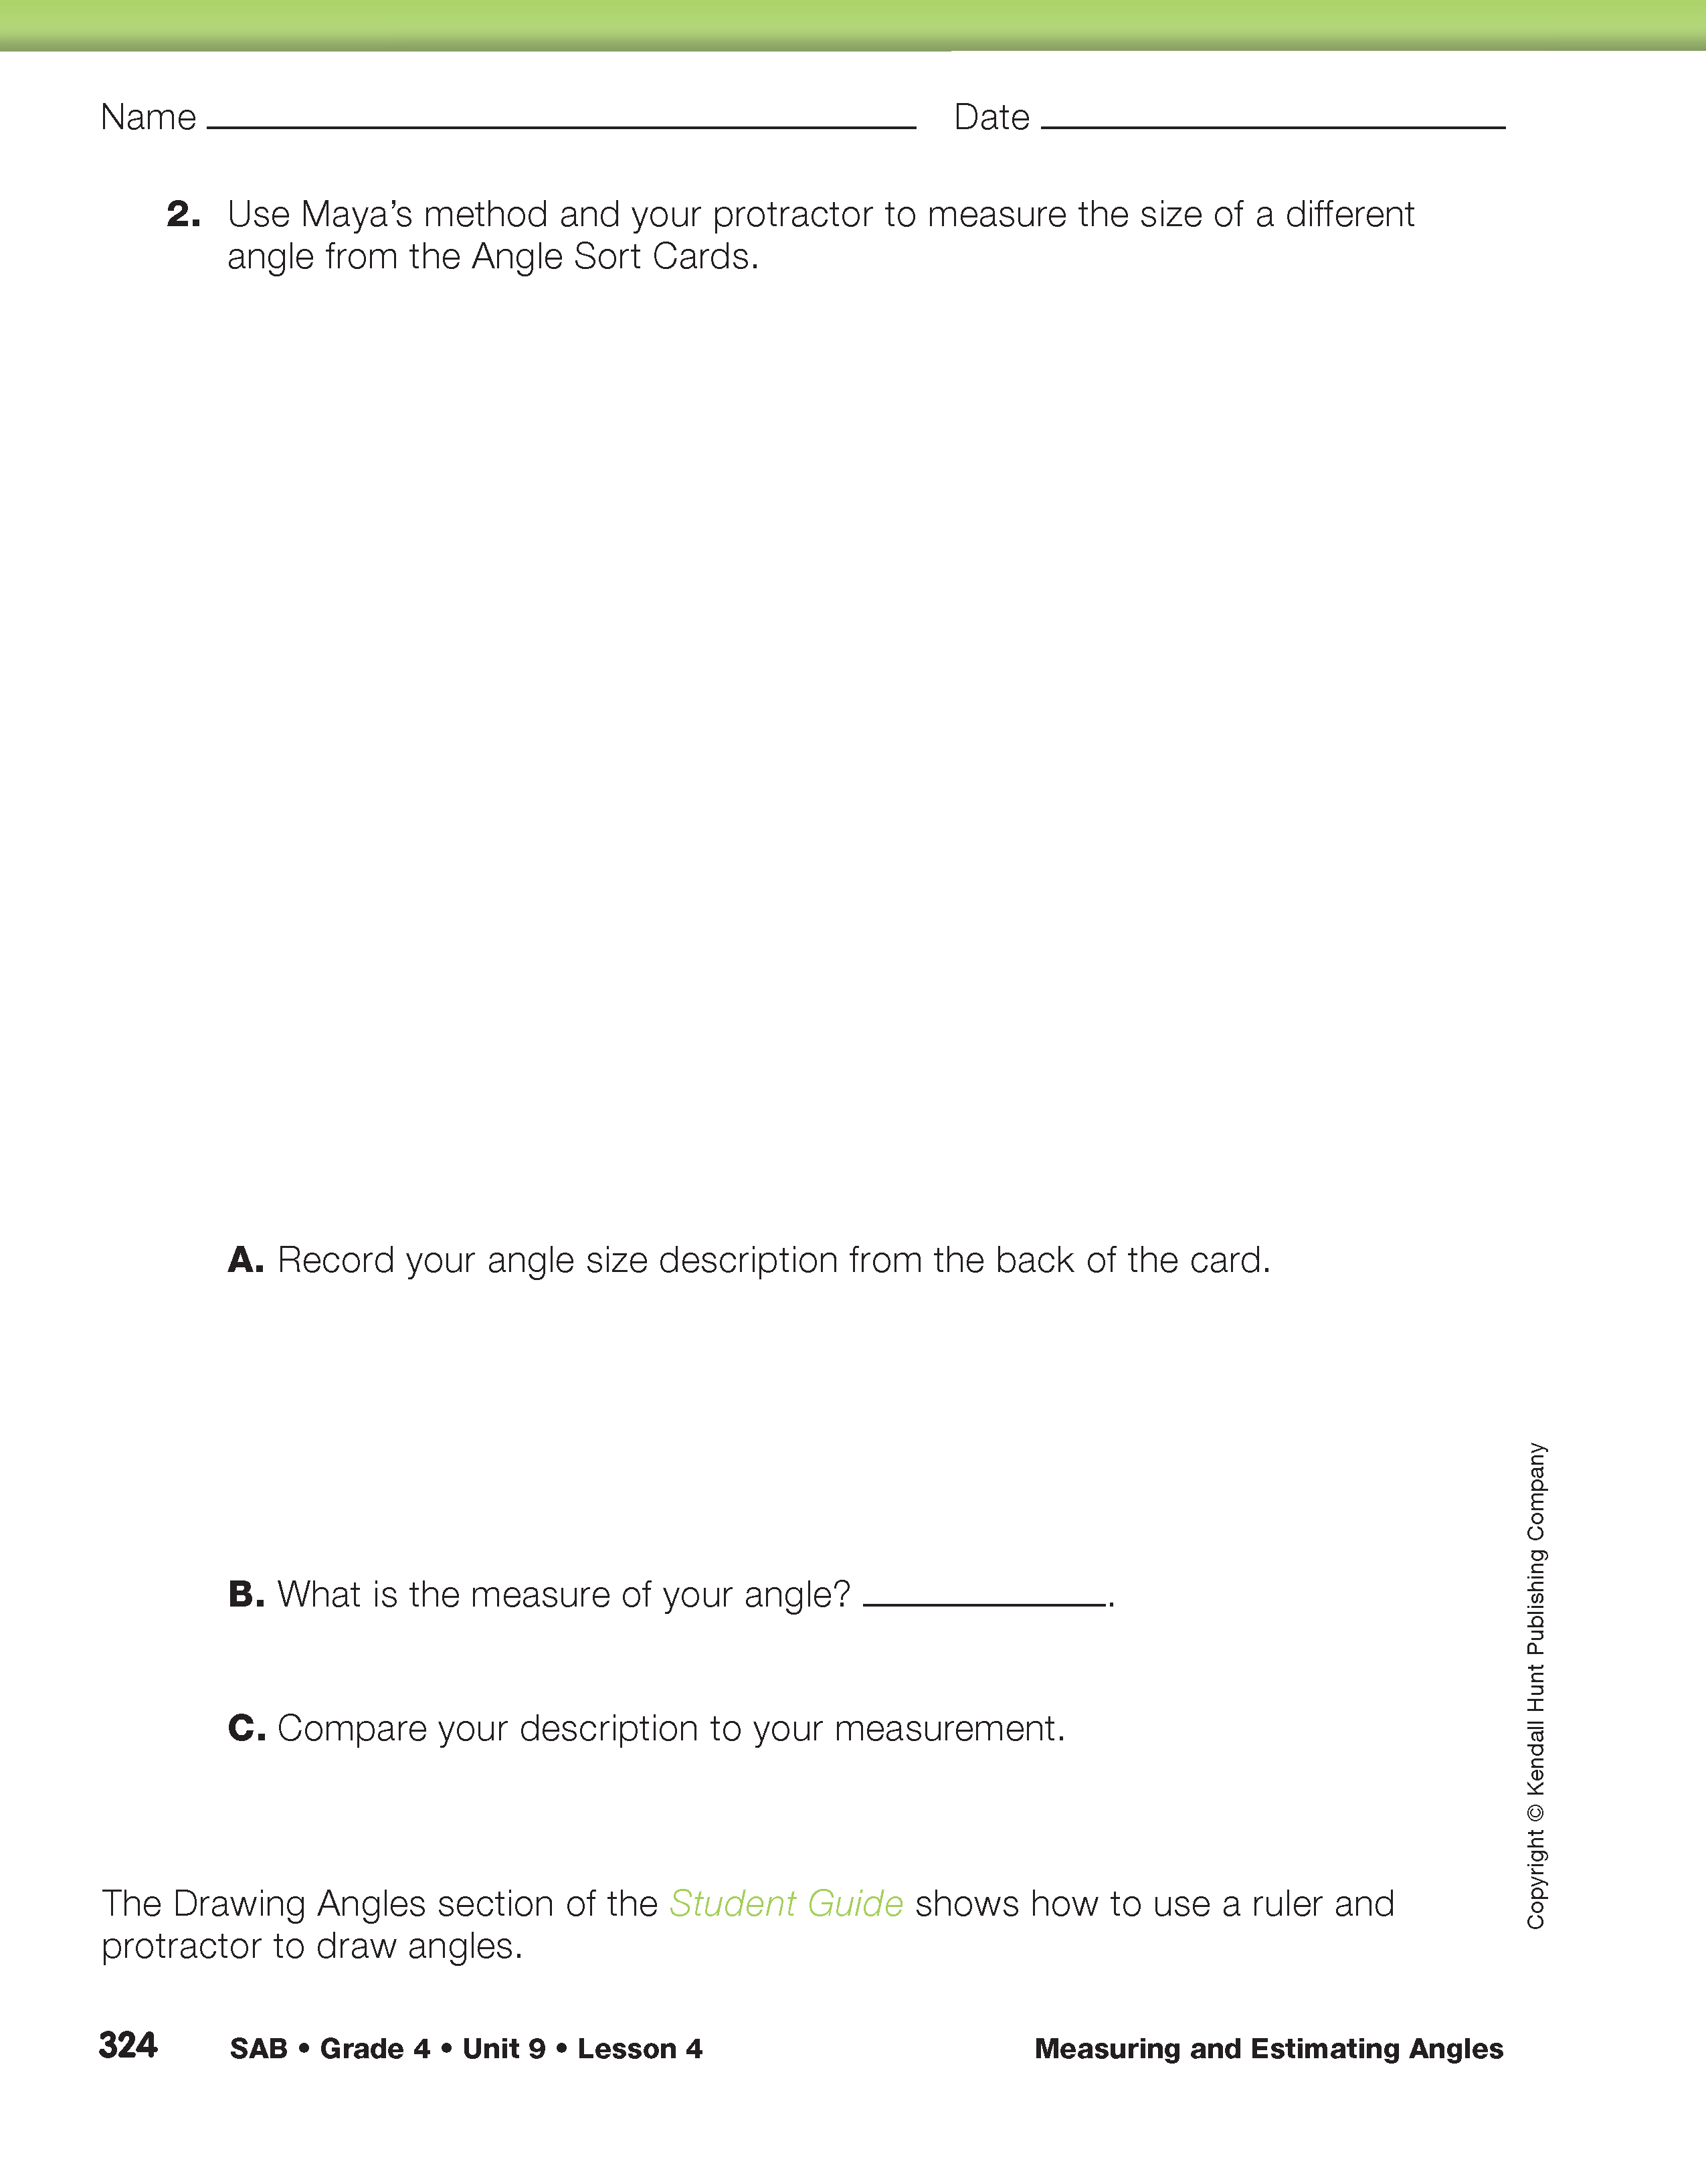
More Work with Angle Sort Cards. Ask students to remove the Measuring Angles pages from their Student Activity Book. In Question 1, Maya shows how she taped the ∠F Angle Sort Card to the page and measured the angle with a protractor. After students have completed and discussed Question 1, ask each student to choose and measure a different angle from the Angle Sort Cards (Question 2).
Review Math Practices Expectations 3 and 6 on the Math Practices page in the Reference section of the Student Guide. Tell students that they are going to share with a partner their size description and measurement for Question 2. While they are sharing, they should check to see that their partner's work is labeled with a unit and that their partner checked for reasonableness.
Ask:
Ask volunteers to write an angle measurement for each Angle Sort Card on the board. Ask students to compare the measurements to the descriptions they recorded on the back of their cards.