


Angles in Polygons
Est. Class Sessions: 3Developing the Lesson
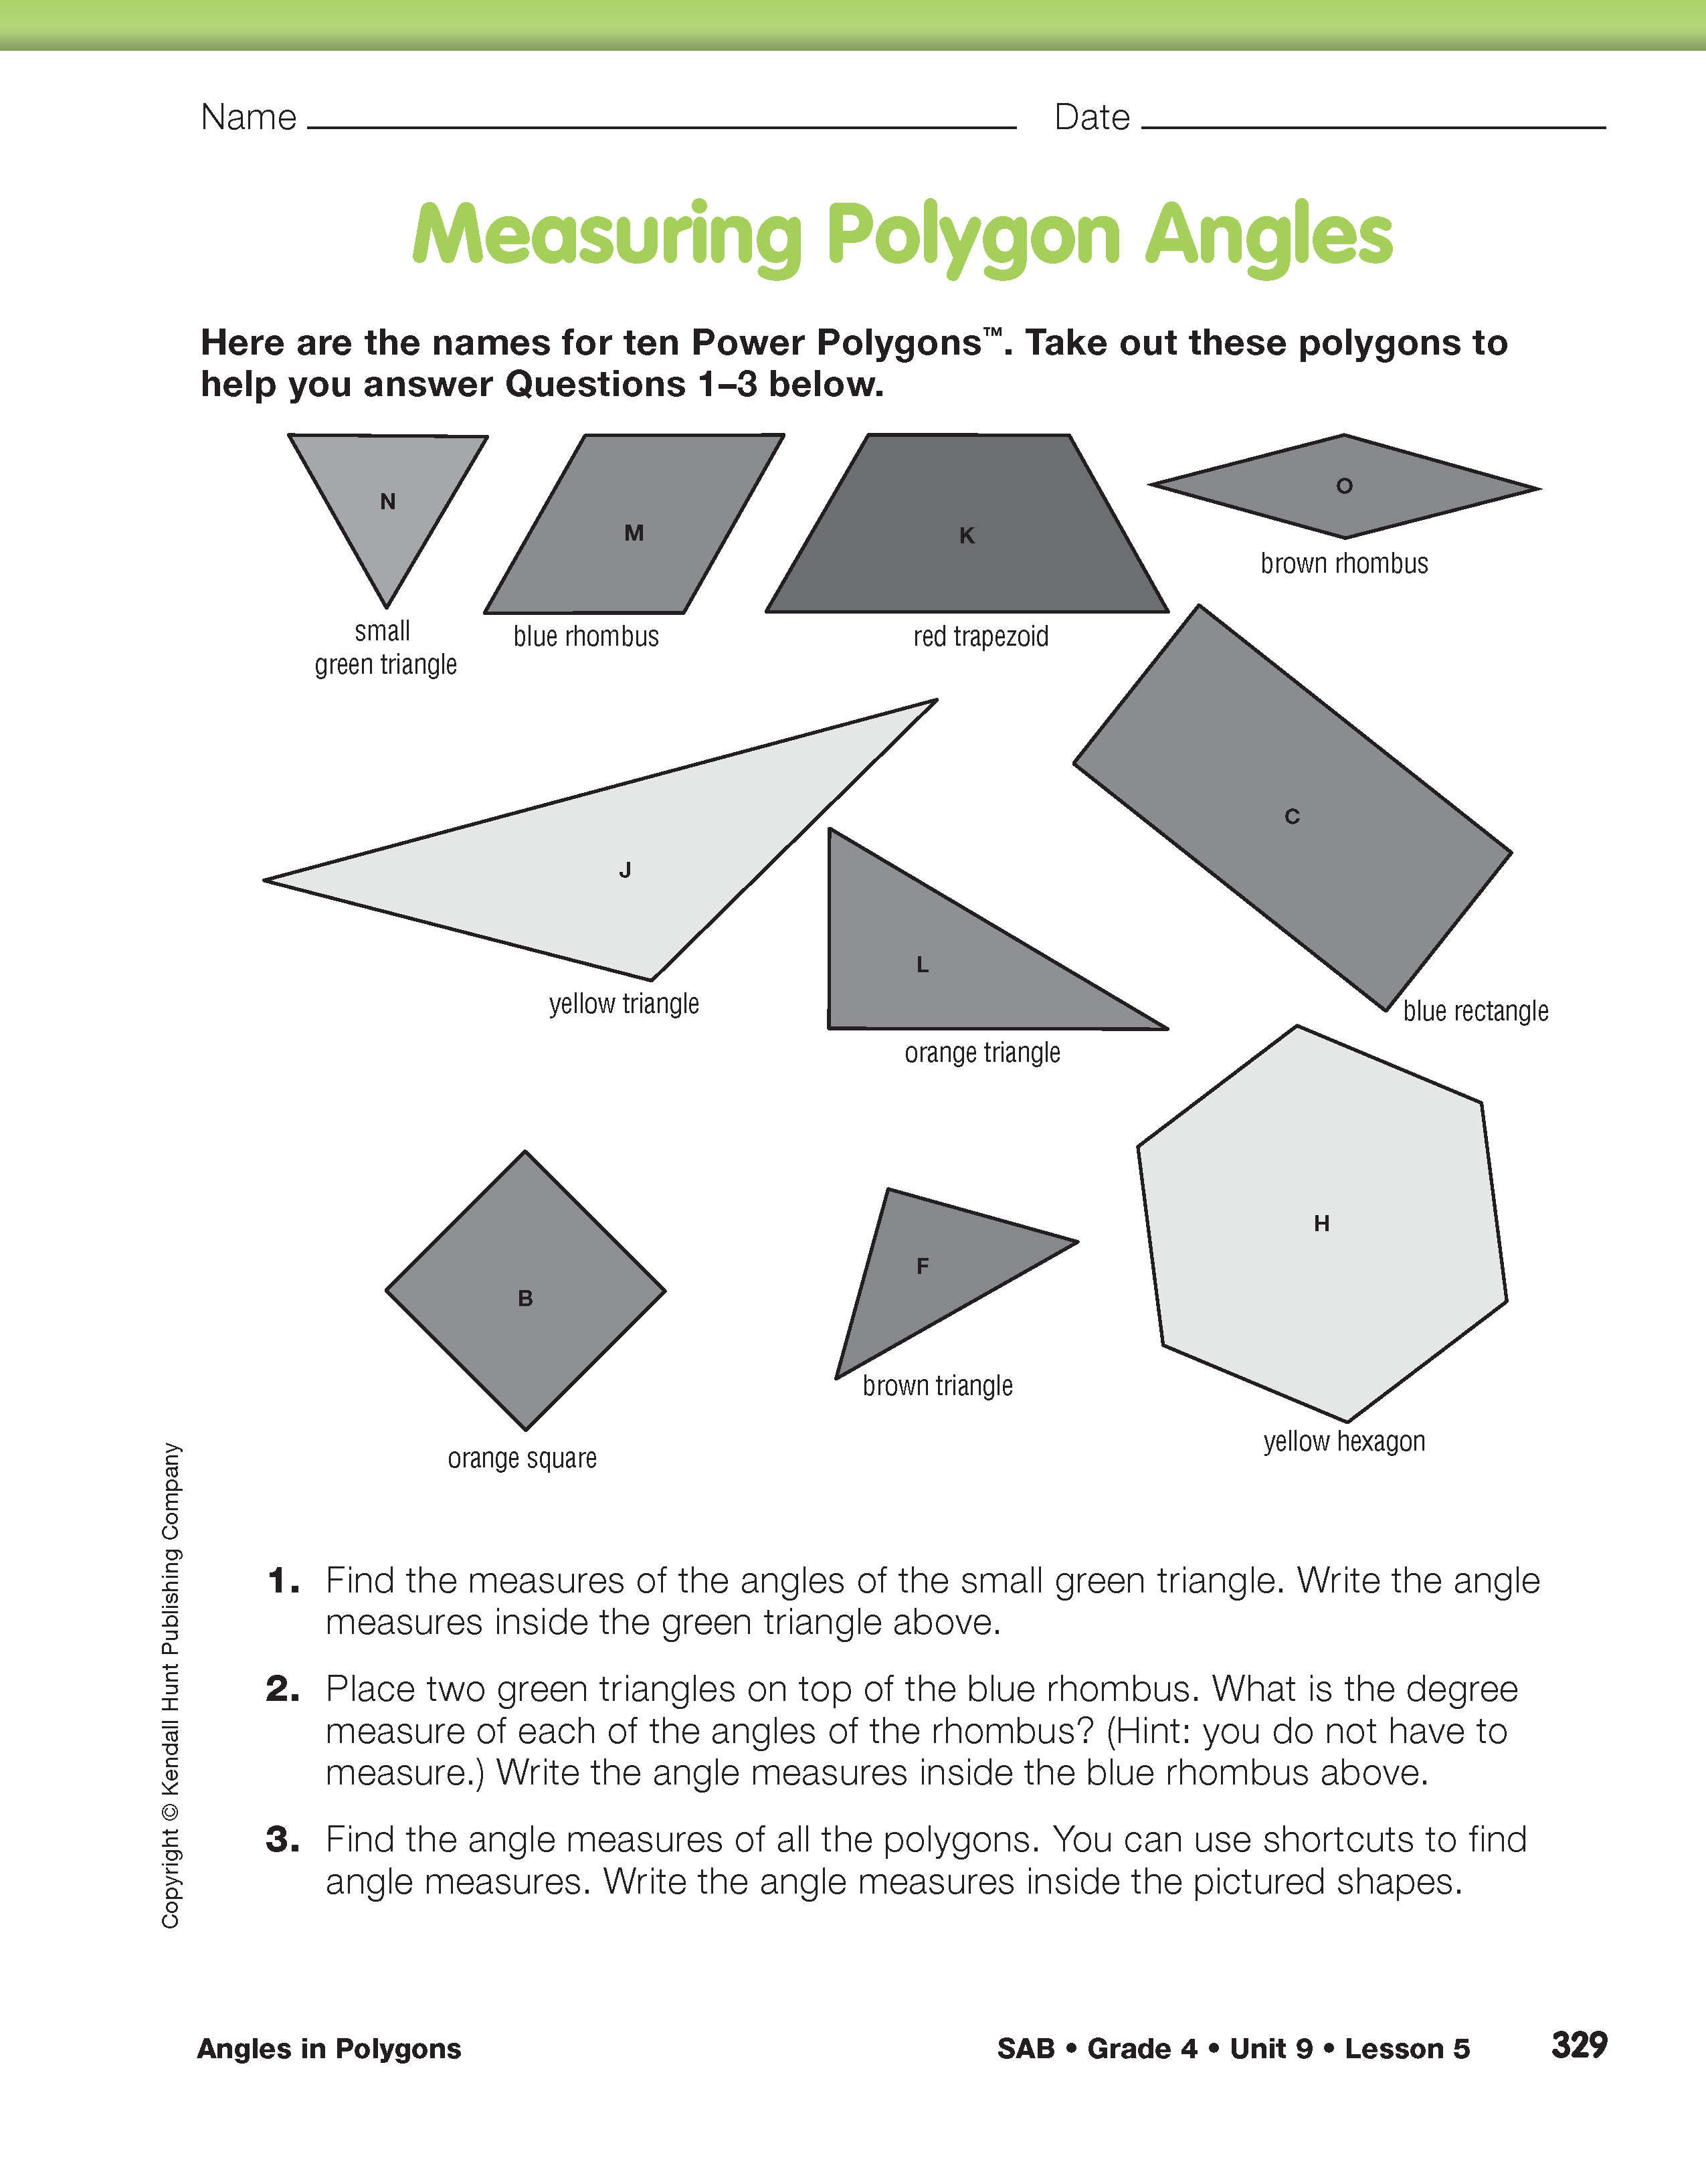
Part 2. Measuring Angles in Polygons
Explore Power Polygons™. Distribute protractors and envelopes with the Power Polygons™ to students. Polygons are shown in Figure 2. Allow students plenty of time to explore the shapes individually.
Ask:

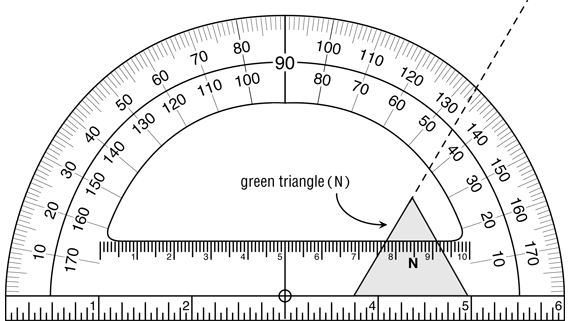
Measure Polygon Angles. Read with the class Question 1 on the Measuring Polygon Angles page in the Student Activity Book. Students use their protractors to measure the angles of the small green triangle (N). This may be done using the actual polygon, though it may be easier to use the drawing of the shape on the page. Students will notice that the line segments in this shape do not extend far enough to measure the angles directly with the protractor.
Ask:
Allow students to experiment with methods to solve this problem on their own. By extending the line segments using the ruler edge of the protractor, a more accurate angle measurement can be made as shown in Figure 3.
Ask:
By visual inspection, students may decide that all the angles in the green triangle have the same degree measure. Have them measure all three angles to test this assumption.
Students work with partners to complete Questions 2 and 3. In Question 2, students find the angle measures of the blue rhombus (M). For this shape and others to follow, students may find shortcuts to find the angle measures, since many can be figured out by placing shapes with known angle measures on top of other shapes. For example, Figure 4 shows how two green triangles combine to make a blue rhombus.
Students continue in this way to find the angle measures of all the shapes shown (Question 3). After individually writing explanations for two of their shortcuts (Questions 4 and 5), have several students share their answers and the shortcuts they used to find them. Lead a classroom discussion to verify and compare these shortcuts.
Ask students to complete Questions 6 and 7. Students analyze the shortcuts used to measure angles and are introduced to the use of number sentences to represent how angles are put together. Students will practice and explore this representation more later in the lesson.
Regular Polygons. Read with the class the sentence about regular polygons above Question 8. Now ask students to work with partners to sort all 15 of their Power Polygons™ into two groups: one with only regular polygons and one with only shapes that are not regular polygons. If needed, students may look at their angle measures from Questions 1–3 to help them decide. Have students answer Questions 8–10 to show examples of sorted polygons and explain their reasoning. Have a student share his or her sort of all the polygons with the class and compare it with the rest of the class.