


Describing and Analyzing Shapes
Est. Class Sessions: 1–2Developing the Lesson
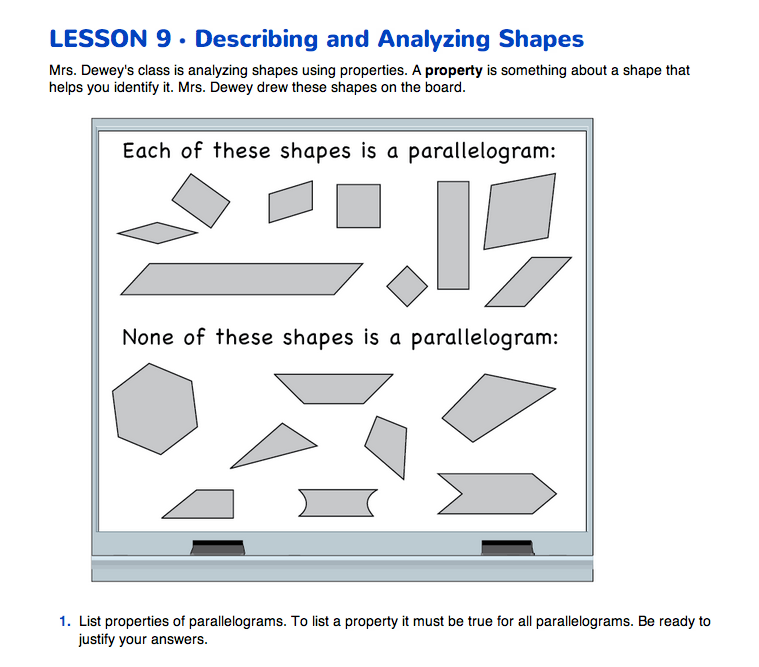
Part 2. Analyzing and Describing Shapes
Properties of Parallelograms. Have students turn to the Describing and Analyzing Shapes pages in the Student Guide. Ask them to work with partners to make a list of properties that are true for all parallelograms using the shapes on the page (Question 1). Remind them to look for properties similar to those they listed on the Shape Finder chart as they played the game. See Figure 4. Encourage them to use the corners and edges of their Power Polygons™ to compare sides and angles.
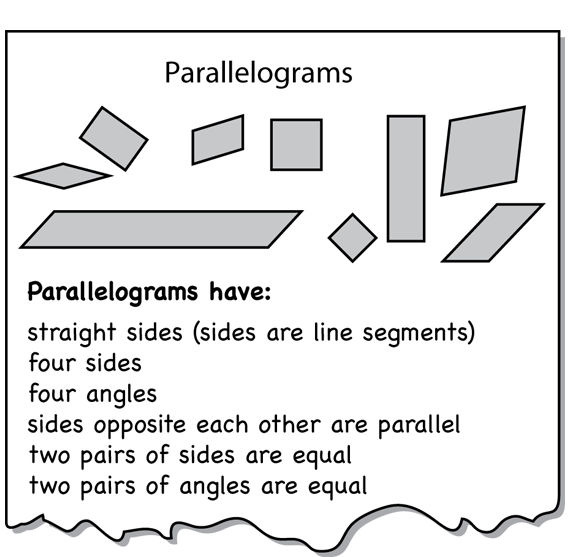
After students have made their lists, direct their attention to the Parallelograms chart you prepared and displayed in the room. See Figure 2 in Materials Preparation. Ask volunteers to take turns writing properties on the Parallelograms chart. Possible properties are listed in a sample chart in Figure 6. The class will likely not list all these properties at this point in the lesson. They will add to the list later.
When the class has made its initial list, discuss Questions 2–3. These questions model language students can use to describe properties. For a student to show that Linda is correct in Question 2 (opposite sides are equal), have students point to the opposite sides to which Linda refers. To show that Jessie is incorrect in Question 3 (all angles are equal), students may point out that all angles are equal in the rectangle because they are all right angles, but in the long thin parallelogram (O), two angles are obtuse and two are acute.
Have students work with partners to complete Questions 4–7. Partners should explain their choices of shapes that are parallelograms to each other in preparation for reporting to the class.
A List for Looking for Properties. Have students review the list of questions Mrs. Dewey's class uses to help find properties of shapes.
Then ask:

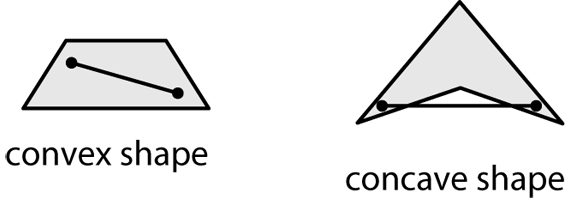
Convex and concave shapes. The shapes in Question 4 in the Student Guide can be classified as convex or concave. Shapes C and H are concave and the remaining shapes are convex. A shape is convex if all line segments connecting any two points in the interior of the shape are completely in the interior of the shape. See Figure 7. While students do not use this definition at this time, they may describe the concave shapes as being “pushed in” or “having a cave.”

Figure 7: Examples of a convex and a concave shape
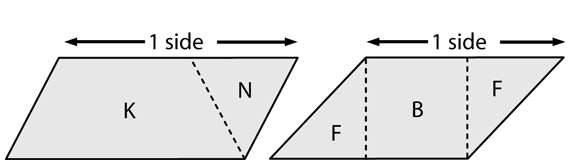
Making Shapes from Other Shapes. To complete the discussion of parallelograms, have students use their Power Polygons™ to build a parallelogram with at least two different shapes (Question 8). See Figure 8. Have two or three students add their shapes to the class chart by drawing the outside edges of their shapes.
Have students count the number of sides of each shape they make. The parallelograms in Figure 8 have four sides. They should not count the interior line segments (shown here with dotted lines) as sides. Have them trace the outside of the new shapes with their fingers as they count.