


Investigating Angles
Est. Class Sessions: 2Developing the Lesson
Part 2. Constructing Angles
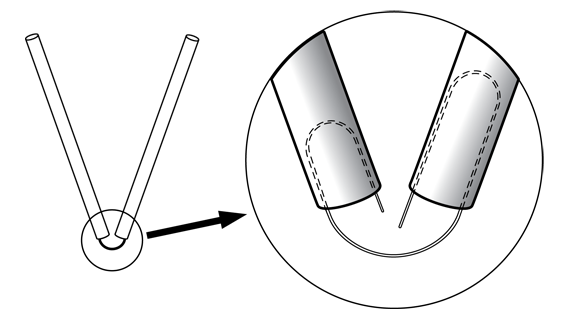
Make Angles with Straws. Students work in pairs for this activity. Distribute 10 drinking straws and 5 paper clips or pieces of chenille stems to each student. Demonstrate to students how to assemble an angle using two straws as shown in Figure 1. If needed, show students how to bend the ends of the paper clip outward to keep the straws securely attached.
Once students have connected five pairs of straws and paper clips, have them form five different angles. Allow students to play with the straw angles by bending them at the paper clip connection. It is important to help students develop the imagery of angles as “opening” from two overlaid segments fixed at a corner. Demonstrate these images by opening an angle with your straws from 0°, and by bending, or closing, an angle from 180°.
Ask students to construct their five angles to range from small angles (close to 0°) to large angles (close to 180°). Have students sketch and name each angle by labeling the corner (or vertex) point with a capital letter as shown in Figure 2.
Ask the following questions, allowing time after each question for students to discuss their angles with a partner:

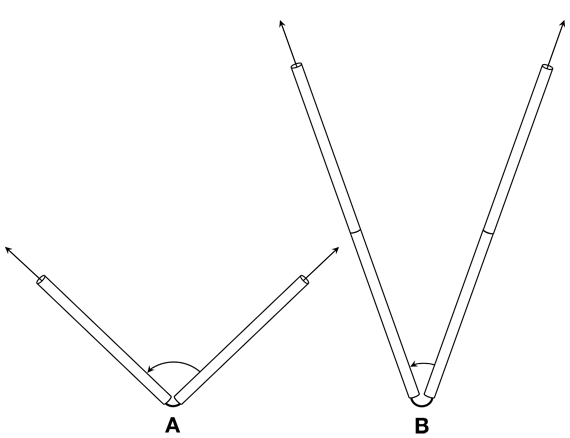
The Meaning of Angle Size. Some students tend to confuse angle size for the size of the segments or rays that intersect to form the angle. Start a class discussion about this by constructing two angles with straws and paper clips as shown in Figure 3. For one angle (∠A), use only one straw per line segment. For the other angle (∠B), use two straws per line segment, but make sure to bend the paper clips so that the angle size of ∠B is smaller than that of ∠A.
Show both angles to the class.
Ask:
If students are still having difficulty distinguishing angle size from segment size, exaggerate the effect by making ∠A very wide and ∠B very narrow. Demonstrate the angle sizes by physically turning the straws from 0° to the final angle positions. You may also draw angles on the board to show how a very sharp angle with long segments is smaller than a very wide angle with short segments because it shows less turning.