


Symmetry
Est. Class Sessions: 1Developing the Lesson
Part 1. Line Symmetry
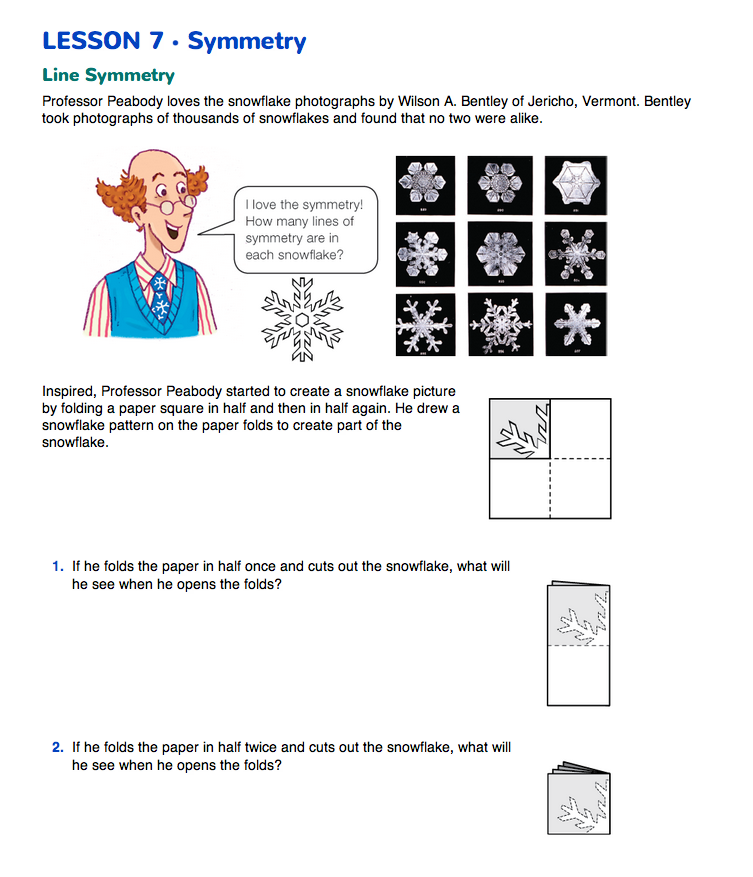
Find Lines of Symmetry in Snowflakes. Show students images of snowflakes.
Ask:
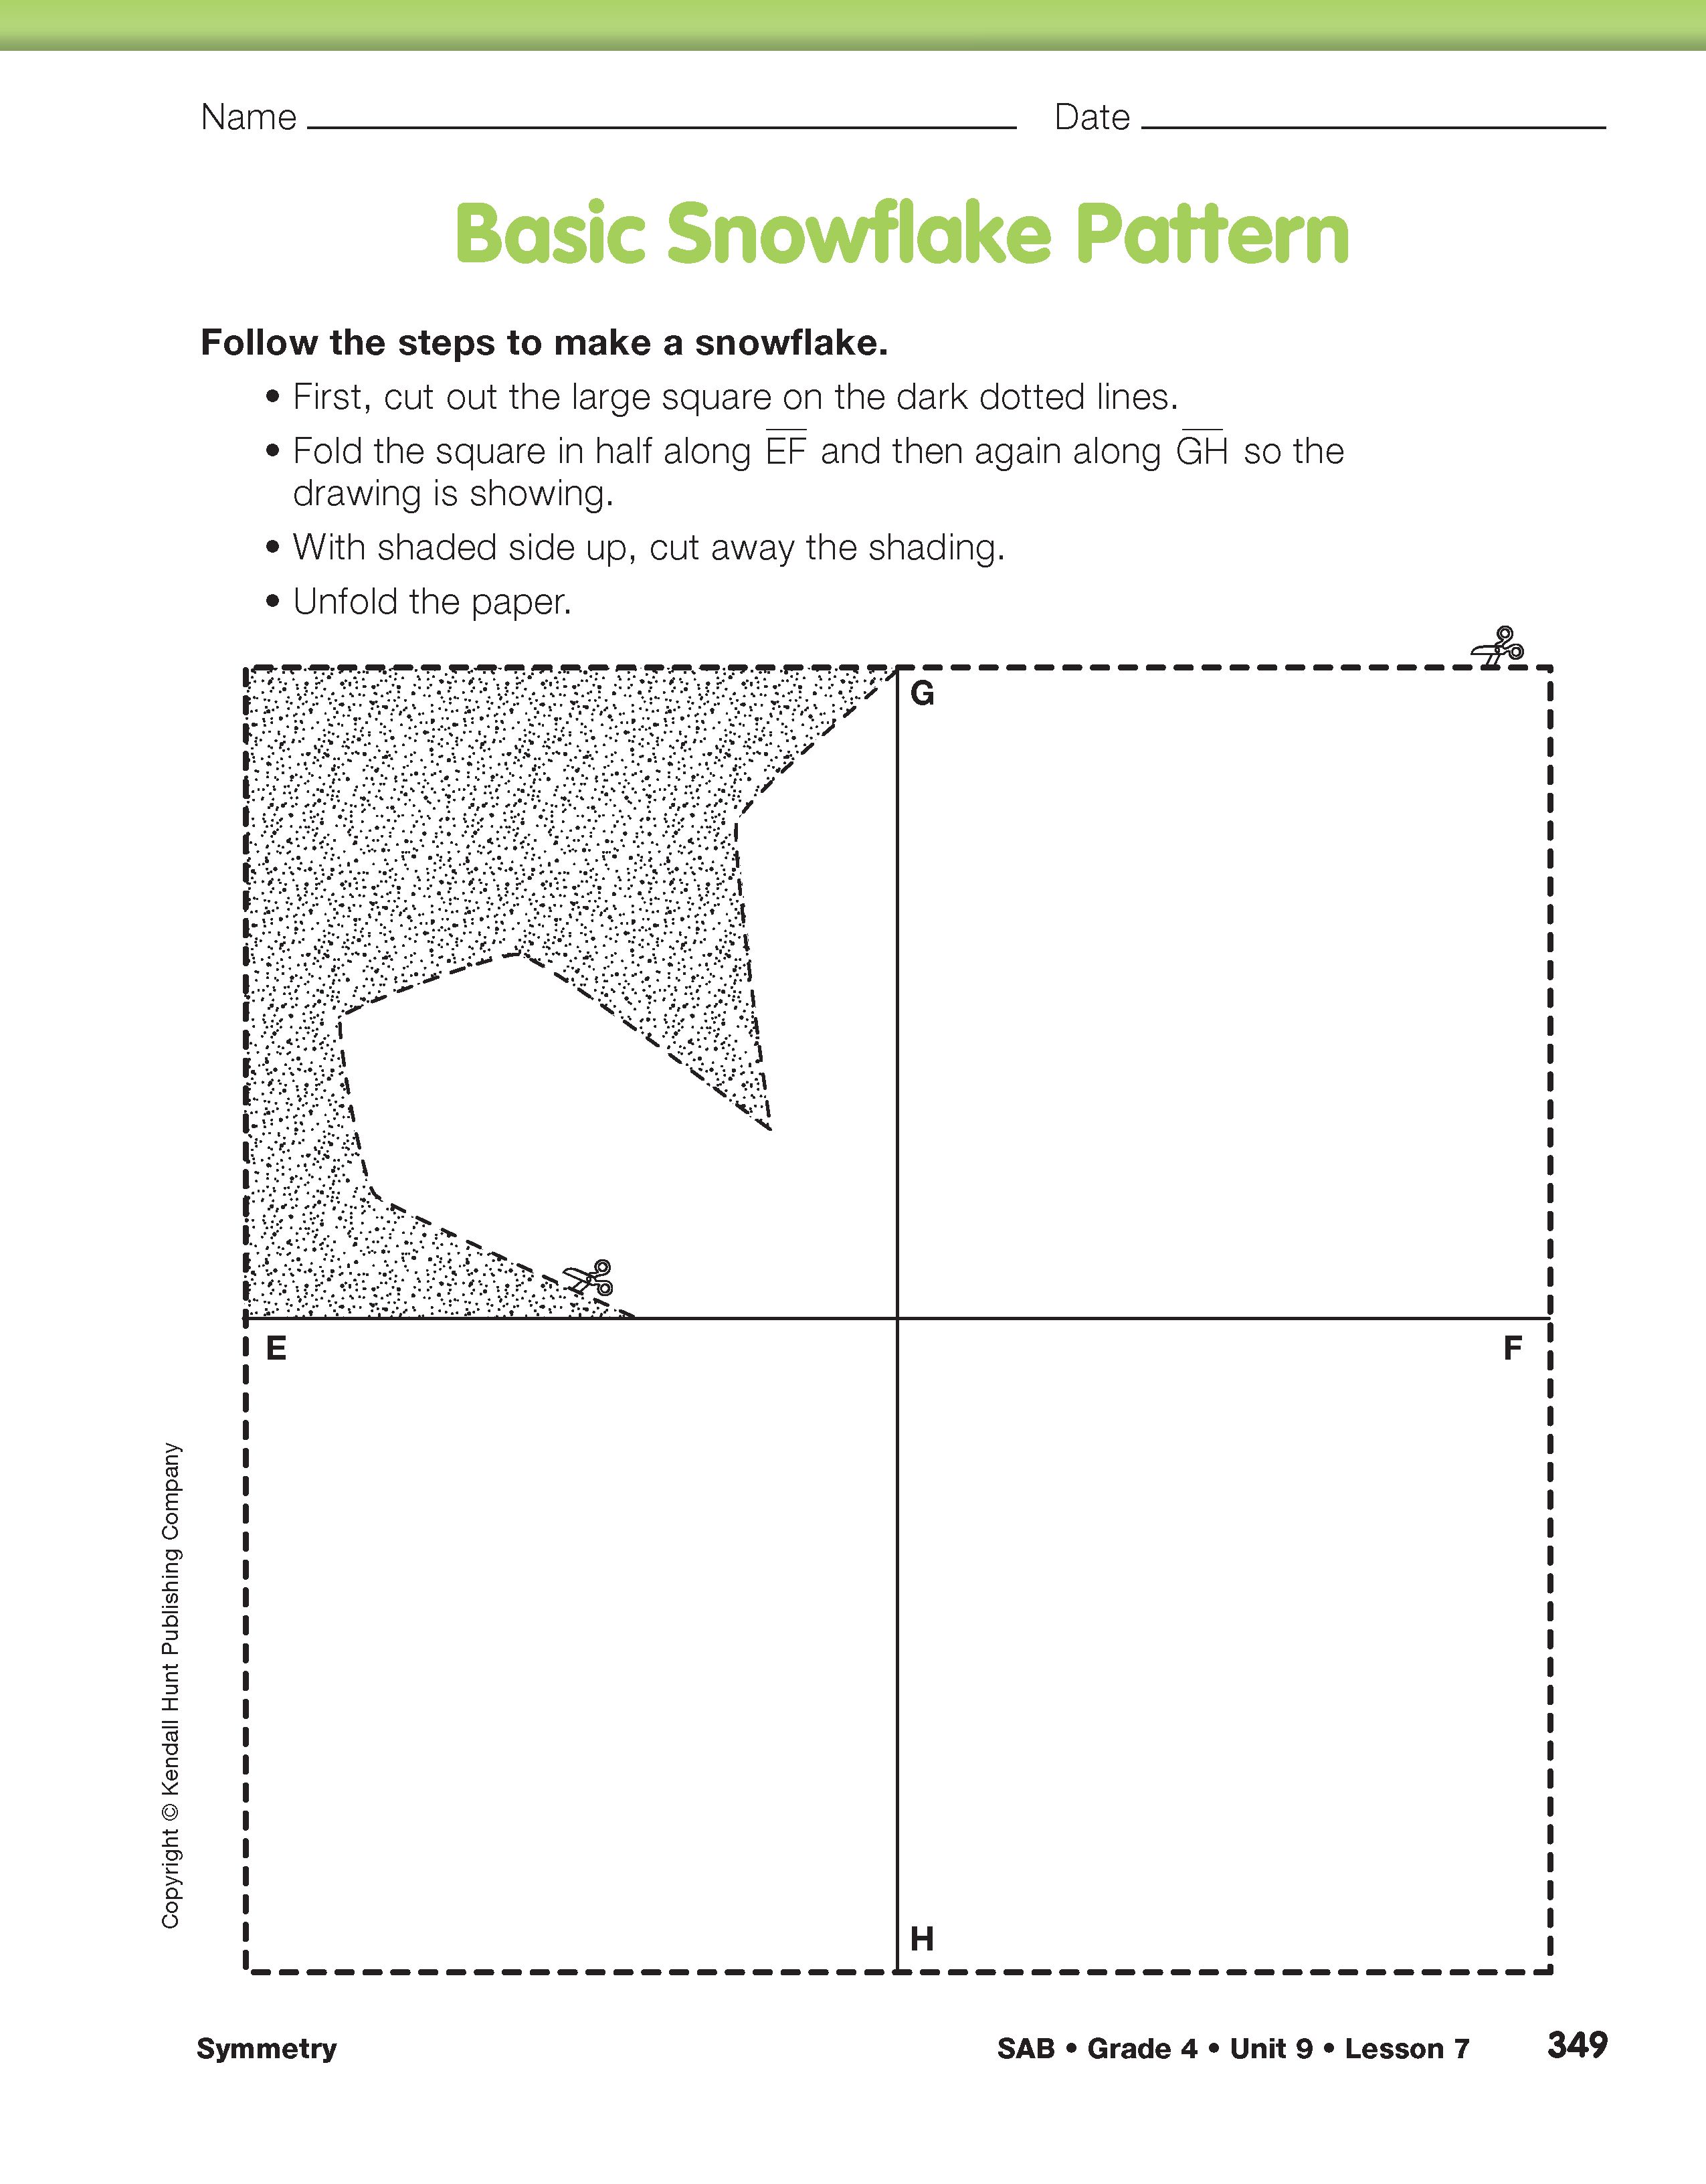
Refer students to the Basic Snowflake Pattern page in the Student Activity Book.
Students can draw a sketch or describe their predictions to a partner.
Ask:
Students might say the fold lines are like mirrors—what is on both sides matches exactly. After students have discussed their predictions, ask them to fold and cut out the snowflake. See Figure 1.
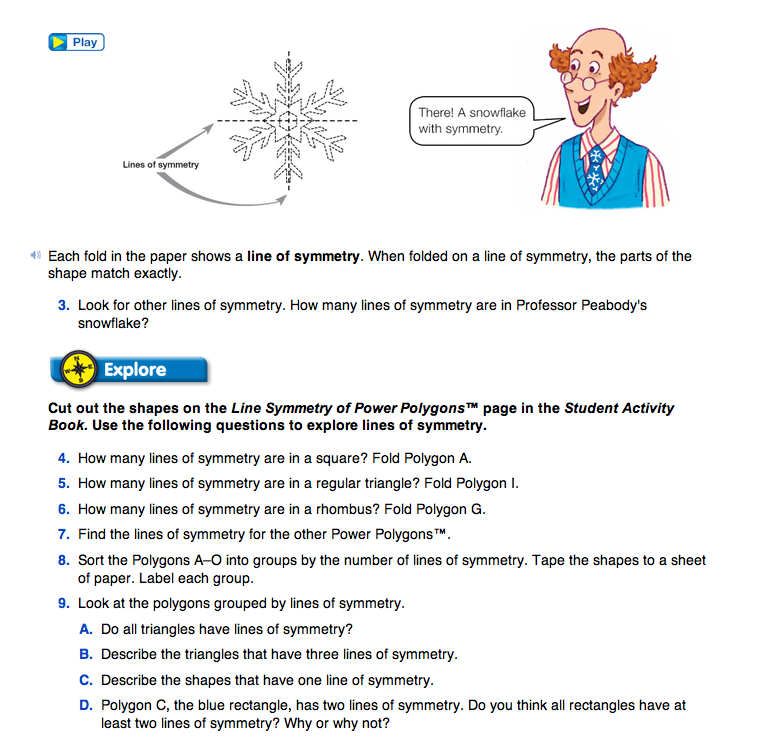
Tell students that the fold lines are called lines of symmetry. When you fold on the lines, the pieces of the shape match exactly.
Ask:
Some students may think there are two more lines of symmetry. Have them fold the snowflake they cut out. Students should notice that the pieces of the shape do not line up exactly. Therefore, that is not a line of symmetry.

Refer students to the Symmetry pages in the Student Guide. Have students look at Professor Peabody's pattern in the vignette. Tell students that Professor Peabody is having trouble figuring out how the folds will affect his snowflake. Ask them to help Professor Peabody by answering Questions 1–3. Use the cutout of the Professor Peabody's Snowflake Master to identify the six lines of symmetry during the discussion.
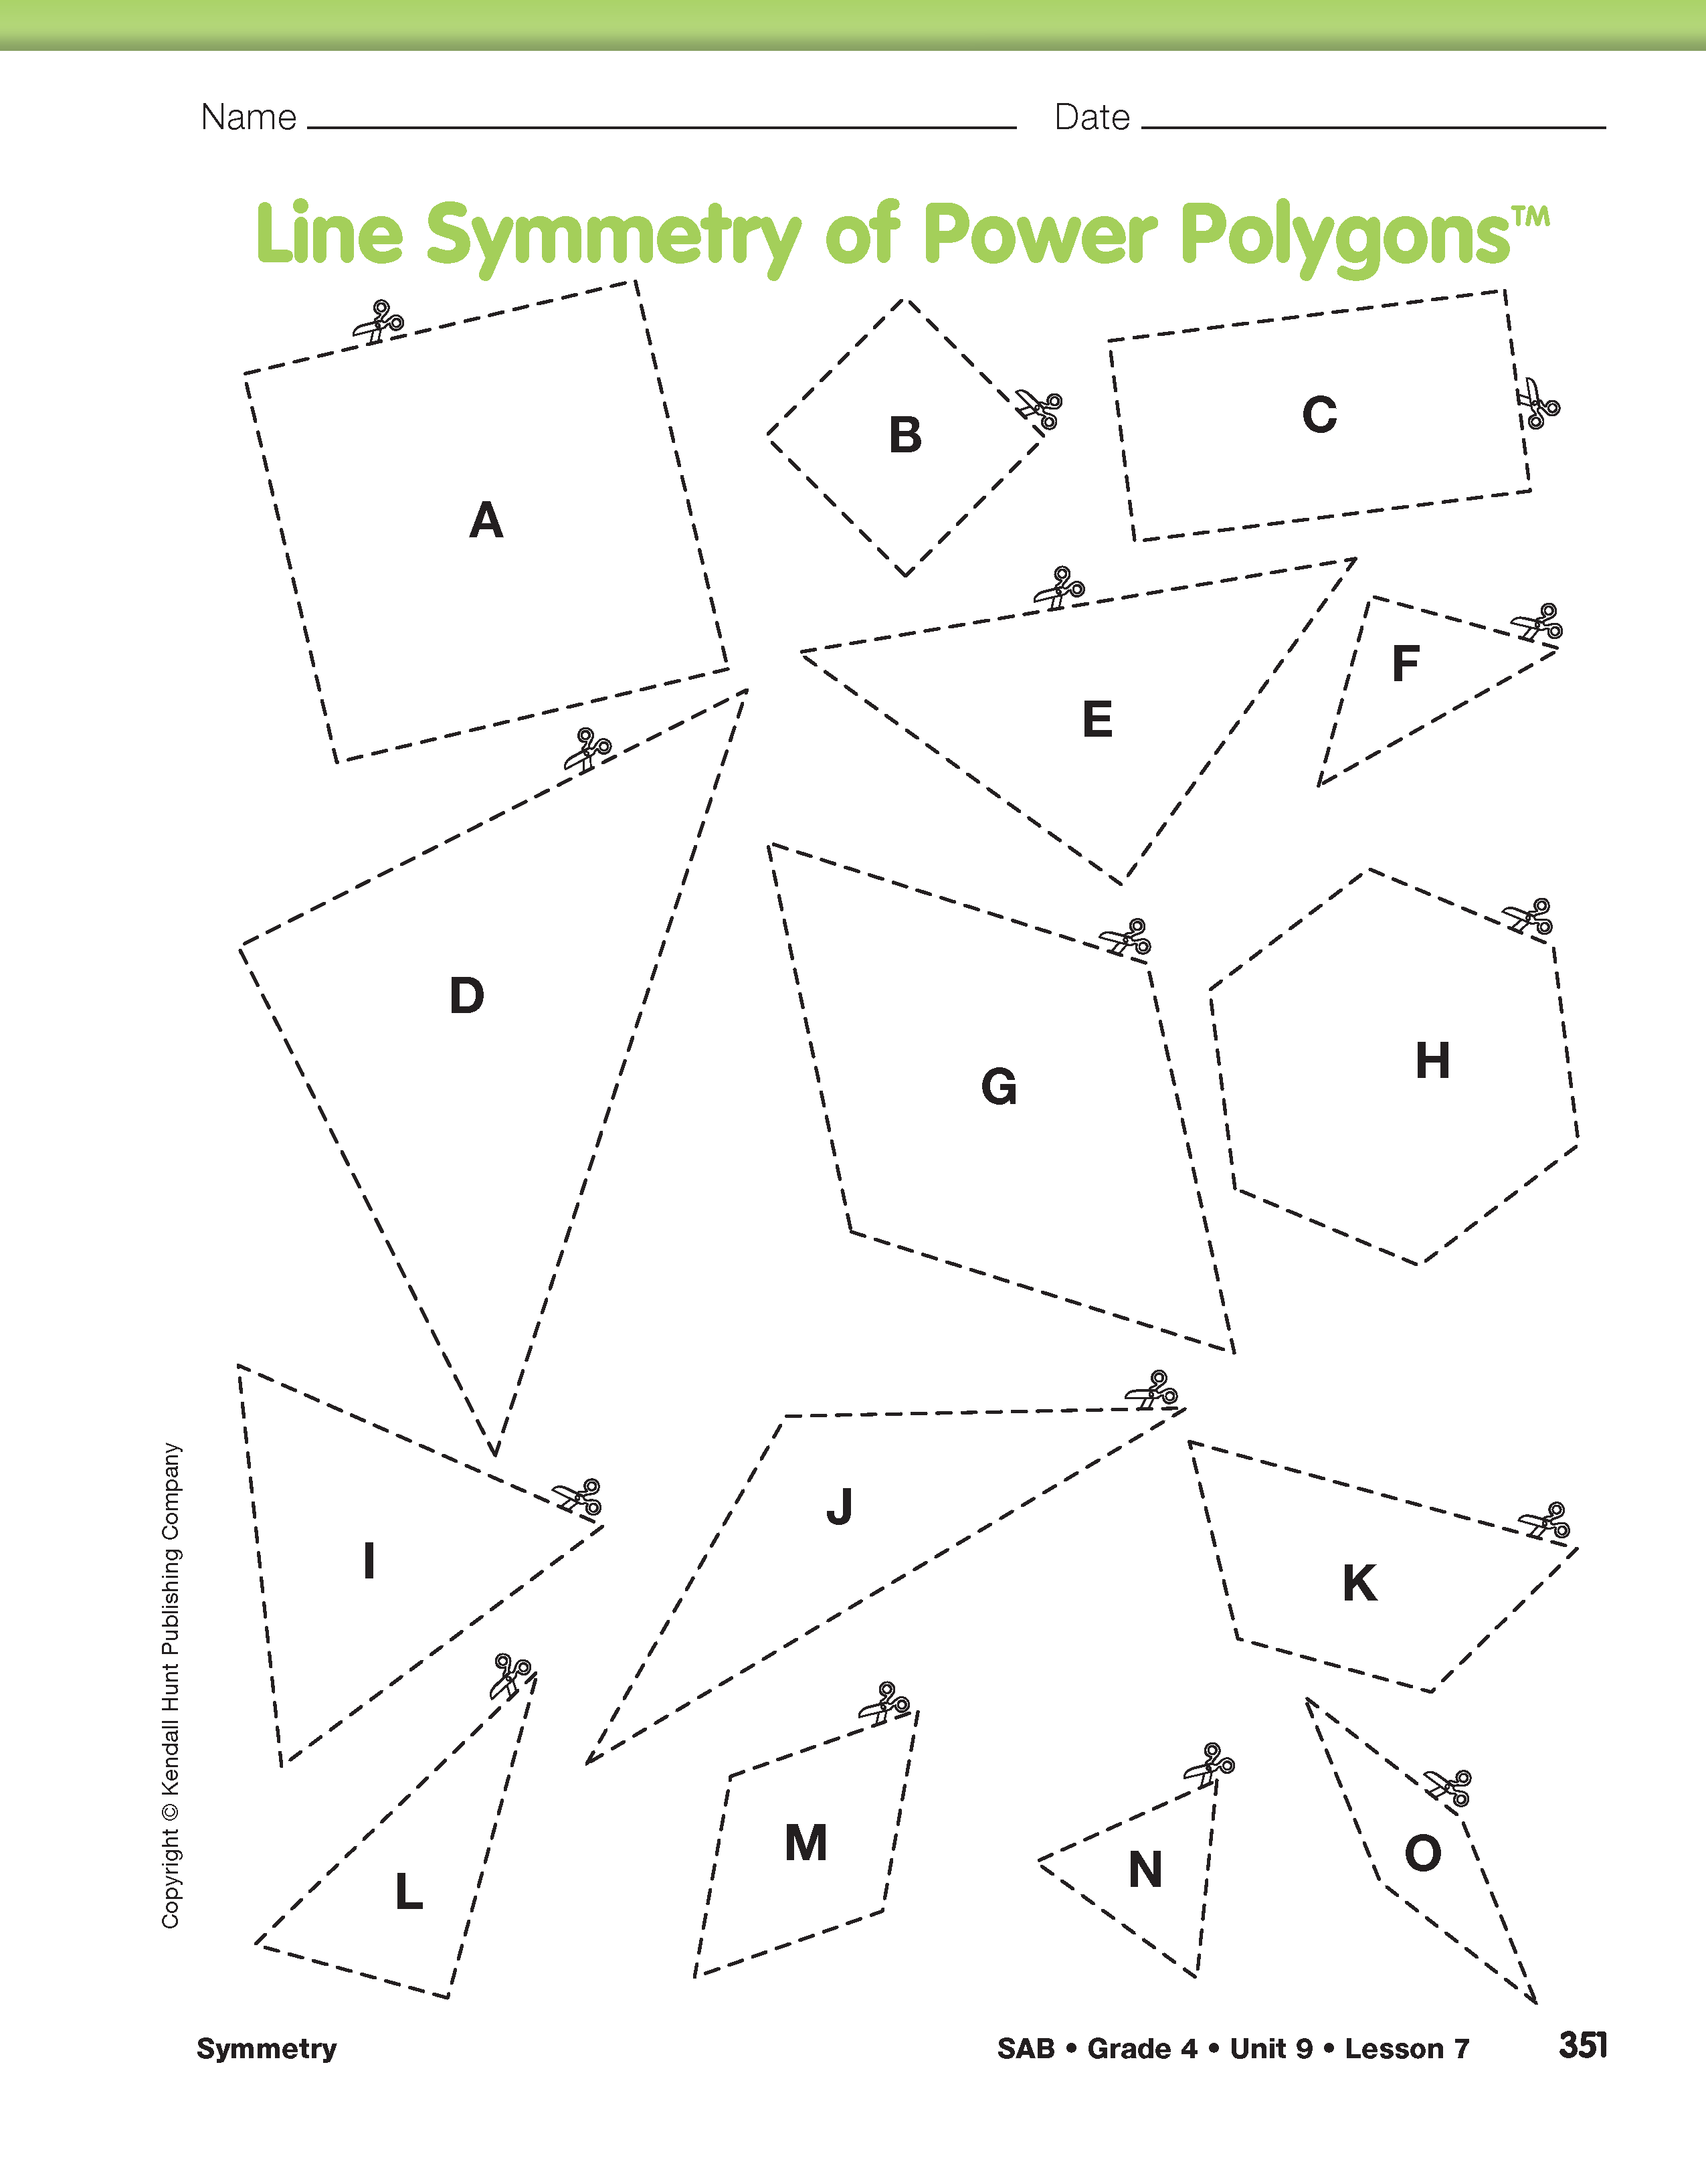
Find Lines of Symmetry in Polygons. Use Questions 4–6 to guide students in finding the lines of symmetry in polygons. Students cut out and fold polygons from the Line Symmetry of Power Polygons page in the Student Activity Book.
While students are working, ask:
Organize students into groups of three or four. Small groups share the task of finding all the lines of symmetry for the rest of the Power Polygons by folding (Question 7).
Give each group a sheet of blank paper and some tape to sort all the polygons by lines of symmetry (Question 8). See Figure 2.
Ask small groups to use Question 9 to describe similarities and differences in the groups for each number of lines of symmetry.
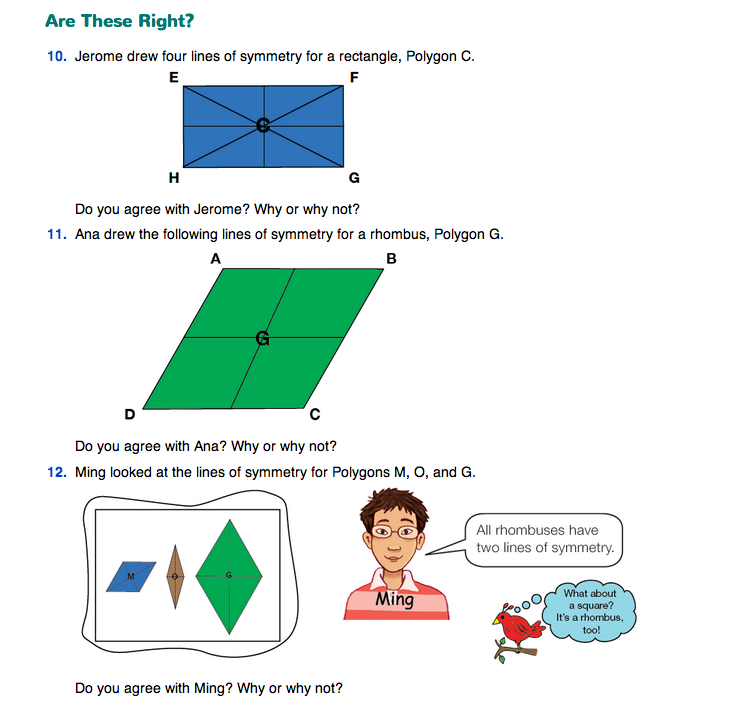
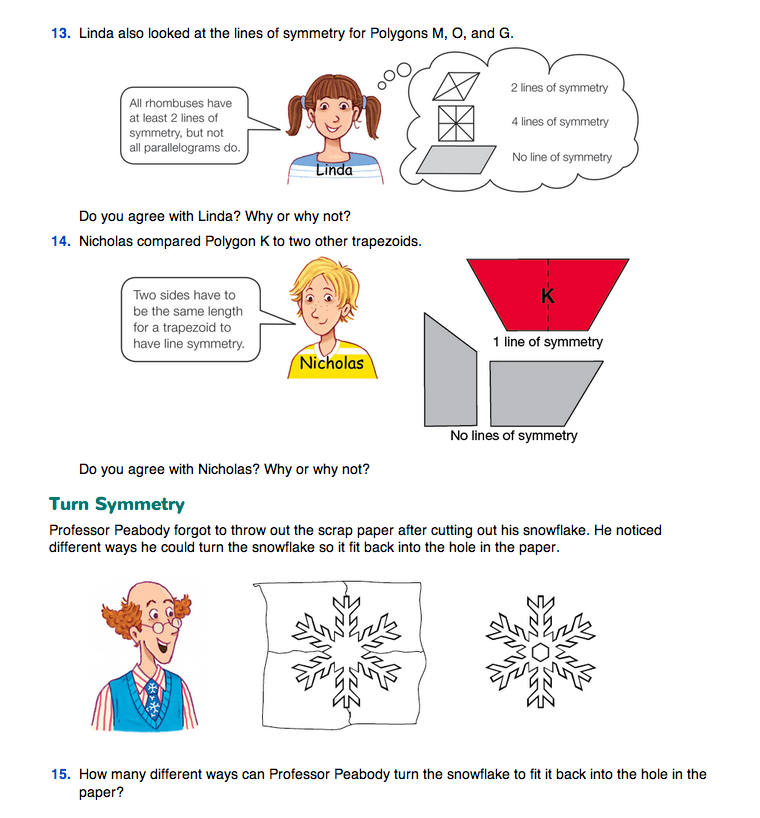
Use Questions 10–14 to take a closer look at the lines of symmetry in parallelograms and trapezoids. Encourage students to use their cut-out polygons to help them answer these questions. They can also trace and cut out shapes similar to the shaded parallelogram in Question 13 and the shaded trapezoids in Question 14.