


Lines
Est. Class Sessions: 1Developing the Lesson
Introduce Lines, Line Segments, and Rays. Introduce the lesson by drawing three lines on the board or on a display as shown in Figure 1. Use a ruler or meterstick to draw the lines.
Ask students to describe what is different about the three lines. Then have them discuss with a partner what they think is intended to be communicated by the arrows and dots. After a few minutes have students report on their discussions.
If students do not come up with reasonable explanations, ask questions to guide their thinking.
Ask students to look around the classroom and point out lines that they see—curvy, jagged, or straight. Along with obvious lines such as that formed by the pole holding the flag, encourage students to notice lines formed by the edges of things: the edge of the board, the edge of a book, the edge of their desks, the edge of the window, and so on.
Have students read the first page on the Lines pages in the Student Guide with a partner and answer Questions 1–4.
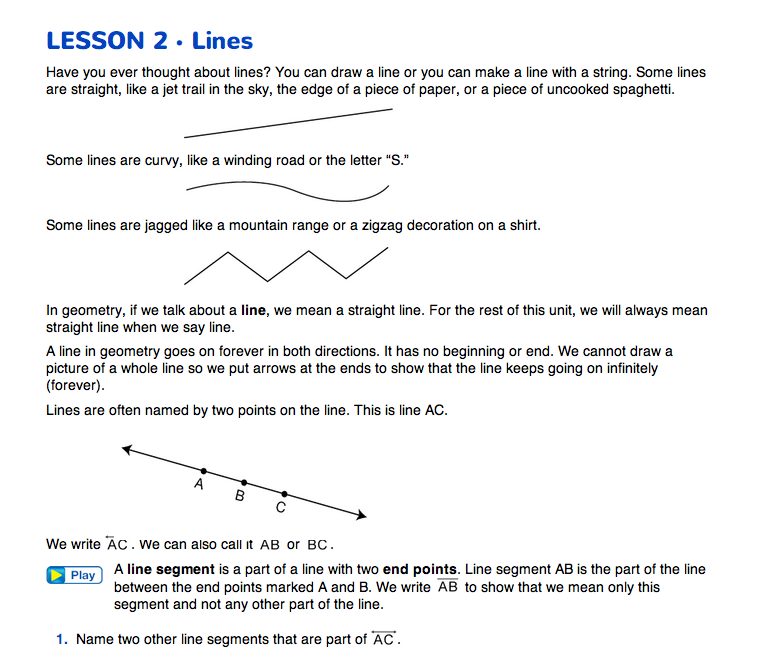
Discuss with students that the lines they see are really parts of lines, or line segments. A line (also called a straight line) is something that goes on infinitely in both directions. Lines never end. Of course, you cannot really draw a line, since you would have to keep drawing forever. A line is an idea, something we imagine. To represent a line, we draw part of the line and put arrows at each end to mean that it keeps going in both directions, as shown in Figure 2. See Content Note about lines.
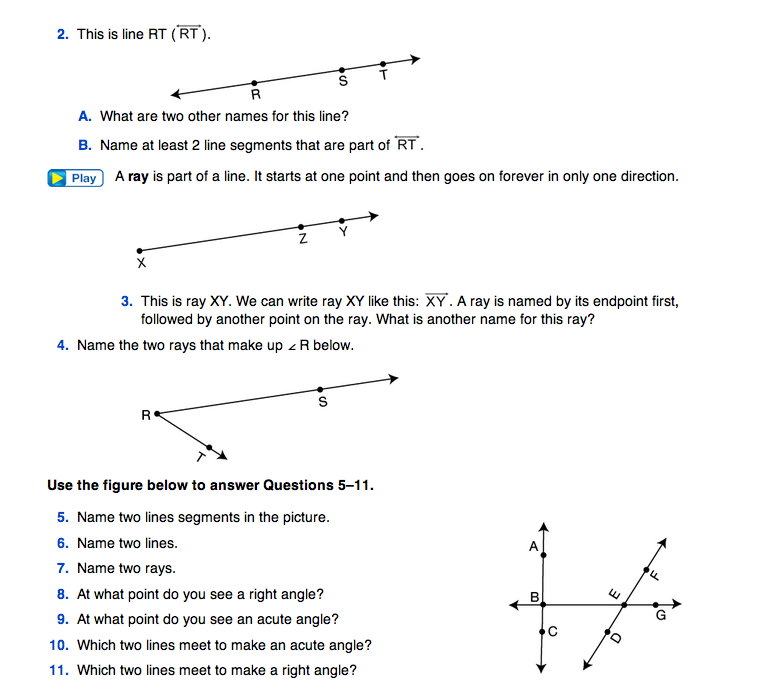
Students are introduced to rays in Questions 3–4. A ray is similar to a line, but goes on forever in only one direction, as shown in Figure 3.
Ask:
Add to the Geometry Word Chart. Have students record words and pictures on the Geometry Word Chart to represent the concepts of line, line segment, ray, and end point. Discuss the representations students put on the chart with the whole class and revise them based on other students' input. Encourage students to use symbols to name the points, lines, segments, and rays in their example drawings.
Have students work with a partner to answer Questions 5–11. Remind them to refer to the Word Chart as they work.

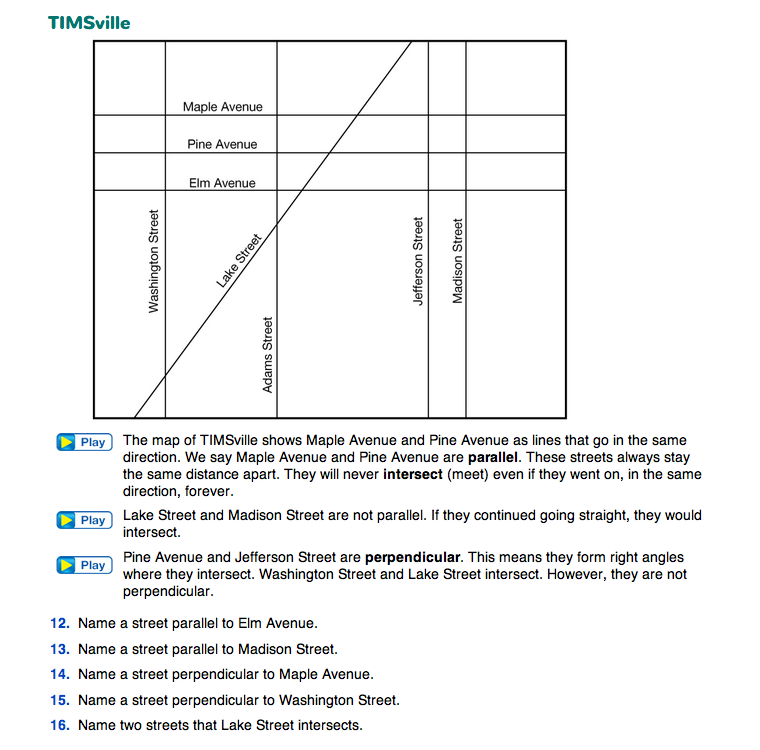
Introduce Parallel and Perpendicular in TIMSville. Use the map and the text in the TIMSville section of the Lines pages in the Student Guide to discuss parallel streets such as Maple and Pine, and perpendicular streets such as Washington and Elm. Make sure students understand that parallel streets always stay the same distance apart and never intersect while streets that are perpendicular to one another intersect at right angles. Have students answer Questions 12–16 with a partner. Encourage students to find more than one answer to each question.
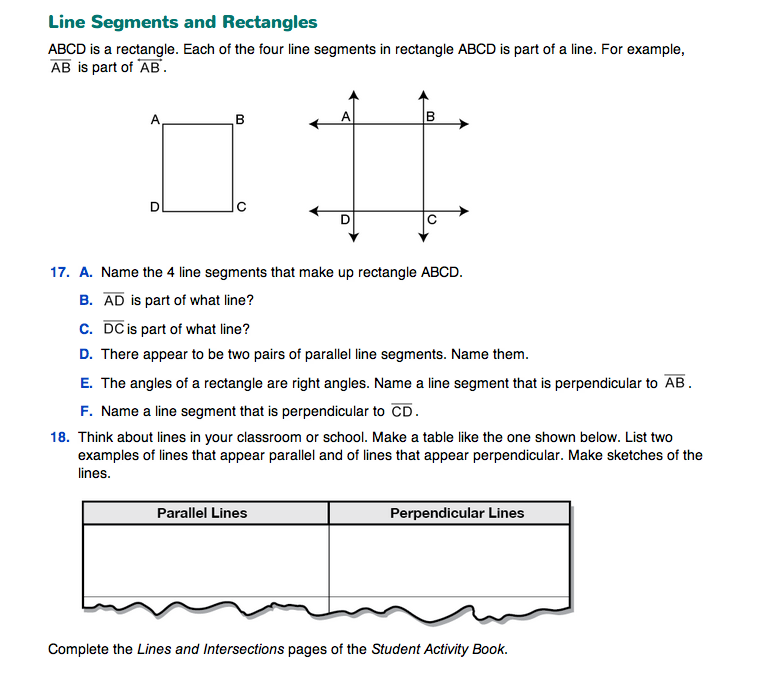
Discuss Line Segments in Rectangles. Explain to students that a rectangle is usually named by listing its vertices in clockwise or counterclockwise order. The rectangle in Figure 4 could be named ABCD or CBAD, but not ACBD.
Note to students that each segment is part of a line. Illustrate that each segment can be extended to show the line that contains that segment. See Figure 5.
Assign Questions 17–18. Question 18 asks students to find and sketch lines in their environment that appear to be parallel and lines that appear to be perpendicular.